
Pull up a Chair—Let's Chat About Brownie Bottom Mini Cheesecakes
Alright, so here's the deal: if you've ever had to choose between a brownie and a cheesecake (and seriously, who hasn't struggled with that?), this recipe will save your sanity. I started making these Brownie Bottom Mini Cheesecakes for my nephew's birthday one hectic Saturday, and let me tell you—six years later, my family still brings up 'those little cake things with the brownie bit.' I'm not saying I peaked that day, but... you know. Anyway, if you like desserts that taste like you spent the whole afternoon fussing but actually only took you, like, half an hour (baking time not included, but that's just the oven's problem), you're in for a treat.
Why You'll Love These (Or at Least Why I Do!)
I make these when I can't decide between fudgy and creamy, or when I forgot to plan something fancy but don't want to admit it. My family goes absolutely bonkers for them because it's like getting two treats in one little cup. Plus, if you mess up the brownie part a bit, the cheesecake just covers it up (no one has to know except you and me). Actually, my mum once complained they were too rich, so I just made the cheesecakes smaller the next time and she ate three. Go figure.
Ingredients (With Some Real-Life Substitutions)
- ¾ cup (about 100g) all-purpose flour – Or you know, sometimes I just grab the self-raising stuff if that's what's left.
- ½ cup cocoa powder – My grandma always insisted on Hershey’s, but I use whatever's on sale. Dutch process works, too.
- ½ teaspoon salt
- ½ teaspoon baking powder (sometimes I skip this but things get a bit too dense, so... your call!)
- 1 cup sugar (granulated, but brown sugar adds a caramelly thing if you’re into that)
- ½ cup (115g) unsalted butter, melted (actually, I've used salted in a pinch—just leave out the extra salt)
- 2 large eggs
- 1 teaspoon vanilla extract
- 16 oz (450g) cream cheese, softened (full-fat is best, but I won't judge low-fat, though it's a bit less creamy)
- ⅓ cup (about 67g) white sugar
- 1 large egg (for the cheesecake bit)
- 1 teaspoon vanilla extract (yep, again—vanilla is the best-smelling thing in the kitchen, hands down)
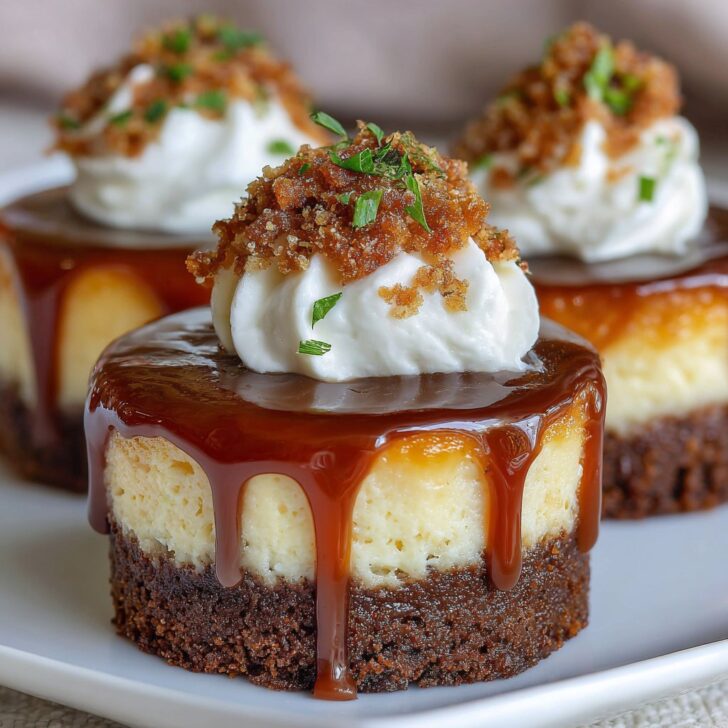
- Optional: mini chocolate chips for topping, or a spoonful of jam in the middle—try raspberry, it’s divine
How I Actually Make Them (Not Always By the Book)
- Preheat your oven to 350°F (175°C). Line a 12-cup muffin tin with paper liners. (If you only have the silicone ones—honestly, they’re great, I only lose them constantly.)
- First, the brownie bit: In a biggish bowl, whisk the melted butter and sugar together—don’t worry if it looks a little grainy, it smooths out later. Beat in the eggs and 1 teaspoon vanilla until combined. (This is where I usually sneak a taste. Just me?)
- Sift in the flour, cocoa, salt, and baking powder. Fold until just mixed. It’ll look pretty thick, kind of like frosting. If it’s too stiff, add a splash of milk.
- Spoon a heaping tablespoon of brownie batter into each muffin liner. Spread it a bit. It doesn't have to be perfect—cheesecake covers a multitude of sins.
- Pop the tin into the oven for about 8 minutes, just enough to set the brownie base. Not fully baked, more like half-cooked. (One time I forgot and did the whole baking time here, and the base was dry as sawdust. Don’t be me.)
- Meanwhile, for the cheesecake layer: Beat cream cheese and sugar together until fluffy. It takes about 2 minutes with an electric mixer, or a good arm workout with a wooden spoon if that's all you've got.
- Add in one egg and the vanilla, beat again till smooth. Try not to overmix or it gets runny.
- Once the brownie bottoms are set, scoop about 2 tablespoons of cheesecake mixture onto each. Gently smooth the tops. Sprinkle with chocolate chips if you like (or don't, it's your kitchen).
- Bake for 15-18 minutes, until the centers just barely jiggle. They set up as they cool, promise!
- Let them cool in the tin for 10 minutes, then transfer to a rack. Chill in the fridge for at least 2 hours if you can stand to wait (I rarely do).
Stuff I Learned the Hard Way (Notes)
- If you use the paper liners, peel them off gently after chilling—if you rush, half the cheesecake clings to the paper. Annoying, but not a dealbreaker.
- The brownie bottom sometimes puffs up weirdly in the oven. I just press it down with a spoon before adding the cheesecake, works like a charm.
- The longer these chill, the easier they are to eat (and honestly, I think the flavor gets better the next day, though my lot rarely let them survive that long).
Variations I’ve Tried (Some Worked, Some... Eh, Not So Much)
- Swirl a spoonful of peanut butter into the cheesecake layer before baking—major hit with the peanut butter crowd.
- Replace the brownie base with crushed Oreos mixed with a bit of melted butter—easy, though it’s a bit sweeter. My cousin loves it, I find it a tad much.
- Tried caramel sauce in the middle once; it basically vanished into the batter (not my best idea, but maybe you’ll have better luck?)
What If You Don't Have Every Tool? (Equipment)
You’ll want a muffin tin and paper liners. If you don’t have an electric mixer, just use a good old spoon—takes a bit longer, but who needs a gym? Once, I used a silicone ice cube tray (washed, obviously) when I couldn’t find my muffin tin. Worked in a pinch, though the shapes were... creative.


Storing and Keeping (If They Last That Long)
Keep these in a sealed container in the fridge for up to 4 days, but honestly, in my house they never last more than a day! You can freeze them, but the texture changes a bit—gets a tad crumbly, but not the end of the world.
How I Like to Serve These (And a Family Quirk)
I love them cold, straight from the fridge, but my brother microwaves his for ten seconds so the brownie gets all fudgy. At Christmas, my aunt insists on dusting them with icing sugar and serving with a splash of Irish cream (not for the kids!). If you’re feeling fancy, a drizzle of homemade chocolate sauce goes a long way.
Things I Wish I'd Known (Pro Tips)
- I once tried rushing the cooling step and ended up with a cheesecake landslide. Actually, I find it works better if you let them cool in the tin before moving them.
- Don’t overbake the brownie layer at the start, seriously—it turns into a brick. Set your timer.
- If you want super neat edges, wipe your knife between cuts (if you’re cutting them in half to share... but why would you?).
FAQ Because People Have Actually Asked Me These Things
- "Can I use boxed brownie mix instead of making the brownie from scratch?"
Definitely! I’ve done it when I’m in a rush. Just mix according to the box, and use about a tablespoon per cup. Works a treat. - "Do I need to chill them before eating?"
Well, you don’t have to, but you’ll get the best texture and flavor if you let them chill at least an hour. That said, I’ve eaten one warm and it was still pretty good. - "Can I make these gluten free?"
Yep! Just sub in your favorite gluten-free flour blend. I tried this one from Minimalist Baker and it worked fine. - "My cheesecakes cracked! What did I do wrong?"
Probably overmixed or overbaked. But you know, they still taste great. Just cover them with chocolate chips and pretend it’s a design choice. - "How many does this make?"
You’ll get about 12 if you use a standard muffin tin. If you use one of those mini tins, you’ll get loads more, but they disappear even faster—just a heads up.
Anyway, hope you have fun baking! Let me know how yours turn out—or if you come up with a new twist. And if you’re looking for more dessert ideas, this cheesecake brownie recipe from King Arthur Baking is a solid inspiration. Cheers!


Ingredients
- ½ cup unsalted butter, melted
- ¾ cup granulated sugar
- 2 large eggs
- ⅓ cup unsweetened cocoa powder
- ½ cup all-purpose flour
- 8 oz cream cheese, softened
- ¼ cup sour cream
- ¼ cup granulated sugar (for cheesecake layer)
- 1 large egg (for cheesecake layer)
- 1 teaspoon vanilla extract
- Pinch of salt
Instructions
-
1Preheat the oven to 350°F (175°C). Line a 12-cup muffin tin with paper liners.
-
2In a medium bowl, whisk together melted butter and ¾ cup sugar. Add 2 eggs, cocoa powder, flour, and a pinch of salt. Mix until just combined.
-
3Spoon about 1 tablespoon of brownie batter into the bottom of each muffin liner and spread evenly.
-
4In another bowl, beat cream cheese until smooth. Add sour cream, ¼ cup sugar, 1 egg, and vanilla extract. Beat until creamy and well combined.
-
5Divide the cheesecake mixture evenly over the brownie batter in each cup.
-
6Bake for 22-25 minutes, or until the centers are set. Cool completely, then chill in the refrigerator before serving.
Approximate Information for One Serving
Nutrition Disclaimers
Number of total servings shown is approximate. Actual number of servings will depend on your preferred portion sizes.
Nutritional values shown are general guidelines and reflect information for 1 serving using the ingredients listed, not including any optional ingredients. Actual macros may vary slightly depending on specific brands and types of ingredients used.
To determine the weight of one serving, prepare the recipe as instructed. Weigh the finished recipe, then divide the weight of the finished recipe (not including the weight of the container the food is in) by the desired number of servings. Result will be the weight of one serving.
Did you make this recipe?
Please consider Pinning it!!