
Okay, so picture this: it’s a stormy Tuesday, everyone’s cranky (including me), and the only thing that might save dinner is my not-so-secret weapon—chicken pot pie. Now, I’ve made this more times than I can count, sometimes with a glass of wine in hand (sometimes with two). And you know what? It always brings the house together. My first attempt, years ago, was a bit of a mess—spilled flour everywhere, pastry glued to the counter, and a cat who wouldn’t stop trying to eat the peas. But hey, practice makes, well, not perfect, but definitely tastier. Let’s get into it, shall we?
Why You’ll Fall for This (Like I Do)
I make this when I want to feel like a proper home cook—even if my hair’s still in a bun and I’m wearing socks with holes. My family goes nuts for this because it’s hearty, creamy, and packed with the kind of flavors that remind you of Sunday afternoons at grandma’s. (Actually, my grandma’s kind of disliked peas, but I sneak them in anyway. Sorry, Gran!) It’s also sort of forgiving—if you overdo the carrots or swap out the chicken for turkey because, oops, that’s all you’ve got, you’ll probably still end up with a winner. And if you’ve ever wrestled with store-bought pie dough that cracks like a dry creek, I’ve got thoughts on that too.
The Ingredients (With Real-World Substitutions)
- 2 cups cooked chicken, diced or shredded (rotisserie chicken is my lazy-day hero, but leftover roast works, too)
- 1 cup frozen peas and carrots mix (I totally use whatever bag’s open in the freezer—sometimes just peas or even chopped green beans if I’m desperate)
- ½ cup celery, chopped (skip it if you hate it, or use a little more onion instead)
- ½ cup onion, diced, any kind really, even a shallot’s fine
- ⅓ cup unsalted butter (salted is fine, just watch the salt later)
- ⅓ cup all-purpose flour (I’ve tried whole wheat; it’s okay, but a bit heavier)
- 1 ¾ cups chicken broth (I use Better Than Bouillon sometimes—it’s handy, and honestly, tastes pretty good)
- ⅔ cup milk (whole milk makes it richer, but I’ve used 2% in a pinch)
- Salt and pepper, to taste
- ½ teaspoon dried thyme (fresh is lovely, but who has that on a Tuesday?)
- 1–2 store-bought pie crusts, or homemade if you’re feeling ambitious (My grandmother swore by Pillsbury, but honestly, the generic ones work too, especially if it means dinner is served before 9pm)
- 1 egg, beaten (for that shiny golden top, but sometimes I skip it and nobody notices, except me)
How I Actually Put This Together
- Prep the filling: Melt the butter in a big skillet over medium heat. Toss in the onion and celery—cook until they’re a bit soft, around 3 to 5 minutes (this is where I usually sneak a taste, though it’s just onions, so maybe don’t follow my lead).
- Add flour and make the roux: Sprinkle in the flour. It’ll look lumpy and weird at first—don’t fret, just stir for a minute or so until it smells a little nutty.
- Whisk in broth and milk: Pour in the broth slowly while mixing (I use a whisk and still get a few lumps; they disappear later), then add the milk. Bring to a gentle simmer. If it seems outrageously thick, add a splash more milk—no big deal.
- Season & bulk up: Toss in the thyme, salt, pepper, chicken, and veggies. Mix it all up, let it bubble gently until thickened—about 5 to 7 minutes. (This is also when I realize I should have made a bigger batch.)
- Fill your pie: Pour the filling into a 9-inch pie dish (though I’ve made it in an old casserole and it worked fine). Top with your pie crust—if you’re feeling fancy, crimp the edges; if not, just flop it on and call it rustic. Cut a few little slits so steam escapes (I once forgot this and let’s just say, cleaning the oven wasn’t fun).
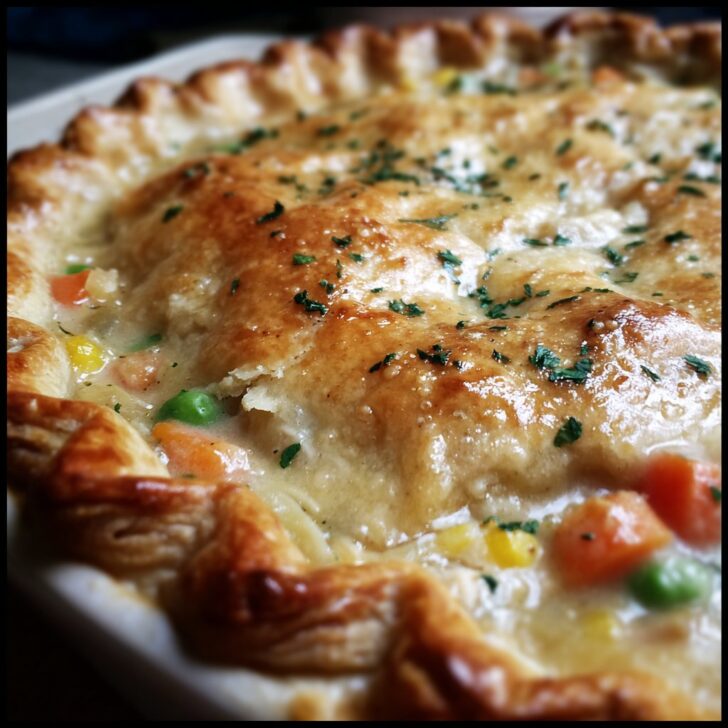
- Egg wash & bake: Brush with the beaten egg for shine. Bake at 425°F (220°C) for 30–35 minutes, or until it’s bubbly and the crust is golden. If the edges are browning too fast, just tuck some foil over them. Or don’t, and embrace the extra crispy bits.
- Let it rest: This is where patience comes in—let it cool for at least 10 minutes (I almost never wait; molten filling, every time).
Kitchen Notes (The Real, Slightly Messy Kind)
- I used to think homemade crust was essential, but store-bought really is fine. Unless you’re channeling Julia Child, buy yourself some time.
- If the filling spills over, that’s just bonus crispy bits. Actually, I sometimes scrape those off the pan and snack on them before serving.
- One time I tried using almond milk. Don’t. It split—and my kids still talk about the "funny pie night."
How I’ve Tweaked It (For Better or Occasionally Worse)
- Turkey instead of chicken? Absolutely. Even leftover rotisserie from last night’s dinner. No one’s ever guessed.
- Mixed in mushrooms once—turned out earthy and nice. My son picked them out, but what can you do?
- Once, I used puff pastry instead of pie crust. It was...oddly delicious, but definitely more of a pot "mountain" than "pie."
- Gluten-free crusts are fine, but tend to break apart more. Just, you know, warn your guests so there’s no surprise crumb shower.
Gear I Actually Use (Or Don’t)
- Pie dish: Any 9-inch one; honestly, I’ve used my old lasagna pan when the pie dish was MIA.
- Rolling pin: If you need to roll the crust. Or just use a wine bottle—works a charm.
- Whisk: Good for lump-busting. If you don’t have one, a fork’ll do in a pinch.
- Sharp knife or kitchen shears (for venting the crust; just don’t use the kids' craft scissors, trust me.)


Storing Leftovers (If You Even Get Any)
Technically, this keeps in the fridge for 3–4 days (I just use cling film or foil). But honestly, in my house it never lasts more than a day. You can freeze slices wrapped tightly, then thaw and reheat at 350°F. It’s surprisingly good cold, too, though I don’t exactly advertise that.
What We Eat With It (Besides Forks)
We usually have this with a heap of mashed potatoes or sometimes a simple green salad if I’m pretending to be healthy. My partner insists on extra gravy on the side—no comment. Oh, and crusty bread for mopping up the last bits. (If you want a dead-easy salad, I like this one from Spend With Pennies.)
Pro Tips (From My Occasional Failures...)
- Don’t rush the cooling. I once cut in right away and the filling just sort of...slid out. Not my finest moment.
- If your crust edges are burning, the foil trick works, but I always forget halfway through. It’s still edible, promise.
- I thought I could wing the measurements once—ended up with a soupy mess. Actually, it was more like chicken pot pie soup. Not terrible, but definitely not pie.
Questions I’ve Actually Gotten (And Maybe Even Answered)
- Do I have to use chicken? Nope. Turkey, tofu, or even just all veggies. Honestly, whatever’s in the fridge.
- Can I make this ahead? Totally. You can prep the filling a day ahead, store it in the fridge, and assemble/bake when ready. The crust might get a bit softer, but it’s still tasty.
- Can I freeze it unbaked? Yes, but I’d wait to add the egg wash until just before baking. And maybe thaw a bit before putting it in the oven so your dish doesn’t crack from the cold shock (learned that the hard way!).
- What if I don’t have a pie dish? Use a deep cake tin or even a big ramekin. Or just make a deconstructed version in a baking dish—no one will know but you.
- How do I know it’s done? The crust should be golden and the filling should bubble up at the sides. If you’re unsure, poke a knife in and check if it’s piping hot in the middle. Or just trust your nose—smells like home when it’s ready.
So, that’s my cozy chicken pot pie—messy edges, shortcuts, and all. If you want to geek out more about pie crusts, I’ve found this pie crust guide super useful (even though I almost always buy the crust, shh). And if you’re looking for a deeper dive on homemade stocks, this Serious Eats tutorial is gold. Enjoy, and may your pie always be the first thing to disappear at the table!


Ingredients
- 2 cups cooked chicken breast, diced
- 1 cup frozen peas and carrots
- ½ cup diced celery
- ½ cup diced onion
- ⅓ cup unsalted butter
- ⅓ cup all-purpose flour
- 2 cups chicken broth
- ¾ cup whole milk
- 1 teaspoon salt
- ½ teaspoon black pepper
- 2 refrigerated pie crusts
Instructions
-
1Preheat oven to 425°F (220°C).
-
2In a large skillet, melt butter over medium heat. Add onion and celery; cook until softened, about 5 minutes.
-
3Stir in flour, salt, and pepper until well blended. Gradually whisk in chicken broth and milk. Cook, stirring constantly, until mixture thickens and bubbles.
-
4Add cooked chicken, peas, and carrots. Mix well and remove from heat.
-
5Fit one pie crust into a 9-inch pie dish. Pour chicken mixture into crust. Cover with second crust, seal edges, and cut small slits in the top to vent.
-
6Bake for 30-35 minutes or until crust is golden brown. Let cool for 10 minutes before serving.
Approximate Information for One Serving
Nutrition Disclaimers
Number of total servings shown is approximate. Actual number of servings will depend on your preferred portion sizes.
Nutritional values shown are general guidelines and reflect information for 1 serving using the ingredients listed, not including any optional ingredients. Actual macros may vary slightly depending on specific brands and types of ingredients used.
To determine the weight of one serving, prepare the recipe as instructed. Weigh the finished recipe, then divide the weight of the finished recipe (not including the weight of the container the food is in) by the desired number of servings. Result will be the weight of one serving.
Did you make this recipe?
Please consider Pinning it!!