
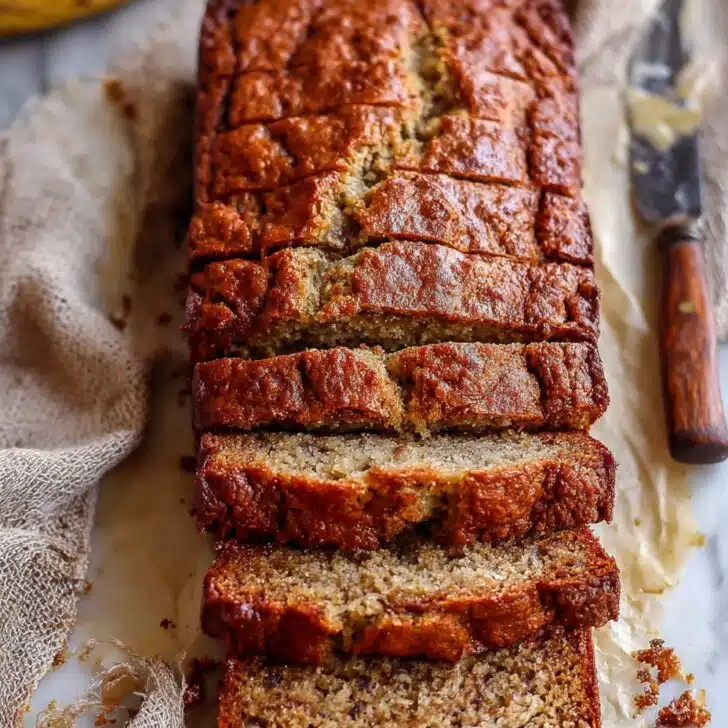
The Only Banana Bread Recipe I Trust (and My Kids Actually Eat)
Alright mate, so here's the deal: Banana bread and I go way back. Like, back to the days when my mom would forget about those spotty bananas in the fruit bowl (you know the ones), and I'd show up after school smelling something amazing. I'll be honest, I used to think banana bread was just a ploy to get us to eat fruit — but now that I'm in charge of the brown bananas, I see the genius. Sometimes I'll throw in a bit more sugar than mom ever did. One time, I added way too many walnuts and my dog almost got a bite (don’t worry he was fine but the kitchen? Less so). Anyway, here’s the banana bread recipe I come back to every time because it is moist (yes, that word), quick, and mostly uses what’s already lying around. Oh, and honestly? It might even taste better the next day, but it rarely lasts that long.
")
")
Why You'll Want to Bake This
I make this whenever I see sad bananas staring me down from the counter, honestly. My family goes absolutely bonkers for it — especially after a long week, or when we have friends over to gossip and pretend it’s just for breakfast. (Spoiler: It’s also a midnight snack.) There’s no fussy mixer needed and no complicated steps — I’ve burnt this recipe and it’s still turned out alright…well, except that one time. Plus, if you ever wanted to make your house smell like a bakery without actually baking 10 loaves, this will do it. Swear down.
The Ingredient Line Up (With Some Wiggle Room)
- 3 (really overripe) bananas — the spottier, the better. I’ve used frozen ones in a pinch, just thaw them first.
- ½ cup unsalted butter, melted — but I’ve swapped in coconut oil when I was out and it worked fine.
- ¾ cup brown sugar — granulated sugar will do if you’re out, but brown’s got more oomph.
- 2 large eggs
- 1 teaspoon vanilla extract — I once ran out and used maple syrup. Not the same, but good enough in a bind.
- 1 ½ cups all-purpose flour — go ahead and do half whole wheat if you’re feeling, you know, virtuous.
- 1 teaspoon baking soda
- ¼ teaspoon salt
- ½ teaspoon ground cinnamon (optional, but isn’t life better with cinnamon?)
- ½ cup chopped walnuts or pecans (optional — my family’s split on nuts every time)
- ½ cup dark chocolate chips (or just chuck in whatever’s left in the bag)
How I Actually Make Banana Bread (No Stress)
- First thing: Preheat the oven to 350°F (about 175°C). Grab a loaf pan (around 9x5in) and either line it with parchment or just butter it up — your call. I usually can’t find parchment when I actually need it.
- Mash those bananas in a big bowl until they look weird and lumpy (totally normal). This is where I take my aggression out.
- Pour in your melted butter and give it a quick stir. If it looks separated, don’t panic — it’ll come together.
- Add the brown sugar, eggs, and vanilla. Mix it up until pretty well combined. I usually sneak a taste here, just saying...
- Over in another bowl (or just use the same one if you’re not feeling picky), whisk together flour, baking soda, salt, and cinnamon if you’re using it.
- Dump the dry stuff into the wet and fold it with a spatula or wooden spoon. Gently. It’ll look thick but it should be mixed — not perfect though; lumps are fine!
- Now, toss in nuts and chocolate chips, if you’re feeling it. Or raisins, if you’re one of those people (I’m not judging... much).
- Pour—or honestly, scoop—the batter into your loaf pan. Even it out a bit, but don’t fuss.
- Bake for 50–60 minutes. Maybe check at 50 if your oven runs hot. If a toothpick stuck in the middle comes out almost clean (a smudge is fine—gooey is great), you’re done.
- Let it cool...or don’t. Sometimes we dig in while it’s still steaming and the chocolate is melty. If you turn it out of the pan too early, though, it might kind of collapse — not the end of the world.
")
")
Real-Life Notes (AKA: What I Learned the Hard Way)
- If your bananas aren’t ripe, you can microwave them in their skins for 30–40 seconds. Will it be perfect? No. But it works in a pinch.
- The top might crack. I actually love that. It looks homemade — like, in a good way.
- If your loaf is browning too fast, loosely tent some foil over the top the last 15 minutes or so. Otherwise, you’ll get a burned hat (done this more than twice, sigh).
- Batter looks thicker than cake batter — I’ve worried it’s too dry, but every time it bakes up moist.
What Happens If You Mix It Up (Variations)
- I’ve swapped out half the flour for almond flour — comes out a bit denser but so nutty and nice.
- Blueberries instead of chocolate chips? Tried it once and, well, it baked up kind of strange in the middle. Not horrible, just... odd. Maybe not my best idea.
- Sometimes add a spoonful of Greek yogurt if my bananas are on the small side — makes it extra tender.
- No nuts? Toast up some oats and add them to the top for a little chew.
")
")
The Stuff You Need (And What To Use If You Don’t Have It)
- A 9x5in loaf pan. If you’ve only got a smaller tin, just fill it ¾ full and maybe make a couple of muffins with the extra batter.
- Mixing bowls, obviously. But I’ve made do with a big saucepan before, not gonna lie.
- Wooden spoon or spatula — but hey, I’ve used a fork in a pinch. Sometimes you just go with what’s clean.
- Toothpick or a sharp knife for checking doneness. I usually grab a skewer out of the barbecue drawer.
How to Store It (But Honestly...)
Keep it in an airtight container at room temp. Should last 3 days, but in my house, banana bread vanishes overnight. If you actually have leftovers (do you?), it’s still nice after a little zap in the microwave. Wrapped slices freeze alright too.
Serving Suggestions – How We Eat It
I’m partial to a thick slice toasted with salty butter and a cup of strong tea. My youngest runs in and grabs it plain off the counter. We once made French toast with leftovers — that was gone in a flash. Oh, and for some reason, my neighbor swears by putting cream cheese on hers. Might be a regional thing?
Pro Tips (Learn From My Mistakes)
- I once tried doubling the recipe in a single pan. Don’t do it — the outside burned and the middle was gooey (but not in a good way).
- Letting it cool in the pan for 10–15 minutes helps it not fall to pieces (ask me how I know...)
- Don’t overmix — it gets tough if you go wild with the stirring.
- If your bananas are underripe, use a bit less flour. I didn’t once and it was brick-like.
FAQ — Real Stuff People Have Asked Me
- Can I use less sugar? Yep! I’ve cut it down to ½ cup with ripe bananas — still tastes sweet enough.
- What’s the deal if I don’t have brown sugar? White sugar works, or throw in a spoonful of molasses if you’ve got it lying around. Or just wing it honestly.
- Do I need baking powder? Not for this one — the baking soda’s enough.
- Why did my bread sink in the middle? Usually means it’s not quite cooked, or it cooled too quick. Or sometimes, it just happens for no reason (or maybe Mercury’s in retrograde?)
- Can I make this dairy-free? Swap the butter for coconut oil or a neutral vegetable oil and it’s all good.
- Can I add more bananas? Sure, but maybe take out a couple spoons of flour or risk ending up with banana pudding in bread clothes — hmm, actually maybe not the worst?
And there you have it! A slightly rambling, wildly reliable banana bread — with a few stories along the way. If you stumble on a better variation, don’t keep it to yourself! Seriously, tell me, because I’ll make it tomorrow.
Ingredients
- 3 (really overripe) bananas — the spottier, the better. I’ve used frozen ones in a pinch, just thaw them first.
- ½ cup unsalted butter, melted — but I’ve swapped in coconut oil when I was out and it worked fine.
- ¾ cup brown sugar — granulated sugar will do if you’re out, but brown’s got more oomph.
- 2 large eggs
- 1 teaspoon vanilla extract — I once ran out and used maple syrup. Not the same, but good enough in a bind.
- 1 ½ cups all-purpose flour — go ahead and do half whole wheat if you’re feeling, you know, virtuous.
- 1 teaspoon baking soda
- ¼ teaspoon salt
- ½ teaspoon ground cinnamon (optional, but isn’t life better with cinnamon?)
- ½ cup chopped walnuts or pecans (optional — my family’s split on nuts every time)
- ½ cup dark chocolate chips (or just chuck in whatever’s left in the bag)
Instructions
-
1First thing: Preheat the oven to 350°F (about 175°C). Grab a loaf pan (around 9x5in) and either line it with parchment or just butter it up — your call. I usually can’t find parchment when I actually need it.
-
2Mash those bananas in a big bowl until they look weird and lumpy (totally normal). This is where I take my aggression out.
-
3Pour in your melted butter and give it a quick stir. If it looks separated, don’t panic — it’ll come together.
-
4Add the brown sugar, eggs, and vanilla. Mix it up until pretty well combined. I usually sneak a taste here, just saying...
-
5Over in another bowl (or just use the same one if you’re not feeling picky), whisk together flour, baking soda, salt, and cinnamon if you’re using it.
-
6Dump the dry stuff into the wet and fold it with a spatula or wooden spoon. Gently. It’ll look thick but it should be mixed — not perfect though; lumps are fine!
-
7Now, toss in nuts and chocolate chips, if you’re feeling it. Or raisins, if you’re one of those people (I’m not judging... much).
-
8Pour—or honestly, scoop—the batter into your loaf pan. Even it out a bit, but don’t fuss.
-
9Bake for 50–60 minutes. Maybe check at 50 if your oven runs hot. If a toothpick stuck in the middle comes out almost clean (a smudge is fine—gooey is great), you’re done.
-
10Let it cool...or don’t. Sometimes we dig in while it’s still steaming and the chocolate is melty. If you turn it out of the pan too early, though, it might kind of collapse — not the end of the world.
Approximate Information for One Serving
Nutrition Disclaimers
Number of total servings shown is approximate. Actual number of servings will depend on your preferred portion sizes.
Nutritional values shown are general guidelines and reflect information for 1 serving using the ingredients listed, not including any optional ingredients. Actual macros may vary slightly depending on specific brands and types of ingredients used.
To determine the weight of one serving, prepare the recipe as instructed. Weigh the finished recipe, then divide the weight of the finished recipe (not including the weight of the container the food is in) by the desired number of servings. Result will be the weight of one serving.
Did you make this recipe?
Please consider Pinning it!