
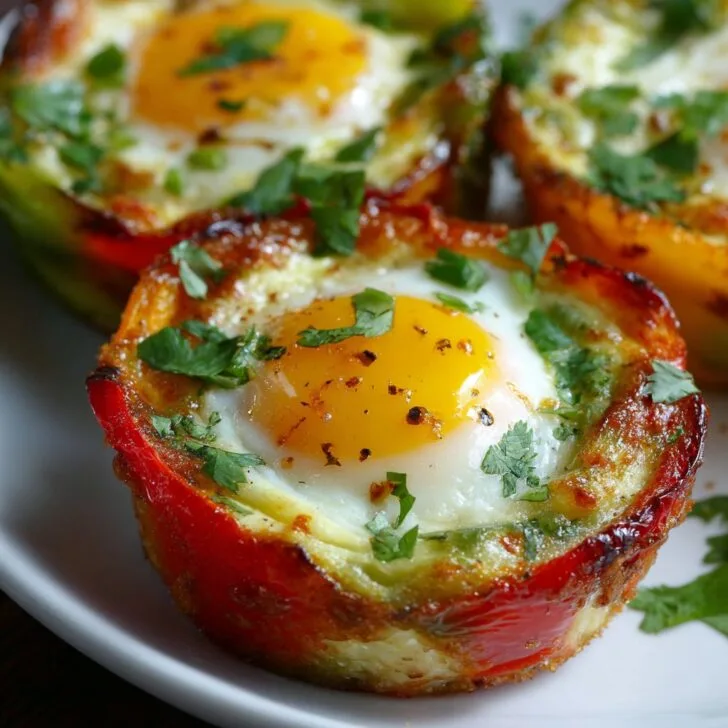
So, You Want to Try Bell Pepper Egg Cups?
Alright, friend, let me level with you: I first made these Bell Pepper Egg Cups years ago when I was desperately trying to use up a rogue bag of peppers and a carton of soon-to-expire eggs. Honestly, it was one of those kitchen experiments I figured would be, at best, edible. Surprisingly, they turned out to be a bit of a breakfast revelation—my son even started calling them "egg boats" and insisted on helping (which mainly involved sneaking bites of cheese, but hey, memories!). And here's the kicker: they're dead simple. Even on a groggy Monday morning when the coffee hasn't kicked in, you can pull these together. Just don't ask me about the time I tried to crack the egg directly into the pepper... let's just say, yolk everywhere.
Why You'll Love Making These (Or At Least Why I Do)
I make Bell Pepper Egg Cups when I crave something healthy but can't face another bowl of cold cereal. My family goes a bit bonkers for them because they're colorful, can be changed up a million ways, and you basically get to eat with your hands (which, for some reason, just makes breakfast more fun). They're also low-carb, if that's your thing—though, word to the wise, my brother-in-law once tried to eat four in one sitting. Regret.
And—full disclosure—sometimes I just make these because I bought too many peppers. You know how it is when the farmer's market gets you with those discounts.
What You’ll Need (With a Few Substitutions)
- 2-3 large bell peppers (I love red and yellow, but green works too; my gran swore by the orange ones, but honestly, any will do. I’ve used mini peppers in a pinch, though they’re fiddly)
- 4-6 eggs (depends how many cups you want—sometimes I just use whatever's left in the carton)
- ½ cup shredded cheese (cheddar is my go-to, but pepper jack is great for a kick; vegan cheese actually works, if that's your style)
- Salt and pepper, to taste (I get carried away with the black pepper, just saying)
- Chopped herbs, optional (parsley, chives, or cilantro—you do you)
- Olive oil or nonstick spray (I once skipped this and learned my lesson the hard way—egg cement in the pan)
- Optional extras: diced ham, cooked bacon, chopped spinach, mushrooms, leftover roast veg—really, whatever's lurking in your fridge
How to Throw These Together (Don’t Stress About Perfection)
- Preheat your oven to 375°F (190°C). Or, if you’re like me and always forget, you can start prepping and turn the oven on halfway through—it’s forgiving.
- Slice the tops (and bottoms, if you want more stability) off your peppers. Pull out the seeds. Slice into thick rings, about ¾-inch wide. Lay them flat on a greased baking sheet or in a big ovenproof skillet. (Don’t worry if the rings aren’t perfect circles; no one’s grading your geometry here.)
- Crack an egg into each pepper ring. Sometimes the egg leaks out the side a bit—doesn’t matter, it cooks up fine. If your eggs are huge, you might want to pour a little white out first. This is where I usually sneak a sprinkle of cheese into the bottom before adding the egg, for maximum gooeyness.
- Sprinkle each with salt, pepper, herbs, and any extras—chopped ham, spinach, leftover roasted sweet potato. I got a bit wild once and added pickled jalapeños (not for the faint of heart).
- Top with more cheese, if you're feeling decadent. Honestly, why not?
- Bake for about 18–22 minutes, until the eggs are just set. If you like your yolks runny, check early (I once forgot and basically made hard-boiled egg peppers—still tasty, but not what I was aiming for). If you want them firmer, a couple extra minutes does the trick.
- Let them cool a minute before you try to move them—ask me how I know. Serve straight from the pan, or pop them onto plates.
Some Notes from the School of Hard Knocks
- If your peppers are a bit wonky and won’t sit flat, just wedge them against each other in the pan. Or, if you really care, slice a tiny sliver off the bottom to flatten them out.
- I once tried using silicon muffin cups for these—did not love the outcome. They just kind of steamed instead of roasted. Stick with a sheet pan or a good skillet.
- The cheese will bubble over and get crispy around the edges. This is not a problem. In fact, it’s the coveted bit.
Wild Variations (and One Mild Disaster)
- I’ve swapped in feta and spinach for a Greek-ish vibe. Good stuff.
- Mozzarella and diced tomatoes make them kind of pizza-y. If you have little ones, this is a winner.
- Once, I tried using raw breakfast sausage instead of cheese. Would not recommend—greasy mess, and the peppers got weirdly soggy.
- Oh, and if you want them spicy, sriracha works wonders.
What If You Don’t Have the Right Pan?
Honestly, any oven-safe dish will do. I’ve made these in a glass casserole when I couldn’t find my sheet pan (story of my life). If you’re desperate, you can even use a toaster oven, though you might need to do them in batches. No fancy equipment required—just don’t use foil if you can help it, it sticks like mad.


How to Store These (Though They Never Stick Around Long)
Leftovers go into an airtight box in the fridge. They’ll keep 2–3 days, but honestly—these always disappear in my house by the next morning. They reheat beautifully in the microwave; just zap them for 30 seconds at a time. I actually think the flavors meld and get better overnight.
This Is How I Serve Them (But You Do You)
We usually pile these onto a plate with sliced avocado and a dollop of salsa. My partner swears by a dash of hot sauce; the kids want ketchup (I try not to judge). Sometimes I’ll make a simple salad on the side, or just serve them with crusty bread for the carb-lovers. Honestly, I just eat them standing at the counter, but you’re probably fancier than that.
Pro Tips: Learn from My (Occasional) Mistakes
- Don't skip the oil or spray—these little guys will weld themselves to the pan if you do. I did it once, spent 10 minutes scraping, and lost half my breakfast.
- I once tried to rush the baking time—ended up with runny whites and a cranky spouse. Just wait the full 18–22 minutes, seriously.
- If you want to prep ahead, slice the peppers and stash them in the fridge the night before. Makes the morning a smidge easier.
FAQ: Real Questions I've Heard (And Answered, Sometimes Well)
- Can I make these dairy free? Yep! Just skip the cheese or use your favorite non-dairy shreds. They’ll still be tasty—promise.
- Do I have to use fresh herbs? Nah. Dried’s fine, or skip entirely. Sometimes I even just sprinkle a little Italian seasoning. (But if you have fresh, it’s worth it.)
- Can I freeze them? I wouldn’t. The peppers get weirdly watery; not worth it. But, if you must, wrap them well and expect texture changes.
- How do I keep the egg from leaking out? Honestly? Sometimes it just does. If you want to minimize mess, press the pepper rings down hard, but it’s no big deal if a little escapes.
- Where did you learn this recipe? Bits and bobs from family, honestly, and a bit of internet sleuthing. I think this version at Skinnytaste is good for reference! I’ve also picked up some smart tips from Budget Bytes over the years.
- What else can I add? Almost anything—bits of last night’s roast, turkey, or even a little salsa before baking. Just don’t overload or the eggs won’t set right.
So there you have it. Bell Pepper Egg Cups, the breakfast that looks way fancier than it is, and truly—once you make 'em, you'll probably end up riffing on the recipe every time. Enjoy, and if you drop an egg on the floor, just remember: we've all been there.


Ingredients
- 2 large bell peppers (any color)
- 4 large eggs
- ¼ cup shredded cheddar cheese
- 2 tablespoons chopped fresh parsley
- 1 tablespoon olive oil
- ¼ teaspoon salt
- ¼ teaspoon black pepper
- ¼ teaspoon garlic powder
Instructions
-
1Preheat the oven to 375°F (190°C). Lightly grease a baking sheet with olive oil.
-
2Slice the bell peppers into 1-inch thick rings and remove seeds and membranes.
-
3Arrange the bell pepper rings on the prepared baking sheet. Crack one egg into each ring.
-
4Sprinkle each egg with salt, black pepper, and garlic powder. Top with shredded cheddar cheese.
-
5Bake for 18-20 minutes, or until the eggs are set to your desired doneness.
-
6Garnish with chopped fresh parsley and serve warm.
Approximate Information for One Serving
Nutrition Disclaimers
Number of total servings shown is approximate. Actual number of servings will depend on your preferred portion sizes.
Nutritional values shown are general guidelines and reflect information for 1 serving using the ingredients listed, not including any optional ingredients. Actual macros may vary slightly depending on specific brands and types of ingredients used.
To determine the weight of one serving, prepare the recipe as instructed. Weigh the finished recipe, then divide the weight of the finished recipe (not including the weight of the container the food is in) by the desired number of servings. Result will be the weight of one serving.
Did you make this recipe?
Please consider Pinning it!!