
Let's Chat About Banana Pudding Rice Krispies
Okay, so I have to tell you about this wild idea I had one late Tuesday evening when I realized I had a box of Rice Krispies, a couple bananas dangerously close to giving up the ghost, and—no kidding—half a packet of instant banana pudding mix I found behind the flour. Banana Pudding Rice Krispies were born. My kids (and honestly, the neighbor's dog, but that's another story) have been obsessed ever since. There's something about the squish of marshmallow and that sunny banana flavor that just makes me forget my to-do list for a minute. I mean, who says you can't have dessert for breakfast? (If someone does, don't tell me.)
Why You'll Want to Make This
I make this when I need a pick-me-up or when my family’s hinting (not so subtly) for something sweet but quick. My family goes absolutely bonkers for these bars because they’re gooey, banana-y (that’s a word in my kitchen), and, wait for it, they take like 10 minutes to throw together. Plus, if I’m honest, there’s something deeply satisfying about mashing bananas with reckless abandon. Oh, and if you’ve ever tried making pudding from scratch and ended up with banana-flavored wallpaper paste—this recipe is for you too.
What You'll Need (and a Few Thoughts on Substitutes)
- 6 cups Rice Krispies cereal (Honestly, the store brand is fine. My grandmother swore by the blue box, but I can't tell the difference.)
- ¼ cup unsalted butter (Salted works too; just skip a pinch of extra salt.)
- One 10-ounce bag mini marshmallows (Sometimes I use the big ones and just chop 'em up; life’s too short to sweat the small stuff.)
- 2 medium ripe bananas, mashed (That slightly overripe stage is perfect. If you’ve only got one, just use it and maybe throw in a splash of vanilla.)
- ½ packet instant banana pudding mix (about 1.5 ounces, Jell-O or whichever brand you dig. I once used vanilla in a pinch. Tasted fine!)
- ½ teaspoon salt (I usually forget this and nobody complains.)
- ½ cup white chocolate chips (optional, but I like the extra sweetness)
- Box of Nilla Wafers for topping (totally optional, but I like the crunch)
How To Make 'Em (With a Few Detours)
- Grease a 9x13 pan (or that slightly too-small brownie tin you keep for emergencies)—I just smear on some butter with a paper towel. No need to be fancy.
- In a big ol’ pot, melt your butter over medium-low heat. Add the marshmallows and stir until they’re mostly melted. At this point, I usually sneak a taste. You know, quality control.
- Stir in the mashed bananas. Now, heads up: it will look a bit... weird. Don’t panic. It always looks like someone tried to make banana soup at this stage.
- Sprinkle in the pudding mix and salt, and keep stirring until everything is thick and sort of glossy. If you’re using white chocolate chips, toss them in now. They might not fully melt—that’s totally fine.
- Take the pot off the heat and quickly fold in the Rice Krispies. This can take some elbow grease. If you’ve got little helpers, this is their time to shine (just watch for sticky fingers—mine always go for a nibble.)
- Press the mixture into your prepared pan. I use wax paper or the back of a spoon rubbed with a dab of butter, otherwise it gets everywhere. Top with crushed Nilla Wafers if you have ‘em, or just leave them naked. Your call!
- Let them cool for at least 30 minutes, but honestly, I rarely wait that long. Cut into squares and serve. Or just dig straight in—no judgement from me.
Couple of Notes (From My Messy Kitchen)
- If your bananas are SUPER ripe, you might want to cut back a little or add an extra handful of cereal. Too much mush isn’t great.
- I tried these with cocoa Rice Krispies once. Good, but not great—kind of overwhelmed the banana.
- Actually, if you forget to line the pan, a quick soak in warm water gets any sticky bits right off.
Variations I've Tried (Not All Winners!)
- Tried subbing in freeze-dried banana slices for fresh. Crunchy, but the flavor didn’t really pop.
- I once mixed a swirl of peanut butter into the melted marshmallow stage. Crazy good, especially if you’re a PB&banana fan.
- One time I added cinnamon and regretted it—tasted like banana bread’s confused cousin.
- Chocolate chips instead of white: hey, I say go for it.
Equipment (But You Can Improvise)
- Big saucepan (I only have one; if yours is small, do the melting in batches. Works fine.)
- Wooden spoon or sturdy spatula. Sometimes I just use a regular old serving spoon.
- 9x13 pan (or whatever you've got—I've used a pie plate in a pinch, ended up with thicker bars)
- Wax paper or buttered hands if you’re feeling brave


Storing Your Treats (If They Last That Long)
In theory, keep them in an airtight container for up to 2 days. In reality, in my house these vanish by the next morning—sometimes before they're even fully cooled. If you want them to last longer, pop them in the fridge (covered). They get a tiny bit chewier, which I kind of love.
Serving These Up (My Favorite Part)
I’m all about serving these with a big glass of cold milk. Or, if you’re feeling fancy, a scoop of vanilla ice cream on the side (I do this when I want to impress my sister-in-law). At summer BBQs, I cut them into bite-sized cubes so people can grab ‘em by the handful. Oh, and my cousin puts a candle in one for birthday breakfasts. Not saying you should, just... you could.
My Top Tips—Learned the Hard Way
- I once tried to press these into the pan while the mix was still piping hot; not only did I nearly scorch myself, but the bars came out rock hard. Wait a minute or two, just enough so you’re not wrangling hot lava.
- Don’t use super green bananas. Trust me, the flavor just isn’t there.
- And, if you rush the melting stage, you get lumpy marshmallow bits. (Happened to me last Christmas. Didn’t ruin the batch, but didn’t win any beauty contests either.)
FAQs From Real Folks (And Me, Honestly)
- Can you use fresh bananas in rice krispie treats?
Yep, that’s the whole point! The key is not to overdo it or they’ll get soggy. I find two is just right—but if you’ve only got one, roll with it. - Can I make this vegan?
Probably! Use vegan marshmallows (I’ve seen good things about Dandies), plant-based butter, and check your cereal/pudding mix for sneaky dairy. I haven’t tried this version, so if you do, let me know how it goes? - Is there a way to amp up the banana flavor?
For sure. Add a splash of banana extract (found at specialty stores or here) or even a little mashed freeze-dried banana with the fresh stuff. I tried banana chips once, but they just got weirdly chewy. - How do you keep these from sticking to your hands?
Butter your hands or use wax paper like I said above. Actually, sometimes I just lick my fingers—no shame. - Can you freeze them?
I suppose so, but they might get a little soggy when thawed. I tried once, and they were edible but a bit sad. Best to just eat them fresh (shouldn’t be a problem!).
Oh, and if you’re looking to brush up on basic rice krispie treat skills, Serious Eats has a great guide I’ve used before. Bananas or not, you can’t go wrong with a classic.
Alright, off you pop—go raid your pantry and let me know how it turns out. And if you end up with a sticky counter, well, you’re in good company!


Ingredients
- 6 cups Rice Krispies cereal
- 1 package (3.4 oz) instant banana pudding mix
- ¼ cup whole milk
- ½ cup unsalted butter
- 1 bag (10 oz) mini marshmallows
- 1 cup white chocolate chips
- ½ cup crushed vanilla wafer cookies
- 1 medium ripe banana, sliced (optional, for garnish)
Instructions
-
1Line a 9x13-inch baking pan with parchment paper and lightly grease it.
-
2In a large saucepan over medium heat, melt the butter. Add the mini marshmallows and stir until completely melted and smooth.
-
3Remove the saucepan from heat. Quickly whisk in the instant banana pudding mix and milk until fully combined.
-
4Stir in the Rice Krispies cereal and crushed vanilla wafer cookies until evenly coated with the banana pudding mixture.
-
5Press the mixture evenly into the prepared pan. Sprinkle white chocolate chips on top and gently press them in. Allow to cool for at least 30 minutes.
-
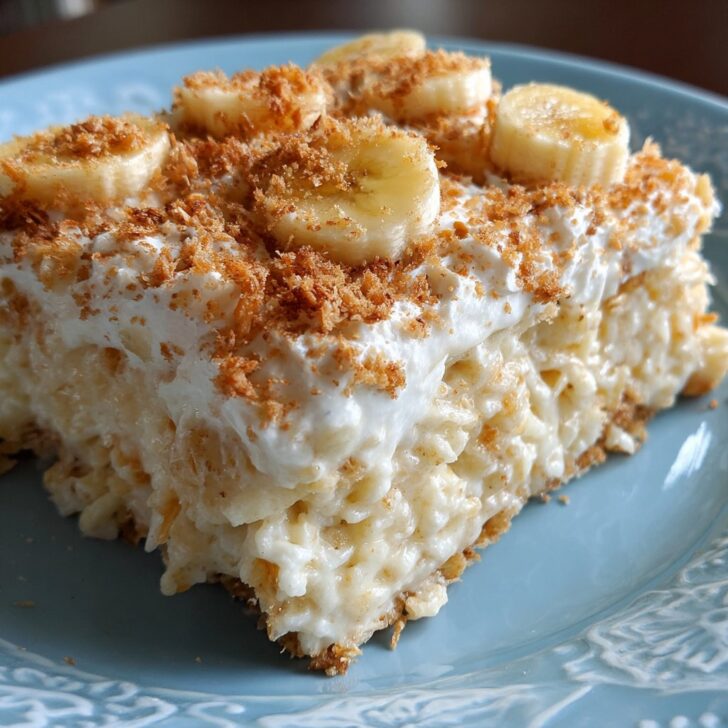
6Cut into squares and garnish with banana slices if desired. Serve and enjoy.
Approximate Information for One Serving
Nutrition Disclaimers
Number of total servings shown is approximate. Actual number of servings will depend on your preferred portion sizes.
Nutritional values shown are general guidelines and reflect information for 1 serving using the ingredients listed, not including any optional ingredients. Actual macros may vary slightly depending on specific brands and types of ingredients used.
To determine the weight of one serving, prepare the recipe as instructed. Weigh the finished recipe, then divide the weight of the finished recipe (not including the weight of the container the food is in) by the desired number of servings. Result will be the weight of one serving.
Did you make this recipe?
Please consider Pinning it!!