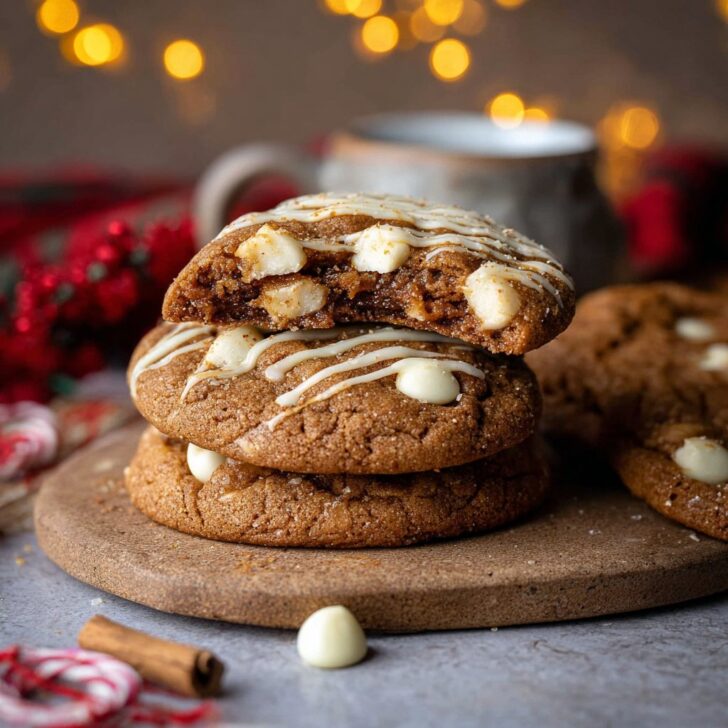

Let Me Tell You About These Gingerbread White Chocolate Cookies
Alright, pull up a chair—this is probably my most wintery-scented kitchen story. I first made these bakery gingerbread white chocolate cookies when my nephew decided gingerbread men were too scary (don't ask me). And, you know, most ginger cookies just weren't giving me that last push of cozy. So I got a little wild, tossed in some white chocolate, and next thing you know, I'm queen of holiday potlucks. Or, at least, the kitchen traffic improved. My husband still claims he can smell these baking even when I'm just making coffee. Honestly, it's probably just wishful thinking on his part. And a quick warning—rolling these out gets sticky, but hey, clean hands are overrated sometimes.
Why You’ll Love This Recipe (Trust Me!)
I make these when my friends text at 9pm asking what I've got sweet (which is disturbingly often). Everybody loses their cool over the white chocolate chunks because, honestly, they're like little edible snowstorms hiding in the chewy gingerbread. Little confession: I used to dread chopping up that thick baking chocolate, but I bought a cheap serrated knife one day and never looked back (works a treat). And—side note—these also freeze well, though mine never make it that far because my family is basically a pack of well-dressed wolves. If you've ever tried to turn out perfect bakery-style cookies and ended up with sad little pancake blobs, you’ll appreciate this—these cookies hold their shape, even if you’re a bit slapdash with the dough.
Here’s What You’ll Need (Substitutions Welcome)
- 2 ¼ cups all-purpose flour (my aunt swears by King Arthur, but I grab whatever’s on special—no drama)
- 2 teaspoons ground ginger (sometimes I use a mix of ginger and a dash of cardamom because I’m nosey with spices)
- 1 teaspoon cinnamon
- ¼ teaspoon ground cloves
- 1 teaspoon baking soda
- ½ teaspoon salt (I eyeball it, but that’s probably bad advice)
- ¾ cup unsalted butter, softened (I’ve used margarine in a pinch—turns out a bit different but still tasty)
- ½ cup brown sugar, packed (light or dark, whatever’s living in your cupboard)
- ¼ cup granulated sugar
- ⅓ cup molasses (you know that jar in the back of your pantry? Yeah, grab that!)
- 1 large egg (room temp is best, but who's actually remembering that?)
- 1 teaspoon vanilla extract (homemade if you’re feeling extra, store-bought for the rest of us)
- 1 cup white chocolate chunks (or chips—sometimes I’ve just smashed up a bar; totally works)
- Optional: a sprinkle of raw sugar for tops (makes them look bakery-fancy, but honest, most won't notice)
How You Make ‘Em (Don’t Overthink It)
- Preheat the oven to 350°F (175°C). If you forget, it's not the end of the world; just wait a bit and put on a podcast.
- Grab a big bowl. Whisk flour, spices, baking soda, and salt. If you’re the kind of person who sifts flour, now’s your moment, I guess.
- In another bowl—ideally with a mixer, but a sturdy wooden spoon works if you’ve got arms—cream the butter and both sugars until fluffy. This is where I usually sneak a fingerful (don't judge; it's basically required for testing). Mix in molasses, egg, and vanilla.
- Tip the dry mix in—don’t worry if it looks a bit messy. It pulls together, promise. Actually, I find adding dry and wet in three waves makes it smoother, but sometimes I’m lazy and just dump it all.
- Stir in your white choc chunks. Sometimes I toss them in with a little flour first so they don’t sink, but honestly, sometimes I forget that and nobody complains.
- Now, scoop balls about a heaping tablespoon each onto a lined baking sheet (I use that silicone mat from Silpat—but parchment is fine). Leave a bit of space because they do a tiny bit of spreading.
- Sprinkle with raw sugar if you’re feeling jazzy. Bake for 10–12 minutes. They’ll puff, crack, and probably look too soft when you take them out—that’s good. They firm up as they cool. If you overbake, well, they'll still be delicious dunked in coffee.
- Wait for five minutes (or as long as you can stand), then move to a rack. Now try not to burn your tongue like I always do because you can’t wait.
Stuff I’ve Learned (Sometimes the Hard Way)
- If you melt the butter by accident, the dough gets sticky; just chill it for 20 minutes and cross your fingers.
- Once I forgot the baking soda and got weird, dense cookies that were more like hockey pucks than treats. Don’t recommend.
- I tried these with candied ginger pieces instead of ground once. Good idea in theory, but they came out a bit too spicy for the school crowd. If you love spicy-sweet, go for it—but warn folks!
Mixing It Up—Cookie Experiments (Not All Winners)
- I’ve swapped white chocolate for dark—tastes fancier, but my kid said it’s “too serious.”
- Once added chopped pecans, and it was pretty great, just not as squishy in the middle.
- Tried rolling them in powdered sugar—looked a bit like they'd been lost in a snowstorm; not visually appealing (but hey, still edible).
If You Don’t Have a Mixer…
Honestly, I’ve done the butter–sugar creaming by hand plenty. Bit of an arm workout but not the end of the world. If you’ve only got a fork, use that—just takes a little longer. Or rope in a helper (kids make great dough stirrers, if you can keep them from eating everything raw).


How to Store (Assuming You’ll Even Get the Chance)
In an airtight container, they keep on the counter 3–4 days, but—truth is—they never last more than a day and a half here. For longer storage (yeah right), freeze them in a zip-bag for up to 2 months. Actually, I think these taste better the next day; the flavors settle. If you like a chewier cookie, just pop one in the microwave for 8 seconds (yes, eight—learned that after one too many molten, collapsed cookies).
How We Serve Them at My Place
My brother dunks his in strong tea; I go the classic route—pile of warm cookies and a mug of cocoa, sometimes with marshmallows if they're hiding in the back of the cupboard. At Christmas, we leave a few out for Santa (plus a carrot, because reindeer need snacks too, apparently). On second thought, these cookies work year round—try them with a dollop of vanilla ice cream in July; they won’t mind.
What I’d Tell Myself (If I Could Time Travel)
- Don’t rush the creaming step. I tried to speed through it once and got cookies that wouldn't puff. Not worth it.
- If your dough feels too sticky to roll, chill it! Or, better, just embrace the mess. That’s half the fun.
- Don’t argue with your oven. Sometimes it’s just going to bake unevenly and that’s life. Rotate the tray halfway if you remember; if not, eat the lopsided ones—call it quality control.
Questions Folks Have Actually Asked Me
- Do I have to use molasses?
- I mean, it's part of the classic gingerbread deal, but if you're desperate, some golden syrup or even honey could substitute. Just know you'll get a different cozy vibe.
- Why white chocolate, not regular?
- Personal preference, honestly. I like the creamy little bursts with the spice. Regular choc is fine—just a bit less wow, in my opinion.
- Mine are flat! What happened?
- Could be warm butter or your baking soda is tired. Or did you skip chilling the dough? If so—well—next batch!
- Can I make the dough ahead?
- Oh, for sure. Make it the night before, let it chill, then just scoop and bake whenever the mood strikes. Actually, I usually do this when I'm planning ahead (rare, but it happens).
- Can I double the batch?
- Absolutely, but use two trays and maybe rotate them halfway through. Also, yes, you’ll want to double it. They go quick.
- Any good resources for troubleshooting cookies?
- If you're obsessed, Sally's Baking Addiction Cookie Guide is fantastic (I've learned a ton there), and King Arthur's cookie tips are oddly helpful too.
And before I forget: I once dropped an oven mitt onto a tray of these right as they came out and, fun fact, cookies are surprisingly forgiving. Just maybe skip that step.


Ingredients
- 2 ¼ cups all-purpose flour
- 1 teaspoon baking soda
- ½ teaspoon salt
- 2 teaspoons ground ginger
- 1 teaspoon ground cinnamon
- ¼ teaspoon ground cloves
- ¾ cup unsalted butter, softened
- ½ cup packed dark brown sugar
- ¼ cup granulated sugar
- ⅓ cup molasses
- 1 large egg
- 1 teaspoon vanilla extract
- 1 ½ cups white chocolate chips
Instructions
-
1Preheat oven to 350°F (175°C) and line two baking sheets with parchment paper.
-
2In a medium bowl, whisk together the flour, baking soda, salt, ginger, cinnamon, and cloves.
-
3In a large bowl, cream the softened butter with brown sugar and granulated sugar until light and fluffy.
-
4Beat in the molasses, egg, and vanilla extract until combined.
-
5Gradually mix the dry ingredients into the wet ingredients until just combined. Fold in the white chocolate chips.
-
6Scoop dough into tablespoon-sized balls and place on baking sheets. Bake for 10-12 minutes until edges are set. Cool before serving.
Approximate Information for One Serving
Nutrition Disclaimers
Number of total servings shown is approximate. Actual number of servings will depend on your preferred portion sizes.
Nutritional values shown are general guidelines and reflect information for 1 serving using the ingredients listed, not including any optional ingredients. Actual macros may vary slightly depending on specific brands and types of ingredients used.
To determine the weight of one serving, prepare the recipe as instructed. Weigh the finished recipe, then divide the weight of the finished recipe (not including the weight of the container the food is in) by the desired number of servings. Result will be the weight of one serving.
Did you make this recipe?
Please consider Pinning it!!