
If you’d asked me ten years ago what a Baked French Egg was, I’d probably have grinned, shrugged, and said something nonsensical (eggs Benedict, but in a beret?). But then my pal Luc from Lyon taught me how his mum made these lovely, tucked-into-cream eggs—somewhere between lazy brunch and "look at me, I’m a proper cook." First time I tried, my eggs ended up somewhere between soft-boiled and total chaos, but I still ate them… and I’ve made them probably a hundred times since (I’m not counting, but the family has definitely noticed).
Also, full disclosure: I have a pretty terrible track record with soufflés, but Baked French Eggs? Foolproof. At least, for me.
Why You'll Love This—Honestly
I make these baked eggs when I'm short on time but still want to feel fancy, or when my sister comes over with her two hungry kids and I've only got 20 minutes to look like I've got my life together. My family goes crazy for them because there's something about scooping the egg out with a slab of bread that just makes it feel special (and there's almost no clean-up, so that's a win). Oh, and when I can't deal with one more pan to scrub, this is my go-to.
And, if you get distracted and forget them for an extra two minutes, it’s not the end of the world—been there, no one noticed. Well, unless you call a firmer yolk a disaster.
Here's What Goes Into My Baked French Eggs
- 4 large eggs (Honestly, whatever size you’ve got—they all work, though jumbo ones get a bit wild)
- ⅓ cup heavy cream or crème fraîche (I occasionally swap in half-and-half when the fridge is looking sad)
- 2 tablespoon grated cheese (Gruyère is classic; but cheddar’s been a solid pinch hitter in my kitchen, and I’ve even tried feta once—odd, but not bad)
- 1 small clove garlic, finely minced (My grandmother used to say "always fresh!" but honestly, powdered garlic will get you there)
- Salt and cracked black pepper (I lean heavy on the pepper; you do you)
- Optional: a knob of butter for greasing, chopped parsley or chives, a handful of chopped mushrooms (I sometimes toss in spinach, but honestly, use what’s about to go dodgy in the crisper)
Let's Get These Eggs Baked
- Crank your oven up to 375°F (190°C). Or, you know, whatever your oven says is 375—mine’s always a bit dodgy since we moved last year.
- Grab 2 little ramekins or, honestly, an oven-safe mug in a pinch. Grease ‘em up with butter (the more, the merrier! Actually, now and then I just spray them if I'm in a rush).
- Pour a bit of cream in the bottom of each ramekin—doesn’t need to be exact, but maybe a tablespoon or so. Toss in that garlic (don’t worry if it looks weird at this stage, it always does).
- Crack two eggs into each ramekin. Try not to break the yolks. But, you know, if one splits, you just call it "rustic" and move on.
- Splash the remaining cream over the eggs, then sprinkle the cheese on top like confetti. Add salt and a frankly irresponsible amount of black pepper.
- Optional: Jazz these up with mushrooms, herbs, or a handful of greens (if you’re feeling extra virtuous).
- Place the ramekins in a baking dish, then carefully pour hot water into the dish to come halfway up the sides. If you spill a bit, welcome to the club.
- Bake for 13–16 minutes, or until the whites are just set and the yolks are still wobbly. Actually, I find if I poke them gently and they jiggle a bit, they’re perfect (I once let them go for 20 min—dry city, don’t do that).
- Carefully (I’m not always careful, but I try) lift the ramekins from the water, sprinkle with herbs, and let them cool for a couple minutes before eating, or you’ll torch your tongue. Not speaking from experience…
A Few Things I’ve Learned (Probably The Hard Way)
- If you skip the water bath, the eggs get a bit tougher, but it’s still edible—I mean, I’ve eaten worse things.
- Don’t be stingy with butter on the ramekins, or you’ll be scraping for ages (though, scraping is oddly satisfying).
- A splash more cream makes it silkier, but sometimes I just run out and skip it. It’s fine.
Some Random Variations I've Actually Tried
- Bacon bits (surprise! Giant hit with the kids, obviously)
- A dollop of pesto on top before baking—maybe not classic, but it’s incredible
- Sriracha. Would not recommend. The eggs turned pinkish… not what you want, trust me.
- A vegetarian version with wilted arugula and sun-dried tomatoes—actually, that one's a keeper (bit fancy, though)
About Equipment (But Don’t Panic!)
Ramekins are great because you feel like you’re on the telly, but if you don’t have ‘em, I’ve literally used mismatched coffee mugs. Just check they’re oven-safe, yeah? If you're not sure, here's a quick guide on spotting oven-safe dishes (learned the hard way so you don't have to).
I used to insist on a proper kettle for heating the water, but a saucepan works if you don’t mind the slight risk of a water disaster. Or, in a pinch, I've microwaved the water in a measuring jug (careful, that can boil over - fun times).


So... How Do You Store These?
Technically, you can cover and keep in the fridge for up to 2 days (wrapped tight), but honestly, in my house, baked eggs rarely make it past brunch—someone always nicks the last one by tea time.
If you do have leftovers (lucky you), reheat gently in the microwave or eat them cold from the fridge. On second thought, cold is very "continental chic" if you serve them on toast.
Oh, And Serving Ideas...
Best with crusty sourdough, in my totally biased opinion. Sometimes we serve them with a mess of roasted tomatoes on the side, or if it’s a big family brunch, I’ll make a green salad to pretend it’s a balanced meal (my son says, "no one is fooled, mum").
If you’re feeling extra, a dab of hot sauce is amazing, or if you want to get properly French, try a little tapenade—this recipe from Serious Eats is the real deal.
A Few "Don't Make My Mistakes" Pro Tips
- I once tried rushing the water bath setup—ended up with egg on my socks and a kitchen that smelt like Eau de Boiled Egg for a week.
- Don’t use pre-shredded cheese (it never melts right), though I still do sometimes. It’s faster. But, really, the proper stuff makes a difference.
- Let the eggs rest a minute or two; they’re hotter than they look—speaking from burned tongue experience more than once (!).
FAQ: You Asked, I Answered
- Can I use milk instead of cream?
Sure—you won’t get the same richness, but it’ll still work. I’ve done it when the fridge is down to its last drop. - Do I have to use a water bath?
Honestly, yes for best texture; but if you skip it, just keep an eye on the eggs. Oh, and they cook faster that way, so don’t wander off. - What if I crack the yolk?
Happens all the time. No big deal; the yolk’ll just cook a bit faster, but you’ll still end up with a tasty brunch. - How do you know when they’re done?
The whites should look set but the yolk should gently wobble. Or, if you like them more done—who am I to judge? (Just don’t tell Luc’s mum.) - Can I make these for a crowd?
Absolutely! Use a muffin tin (I saw this trick on Bon Appétit—works a treat), but start checking for doneness at the 10 minute mark.
Well, if you’ve read this far, you deserve an extra slice of toast. I genuinely hope this recipe brings as much warmth to your weekend mornings as it does to mine. And if it doesn’t—well, at least you tried something new. Plus, who says eggs are just for breakfast? Cheeky late dinner, anyone?


Ingredients
- 8 large eggs
- ½ cup heavy cream
- ⅓ cup grated Gruyère cheese
- 2 tablespoons unsalted butter
- 1 tablespoon chopped fresh chives
- 1 tablespoon chopped fresh parsley
- Salt and freshly ground black pepper, to taste
- Optional: ¼ teaspoon smoked paprika
Instructions
-
1Preheat your oven to 375°F (190°C). Butter four small ramekins or oven-safe dishes with the unsalted butter.
-
2Crack 2 eggs into each ramekin. Drizzle 2 tablespoons of heavy cream over the eggs in each dish.
-
3Season with salt, pepper, and smoked paprika if using. Sprinkle the grated Gruyère cheese over the top.
-
4Place the ramekins in a baking dish and fill the dish with hot water halfway up the sides of the ramekins.
-
5Bake for 15-17 minutes, or until egg whites are just set and yolks are still slightly runny.
-
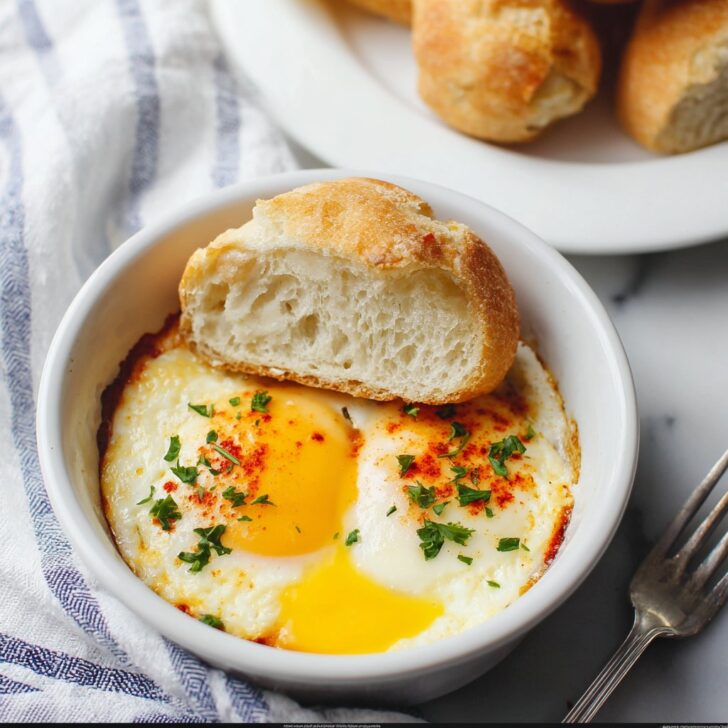
6Remove from the oven and sprinkle with fresh chives and parsley before serving.
Approximate Information for One Serving
Nutrition Disclaimers
Number of total servings shown is approximate. Actual number of servings will depend on your preferred portion sizes.
Nutritional values shown are general guidelines and reflect information for 1 serving using the ingredients listed, not including any optional ingredients. Actual macros may vary slightly depending on specific brands and types of ingredients used.
To determine the weight of one serving, prepare the recipe as instructed. Weigh the finished recipe, then divide the weight of the finished recipe (not including the weight of the container the food is in) by the desired number of servings. Result will be the weight of one serving.
Did you make this recipe?
Please consider Pinning it!!