A Warm Hello & Why I Keep Coming Back to These
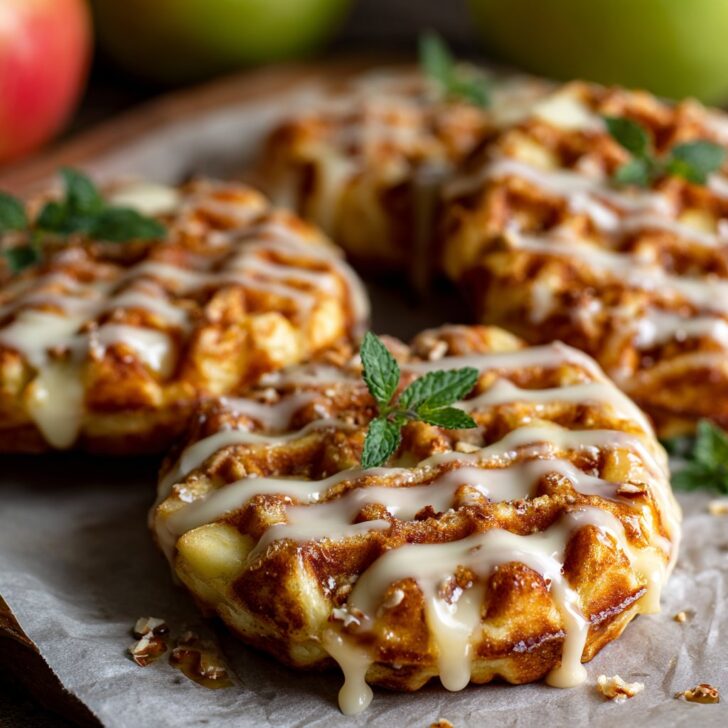
Alright, so here’s the scoop—Apple Fritter Waffle Donuts are what I whip up when the weather’s gray and my mood is, um, somewhere between "meh" and "let’s eat something awesome." The first time I tried them, I was aiming for classic apple fritters, but then my ancient waffle iron sort of stared at me from the cupboard with that “pick me” energy. Long story short, my kitchen smelled like a country fair, and my family basically inhaled the whole batch before I even got my second cup of tea. And, not gonna lie, there was powdered sugar everywhere. Everywhere. (Still finding some under the toaster, honestly.)
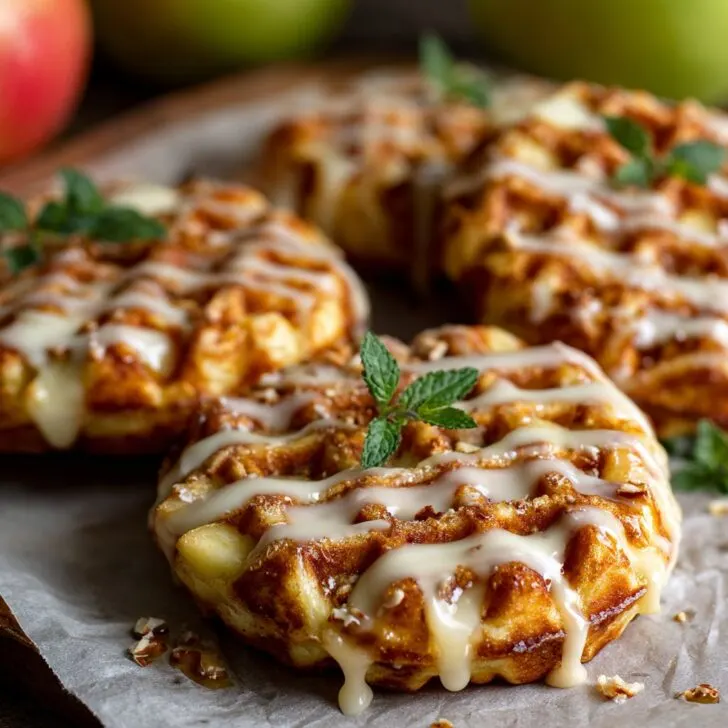
So, if you like your treats crisp on the outside, fluffy inside, and packed with cinnamon apple goodness, pull up a chair. Let’s get into this.
Why I Make These Instead of Actual Donuts
I make these when I want that donut shop flavor but can’t be bothered to haul out the deep fryer (which, by the way, terrifies me a little after that one oil spill incident). My kids go bonkers for them because they’re basically the best part of a waffle, donut, and apple fritter all tangled up together. The scent alone gets people wandering in from the garden, asking “What’s cooking?” And you know, some mornings I just want something that feels like a hug in food form. These deliver. (Plus, you don’t even have to roll or cut dough. Bless.)
What You’ll Need (And What I Substitute When I’m Missing Something)
- 2 medium apples, peeled, cored, and chopped (Granny Smith is my go-to, but Fuji or Gala work if that’s what’s rolling around in the fruit bowl)
- 1 and ½ cups all-purpose flour (I’ve tried half wholewheat when I’m feeling virtuous; honestly, no one notices)
- 2 tablespoons sugar (sometimes I use brown sugar if I want more ... depth? Or if that’s just what’s left in the jar)
- 2 teaspoons baking powder
- ½ teaspoon salt
- 1 teaspoon ground cinnamon (I bump this up to 1.5 teaspoons when I’m feeling spicy)
- 2 large eggs
- ⅔ cup milk (any kind, really; I grabbed oat milk last week because that’s what was open and it was fine!)
- ¼ cup melted butter (my gran swore by salted, but unsalted is perfectly good)
- 1 teaspoon vanilla extract (though if you’re out, skip it—it’s still tasty)
- Powdered sugar, for dusting (or a simple glaze: ½ cup powdered sugar + 2-3 teaspoon milk)
How I Actually Put These Together (No Stress)
- Preheat your waffle iron. If it’s like mine, it’ll beep at you when it’s ready, or just blink its little light. Give it a quick brush with oil or a squirt of cooking spray so things don’t stick.
- In a big bowl, toss together flour, sugar, baking powder, salt, and cinnamon. I usually get distracted here and end up double-checking if I’ve already put in the salt (I have, usually).
- In another bowl, crack in those eggs, pour in the milk, melted butter (cooled slightly so you don’t cook the eggs—ask me how I know), and vanilla. Whisk it all up.
- Tip the wet stuff into the dry, and stir it together just until it’s barely combined. Lumpy batter is your friend here. If you overmix, they go a bit tough. Fold in the chopped apples. This is where I sneak a little batter taste (no shame; just egg caution). The whole thing looks a bit thick and awkward, but trust me, it’s fine.
- Scoop a generous spoonful (maybe ⅓ cup-ish? I just eyeball it) onto the hot waffle iron. Close the lid. If your iron leaks a bit, throw a baking sheet underneath—mine always does and I never remember until it’s too late.
- Cook for 3-5 minutes, until golden and crisp. Don’t be tempted to peek too soon; I always do, and then I get that half-cooked mess stuck to the top plate. Let them get nice and browned.
- Lift out carefully (they’re hot! ask my fingertips), and set on a cooling rack. Dust with powdered sugar or drizzle with glaze while still warm. Repeat till you’re outta batter or patience (usually patience, in my case).
Things I’ve Learned the Hard Way (Notes)
- If the apples are really juicy, I sometimes give them a quick pat dry with paper towels so the batter isn’t too wet. Didn’t do it once, and the batter was practically soup.
- The first waffle is always a bit wonky, but don’t stress—it’s the chef’s snack. (Or the dog’s, if you drop it. Don’t ask how I know.)
- Honestly, they taste better a little while after they’re made. Something about the flavors settling down, like old friends catching up.
- And, if you want to get ahead, you can chop the apples the night before and stash them in the fridge with a splash of lemon juice to stop them browning. (I always forget the lemon, though.)
Variations I’ve Tried (And One I Won’t Repeat)
- Tried swapping pears for apples once. It was... fine, but a bit mushy. Not my favorite, but maybe yours?
- Chopped pecans or walnuts mixed in with the apples—delicious, especially if you toast ‘em first.
- I once added a handful of raisins and it ended up tasting a bit like a hot cross bun. Which isn’t bad, just not quite a fritter. Raisins are divisive, anyway.
- Toss in a pinch of nutmeg if you’re into that cozy spice thing.
Do I Need Fancy Gear? (Equipment Chat)
Waffle iron is technically essential, but I once tried this on my sandwich press in a fit of desperation. They were flatter and, well, rustic, but still tasty. So don’t let a lack of gear stop you. A mixing bowl, whisk, and a spatula are all you really need. Oh! And a cooling rack if you want them to stay crisp—but a wire oven rack works too in a pinch.


How I Store (If They Miraculously Last That Long)
These keep in an airtight container at room temp for a day or so. In my house they never last, but theoretically you can freeze them (just wrap them up tight). To reheat, I pop them in the toaster for a couple minutes so they’re crispy again. Microwaving makes them a bit sad and floppy, but maybe that's just me.
How to Serve (My Family Tradition)
My lot likes theirs still a bit warm, dusted with an avalanche of powdered sugar; my brother dunks his in extra glaze, which is a choice. Sometimes we pile them up with a scoop of vanilla ice cream if it’s a birthday or just a Friday. One time, I poured over a little homemade caramel sauce (thanks Sally!), and even my picky aunt had seconds. Coffee is mandatory, but cider works in a pinch.
Here’s What I Learned the Hard Way (Pro Tips)
- Let the waffle iron fully preheat. I once rushed and ended up scraping half the batter off the plates (not fun and, wow, does it stick!)
- Don’t overfill the iron. It’s tempting, especially when you’re hungry, but overflow is real and cleaning it up is not my idea of fun.
- If you go heavy on the apples, just know they might be a bit squishier. Not bad, just different. Actually, I find a 60-40 ratio of batter to apple works best.
FAQ—Stuff Friends Have Actually Asked Me
- Can I make these gluten-free?
Yep! Just use a 1:1 gluten-free flour blend. I like Bob’s Red Mill. The texture is a tiny bit different, but honestly, still lovely. - What apples do you use?
I like something tart, like Granny Smith. But, whatever’s in the fruit bowl usually ends up in there. I just avoid anything mealy. Red Delicious = nope. - Help, my batter is too thick/thin!
If it’s super thick, add a splash of milk. If runny, a spoonful more flour. It’s pretty forgiving, actually. - Can I make the batter ahead?
You can, but I think it’s better fresh. If you must, keep wet and dry separate, then mix just before cooking. Batter with apples in it gets a bit brown if it sits (but still tastes good). - How do I clean the waffle iron?
With much patience and a damp cloth. I sometimes wish I’d just bought one with removable plates. If you’ve got dried-on bits, let the iron warm up and wipe down again — it helps loosen the stuck bits. Oh, and never submerge it (learned that the hard way!) - Any way to make them healthier?
Maybe sub in some wholewheat flour and cut back a bit on sugar. I wouldn’t skip the butter, though. That’s half the magic.
That’s the whole lot! Hope you love making (and eating) these as much as I do. And if you end up with as much powdered sugar on your shirt as I usually do, well, that’s just part of the fun. If you want to geek out about waffle irons, I found this review super helpful (especially if you’re considering an upgrade). Happy cooking, mate!


Ingredients
- 2 medium apples, peeled, cored, and diced
- 1 ½ cups all-purpose flour
- ⅓ cup granulated sugar
- 2 teaspoons baking powder
- 1 teaspoon ground cinnamon
- ¼ teaspoon salt
- 2 large eggs
- ¾ cup milk
- ¼ cup unsalted butter, melted
- 1 teaspoon vanilla extract
- 1 cup powdered sugar (for glaze)
- 2 tablespoons milk (for glaze)
Instructions
-
1In a large bowl, whisk together the flour, granulated sugar, baking powder, cinnamon, and salt.
-
2In a separate bowl, beat the eggs, then add milk, melted butter, and vanilla extract. Mix well.
-
3Combine the wet and dry ingredients, stirring until just combined. Fold in the diced apples.
-
4Preheat your waffle maker and lightly grease it. Spoon the batter into the waffle wells, filling each about ⅔ full.
-
5Cook for 3-5 minutes or until golden brown and cooked through. Remove and let cool slightly.
-
6For the glaze, whisk together powdered sugar and milk until smooth. Drizzle over the warm waffle donuts before serving.
Approximate Information for One Serving
Nutrition Disclaimers
Number of total servings shown is approximate. Actual number of servings will depend on your preferred portion sizes.
Nutritional values shown are general guidelines and reflect information for 1 serving using the ingredients listed, not including any optional ingredients. Actual macros may vary slightly depending on specific brands and types of ingredients used.
To determine the weight of one serving, prepare the recipe as instructed. Weigh the finished recipe, then divide the weight of the finished recipe (not including the weight of the container the food is in) by the desired number of servings. Result will be the weight of one serving.
Did you make this recipe?
Please consider Pinning it!!