
Let Me Tell You About This Apple Crisp (and That One Time with the Oven...)
Alright, so picture this: it's raining outside, the kind of drizzle that makes your hair frizz, and I've got a bag of Granny Smith apples staring me down on the kitchen table. I think about making something fancy, but honestly? Apple crisp wins every time. Especially this version—because, not to oversell it, but my aunt once claimed it cured her homesickness (though I suspect it was just the extra scoop of ice cream). Oh, and if anyone's counting, I've burned my fair share of crisps by getting distracted with a podcast. Just saying, set a timer!
Why You’ll Probably Fall for This Recipe
I make this when I want something sweet but can’t be fussed with pie crust. My family goes crazy for it because it’s got that crunchy, cinnamon-y topping (I mean, who doesn't love that part?) and it makes the house smell amazing—like, “I wish I could bottle this” levels. Sometimes I throw in a handful of oats or, when I’m out of brown sugar, just regular white sugar (no one’s complained yet). It’s also my secret weapon for potlucks because, let’s be honest, it’s pretty forgiving—mess up the topping? No one notices under the ice cream.
What You’ll Need (And What You Can Swap)
- 6 Granny Smith apples, peeled & sliced (sometimes I leave some peel on if I'm feeling lazy—still good!)
- ⅔ cup brown sugar (or white sugar in a pinch, or a little maple syrup... my cousin swears by it)
- ½ cup all-purpose flour (I've used whole wheat flour—turns out just a bit denser, but not bad)
- ½ cup old-fashioned rolled oats (optional, but they add a nice texture; quick oats work in a hurry, though the topping gets kinda soft)
- 1 teaspoon ground cinnamon (sometimes I’m generous—who’s measuring?)
- ¼ teaspoon ground nutmeg (skip it if you hate nutmeg, no biggie)
- ¼ teaspoon salt
- ½ cup unsalted butter, cold & diced (I’ve used margarine when I ran out, not exactly the same, but edible!)
- 1 tablespoon lemon juice (if you remember to buy a lemon; bottled stuff is fine but tastes more, well, fake—but it works!)
- ½ teaspoon vanilla extract (optional, but I love it)
How to Make This Apple Crisp (with Tangents & a Dash of Chaos)
- Preheat your oven to 350°F (about 175°C). If your oven runs hot like mine does, maybe check on things early—burnt topping is a sad thing.
- Slice the apples and toss them in a big bowl with the lemon juice and vanilla. Sometimes I add a tiny pinch of sugar here, just 'cause. Layer all those apple slices in a buttered 8x8 baking dish (or whatever you’ve got—one time I used a lasagna pan, turned out fine).
- Mix the crisp topping: In another bowl, combine your flour, sugar, oats, cinnamon, nutmeg, and salt. Add the cold diced butter and rub it in with your fingers until you’ve got something that looks like chunky sand (this is where I sneak a taste—don’t tell). On second thought, you could use a pastry cutter or two forks, but honestly, fingers work best unless you hate getting messy.
- Top it off: Sprinkle all your crumbly mixture over the apples. Don’t worry if it’s not even; it’ll sort itself out in the oven.
- Bake for about 40–45 minutes or until the apples are bubbling and the top is golden brown. And if it looks a bit weird at this stage, trust me, it’ll look delicious once it’s cooled a little.
- Let it sit for 10 minutes before scooping. Or don’t, if you’re impatient like me (pro tip: molten apple is very, very hot on the tongue—ouch).
What I Wish I Knew: Notes from the Trenches
- If you slice the apples too thick, they stay a bit crunchy. Sometimes that’s good, other times I regret it. Thin-ish is my happy medium.
- One time I doubled the topping because I thought, why not? Verdict: too much, even for me. But hey, try it once for science.
- I’ve used pears mixed in—wasn’t my favorite, but not a disaster.
Things I’ve Tried (Some Worked, Some... Not So Much)
- Swapping in honey instead of sugar? Turns out a bit runny, but someone always eats it.
- Chopping in some walnuts or pecans—great for crunch, plus they make me feel like I’m being healthy.
- I once tried adding dried cranberries... Not my jam, but my neighbor liked it. So to each their own.
What You Need in the Kitchen (or How I Make Do)
- A peeler and sharp knife (or just a paring knife if that’s all you’ve got—takes longer but works)
- A mixing bowl (well, two, but I’ve used a big saucepan before and just rinsed it between mixes... less washing up)
- A baking dish, around 8x8 inches (if you only have a round pie dish, use that—it’s not fussy!)
- Your hands—for mixing the topping. Seriously, way easier than wrestling with a pastry cutter


How To Store It (If You Somehow Have Leftovers...)
Just cover the dish with foil or plastic wrap and stick it in the fridge. It keeps about 3 days, though honestly, in my house it never lasts more than a day! You can zap single servings in the microwave, or toss the whole dish back in the oven to crisp it up (I think it tastes better the next day, but that could just be me).
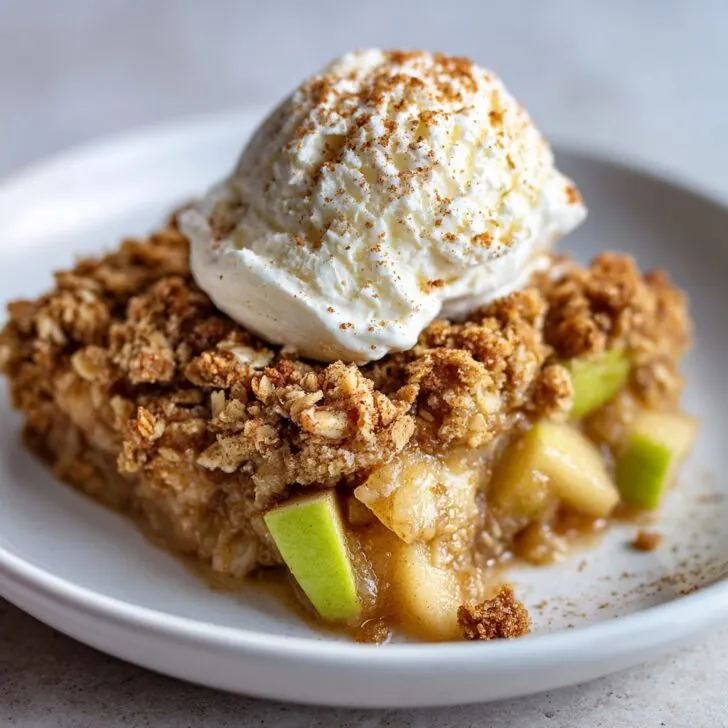
How We Like To Serve It (And How You Could)
I’m partial to a scoop of vanilla ice cream (sometimes two, but who’s counting). My sister always wants whipped cream, and once we tried pouring warm custard on top—surprisingly tasty! If it’s breakfast, I might pretend it’s granola and have it with Greek yogurt (don’t judge).
Things I Learned The Hard Way (So You Don’t Have To)
- Trying to rush the butter-mixing step leaves you with lumps of flour—take a minute and get your hands in there.
- Don’t skip the lemon juice if you can help it—it keeps the apples bright. The time I forgot, the apples turned out a bit grey and sad.
- Baking it too long dries out the apples (did this while watching the footie one time). Better to check early!
FAQ From My Kitchen (and the Group Chat)
- Can I use red apples instead of Granny Smith?
Sure, but it’ll be sweeter and not as tart. Actually, I find Granny Smith gives the best balance, but if red’s all you’ve got, go for it! - I’m out of oats—what now?
Just leave them out, or toss in a few chopped nuts if you’ve got ‘em. No big deal. - Do I need to peel the apples?
Nope! Peeling is for when I’m feeling fancy. Sometimes I leave half the peels on (yep, I’m lazy sometimes). - Can I freeze this?
You can, but the topping gets a little soggy after thawing. I’d just eat it fresh. Or, see if your neighbor wants some—mine never says no. - Where do you get your oats?
I usually buy Bob’s Red Mill (not sponsored, just reliable); you can check out their stuff here. - Is there a gluten-free version?
Yep, use a 1-for-1 gluten-free flour blend and make sure your oats are GF too (Minimalist Baker does it great—I’ve tried it!).
Oh, and before I forget—did you know apple crisp was apparently invented in Canada? (I read it somewhere, but don't quote me at the pub!) Anyway, if you give this a try, let me know how it goes. I love hearing about kitchen wins and, honestly, the disasters too. Good luck and don’t forget the ice cream!


Ingredients
- 6 cups Granny Smith apples, peeled, cored, and sliced
- ¾ cup granulated sugar
- 1 tablespoon lemon juice
- 1 teaspoon ground cinnamon
- 1 cup old-fashioned rolled oats
- ¾ cup all-purpose flour
- ½ cup packed light brown sugar
- ½ cup unsalted butter, cold and cut into cubes
- ¼ teaspoon salt
Instructions
-
1Preheat the oven to 350°F (175°C). Grease a 9x13-inch baking dish.
-
2In a large bowl, toss the sliced Granny Smith apples with granulated sugar, lemon juice, and ground cinnamon. Spread the apple mixture evenly in the prepared baking dish.
-
3In another bowl, combine oats, flour, brown sugar, and salt. Add the cold butter and use a pastry cutter or your fingers to blend until the mixture resembles coarse crumbs.
-
4Sprinkle the oat crumble evenly over the apples.
-
5Bake for 40 minutes, or until the topping is golden brown and the apples are tender.
-
6Let cool slightly before serving. Enjoy warm, optionally with vanilla ice cream.
Approximate Information for One Serving
Nutrition Disclaimers
Number of total servings shown is approximate. Actual number of servings will depend on your preferred portion sizes.
Nutritional values shown are general guidelines and reflect information for 1 serving using the ingredients listed, not including any optional ingredients. Actual macros may vary slightly depending on specific brands and types of ingredients used.
To determine the weight of one serving, prepare the recipe as instructed. Weigh the finished recipe, then divide the weight of the finished recipe (not including the weight of the container the food is in) by the desired number of servings. Result will be the weight of one serving.
Did you make this recipe?
Please consider Pinning it!!