
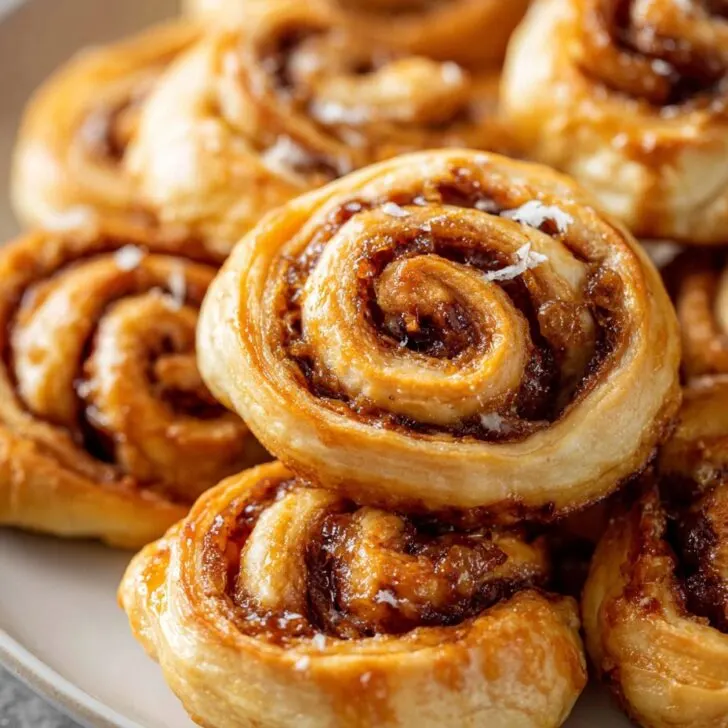
Let's Talk About These Apple Butter Pinwheels (And Maybe My Craving for Cozy Treats...)
I’ll tell you right up front—apple butter pinwheels are my kitchen comfort blanket. I remember the first time I made them: it was a cold, rainy afternoon, my plan was just to make something warm; but things spiraled and before I knew it, I was sticky with flour and the kitchen smelled like a Yankee Candle store exploded (in a good way). But anyway, pinwheels! They’re cozy, kinda messy, and so forgiving it’s almost ridiculous. And honestly? They look way fancier than they actually are. My neighbor once thought I’d bought them at a bakery—she’s sweet, not super observant, but I’ll take the compliment.
Why You'll Love This (Or at Least Why We Do at Home)
I make these pinwheels when I’ve got random apple butter jars lurking in the fridge (who buys that many jars? Apparently, me). My family goes mad for them because you get that lovely swirl of spice and sweet and, bonus, the house smells like autumn—even if it’s May. I used to dread making dough (flour everywhere, dough under my fingernails—don’t get me started); but honestly, this method is so chill it might convert even the most dough-averse. Oh, and they taste somehow better the next day, but don’t ask me why—it’s just science or magic or both.
What You'll Need (And What I Swap In When I'm Out of Things)
- 1 sheet of store-bought puff pastry (thawed)—I sometimes make my own when I’m feeling wild, but store-bought totally works
- About ½ cup apple butter—any kind is fine, my grandmother always insisted on Musselman’s but I’ve used the fancy farm stand stuff and even homemade once
- 2 tablespoons brown sugar (dark or light, no one will notice)
- 1 teaspoon ground cinnamon (add a pinch of nutmeg if you’re feeling festive)
- 1 egg for egg wash (or just use a splash of milk if eggs aren’t your thing)
- A small handful of chopped pecans or walnuts (optional—my kids pick them out but I love them; just don’t add too much or things get messy)
- (Optional) A sprinkle of coarse sugar for sparkle—looks pretty, totally not required
How I Actually Make These (With My Usual Kitchen Mayhem)
- Roll out your puff pastry on a floured surface. If it’s stuck to the paper, don’t panic—just peel carefully. Sometimes it rips, but who cares? You’ll roll it up anyway.
- Spread a fairly generous layer of apple butter all over (this is where I usually sneak a taste, so there’s occasionally a bare patch...)
- Sprinkle brown sugar, cinnamon, and nutmeg on top. Add those nuts if you like crunch—or skip them (no judgment).
- Starting from the long edge, roll the whole thing into a log. This is honestly my favorite bit—it reminds me of making sushi, but way less stressful. If some filling squishes out, that’s normal. Just wipe it off or, uh, lick it (I won’t tell anyone).
- Slice into pieces about an inch thick. They might look squashed. Don’t worry, they puff up like little clouds in the oven.
- Arrange pinwheels on a baking sheet lined with parchment. Brush lightly with the egg wash (or milk) and shower with coarse sugar if you want. If I’m feeling lazy or out of eggs, I sometimes skip this step and it’s still fine.
- Bake in a preheated oven at 400°F (200°C) for about 16–20 minutes. It smells amazing at about minute 12. When they’re puffed and golden, they’re done. (Actually, I tend to pull one early to check—quality control, right?)
Things I've Learned by Messing This Up
- Puff pastry hates being warm; if it gets sticky, toss it in the fridge for ten minutes—works a charm.
- Don’t overstuff with apple butter (I always want to, but then they leak everywhere—lesson learned, sort of).
- Sometimes they glue themselves to the baking sheet, so always use parchment—or heck, even foil works in a pinch.
What else I've Tried (The Good, The Okay, and the Not-Again)
- Swapped apple butter for pumpkin butter once—tastes pretty good, but a bit too moist. Maple pecan was an accidental winner, though!
- Added a handful of raisins—my family rebelled (okay, maybe a slight exaggeration) but I liked the chew.
- Once I tried drizzling icing on top. Honestly? Too sweet for me, but my youngest thought it was genius.
If You Don't Have All the Gear (Or Just Can't Be Bothered)
You’ll want a baking sheet, but honestly in a pinch I once used a pizza pan and kept the pinwheels corralled. Dough scraper’s nice but a butter knife works, and for rolling, I’ve even used a wine bottle (cleaned, I promise!).


How to Store 'Em (But They Never Last Long Anyway)
These keep in an airtight tin or plastic box for a couple days at room temp, or up to five days if you pop them in the fridge (though they might get a bit soft). That said, in my house, a plate of these disappears faster than you can say “second breakfast.” If you want to rewarm, 10 seconds in the microwave or a quick puff in the oven brings the magic back.
What to Serve These With? Here’s Our Weird Little Tradition
I love them with strong coffee, my partner goes for milky tea, and my kids dunk them in warm cider (I didn’t teach them that, promise). On lazy weekends, I’ve even put out a little bowl of vanilla yogurt for dipping—sounds odd but it totally works; sort of like morning dessert. For a party, I set them out next to a sticky bun bread pudding recipe I really love, and honestly they're always gone first!
Pro Tips (Learned by Goofing Up)
- I once tried to rush the rolling step—huge mistake. Take your time or they get weird and lumpy (trust me, no one wants lumpy pinwheels).
- Let them cool a smidge before moving off the tray or they’ll collapse like a soggy tent. I know, patience is tough.
FAQ—Because I've Actually Been Asked These!
- Q: Can I prep these ahead?
Sure thing! They’re good assembled and chilled overnight (wrap tight so the dough doesn’t dry out). Then just slice and bake when you’re ready. - Q: What’s the best apple butter?
Oh, you’ll get a different answer form everyone! Honestly? Use what you like—if you love it on toast, it’ll be good here too. I sometimes order mine from this small-batch producer I found on Farm to People. - Q: Can these be frozen?
Yep! Freeze after baking in a single layer, then bag up. They reheat okay, but they might lose a tiny bit of that puffiness (not a dealbreaker for me). - Q: Gluten-free puff pastry?
I haven’t tried it, but my friend swears the Schar brand works fine. Let me know if you try it—it’s a bear to track down at my local shop.
One last thing—if you ever find yourself with a spoonful of apple butter left at the bottom of the jar, don’t waste it: smear it on toast, swirl it in oatmeal, eat it straight up! (Or maybe that’s just me?)


Ingredients
- 1 sheet frozen puff pastry, thawed
- ½ cup apple butter
- 1 tablespoon granulated sugar
- 1 teaspoon ground cinnamon
- 1 tablespoon unsalted butter, melted
- ¼ cup chopped walnuts (optional)
- 1 egg, beaten
- Powdered sugar for dusting (optional)
Instructions
-
1Preheat your oven to 400°F (200°C) and line a baking sheet with parchment paper.
-
2On a lightly floured surface, roll out the puff pastry sheet to smooth the seams.
-
3Spread the apple butter evenly over the puff pastry, leaving a ½-inch border on all sides.
-
4Sprinkle the cinnamon and sugar mixture, and optionally the chopped walnuts, over the apple butter layer.
-
5Tightly roll the pastry sheet into a log from the longer side. Brush the edge with beaten egg to seal.
-
6Slice the log into 8 equal pieces, arrange them cut-side up on the prepared baking sheet, brush with melted butter, and bake for 16-18 minutes or until golden brown.
Approximate Information for One Serving
Nutrition Disclaimers
Number of total servings shown is approximate. Actual number of servings will depend on your preferred portion sizes.
Nutritional values shown are general guidelines and reflect information for 1 serving using the ingredients listed, not including any optional ingredients. Actual macros may vary slightly depending on specific brands and types of ingredients used.
To determine the weight of one serving, prepare the recipe as instructed. Weigh the finished recipe, then divide the weight of the finished recipe (not including the weight of the container the food is in) by the desired number of servings. Result will be the weight of one serving.
Did you make this recipe?
Please consider Pinning it!!