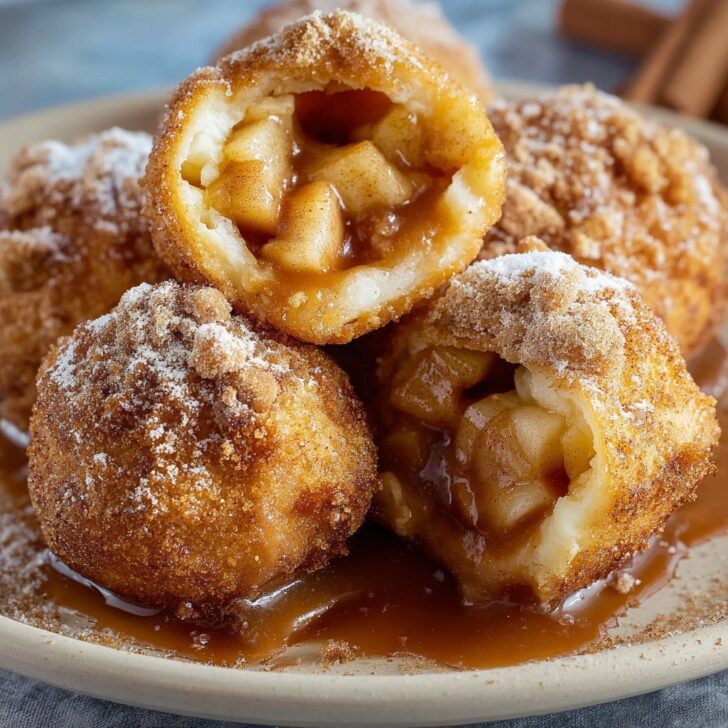

Okay, friend, you know that feeling when you're suddenly craving apple pie but it's like, who actually has time (or patience) to roll out a whole crust on a weeknight? That was basically me last month, standing in the kitchen while the kids circled like hungry sharks. Enter these Air Fryer Apple Pie Bombs. They're sort of my lazy answer to apple pie, but everyone here insists they're even better—could be the extra sugar, could be magic, I dunno. Anyway, if you like buttery pastry, cinnamon, and something that makes your kitchen smell like a cute little roadside diner in autumn, you’re in luck. Just don’t expect them to last till morning!
Why You’ll Totally Want to Make These
I whip up a batch of these when I don't really feel like dealing with the hassle of pie crust drama. My family goes wild for them (especially my youngest, who once tried to sneak two before dinner—caught you, Sam!). They’re quick to throw together, especially if you’ve got some crescent roll dough stashed in the fridge. Honestly, I started making these out of pure laziness, but now they're our ‘surprise guest’ dessert or late-night movie snack. I did have a phase where I tried making the filling from scratch every single time, but, uh, no, store-bought apple pie filling saves my sanity.
All the Ingredients (a Few Optional Cheats)
- 1 can (about 8 oz) refrigerated crescent roll dough
(I’ve used biscuit dough in a pinch, or the store-brand crescent dough…my grandmother swore by Pillsbury, but honestly, any will work if you’re not fussy.) - ¾ cup apple pie filling
— chopped up smaller if the chunks are huge. If I’m feeling fancy, I’ll toss in a chopped tart apple, but the filling alone is fine. - 2 tablespoon melted butter
- ¼ cup granulated sugar, mixed with 1 teaspoon cinnamon
(sometimes I get wild and use brown sugar—totally works for a deeper flavor) - Optional: Pinch of nutmeg (I forget about this half the time and it's still good)
How to Make ‘Em — My Real-World Method
- Pop open your crescent roll can (does anyone else jump every time it explodes?) and separate the dough into triangles. Or, actually, you can just pinch together two triangles to make a square if you want, makes things easier for stuffing.
- Spoon about a tablespoon of apple pie filling into the center of each dough piece. Try not to go overboard—even though I keep doing that. If the filling leaks out, don't panic—it’ll still taste good. Pinch up the sides and squish it together to seal; I'll admit, mine often look lumpy, but they always bake up fine.
- Brush those little bundles with melted butter. Or you can just roll them all around in it—I won’t judge.
- Mix sugar and cinnamon together in a shallow bowl. Roll each ‘bomb’ around till it’s coated, but if you get lazy and just sprinkle it over, I promise nobody will mind.
- Plop into your air fryer basket (don’t crowd them—if they’re touching, they sometimes stick together. Learned that one the hard way). Set to 340F (or about 170C) and cook for 7–9 minutes. Check at the 6 minute mark; sometimes they go golden quicker than you’d expect.
- This is where I normally burn my tongue because I just HAVE to try one straight away. Let ’em cool for at least 5 minutes. If any burst their seams, just call it “rustic” and move on.
Random, Somewhat Useful Notes
- Chopping the apple pie filling smaller actually does help keep things neater; though if you’re not into fussy prep, no biggie.
- The first time I made these, I forgot to spray the basket, and had a little sticking situation. Parchment paper (with holes poked in) works too, but isn’t 100% necessary.
- If you only have homemade apple pie filling, yay you—just make sure it’s a bit thick and not runny, or the bombs will kinda ooze everywhere.
Want to Mix It Up? Here’s What I’ve Tried
- Cherry Pie Bombs: Total win. Sub apple for cherry pie filling. (My neighbor claimed these were the best—traitor.)
- Chopped Fresh Apples & Caramel: Good in theory, but I went too heavy on the caramel and the bottoms went full sticky mess. Less is more there.
- Cream Cheese Swirl: 1 teaspoon sweetened cream cheese with the apple filling. Decadent, but really rich, so don’t go crazy.
What If I Don’t Have All the Gear?
I always reach for my basket-style air fryer—mine's a Cosori, if you’re curious (here’s a review I liked). But honestly, if you only have a regular oven, just bake at 375F for maybe 12 minutes. You don’t get that same crisp outside, but hey, they're still apple pie-ish. No pastry brush? Just use your fingers for the melted butter (actually, sometimes it's easier this way). Don’t stress it!


Storing (Or Trying To!)
If you have leftovers—small miracle around here—pop ’em in an airtight container. They keep at room temp for 1–2 days before going a bit soft, or in the fridge if you don't trust your roommates (I see you, Lisa). Actually, I think these taste even better the next day, but only if they survive that long. You can reheat for a few seconds in the air fryer, too. Not that I've ever had the chance, but in theory.
Here’s How We Serve ’Em (and You Might Even Want to Copy This)
I like them plain, but my husband always insists on a scoop of vanilla ice cream melting beside his. If I'm feeling fancy (and it’s a Sunday), maybe a drizzle of caramel sauce or a sprinkle of chopped pecans. During autumn, we make these with apple cider spiked with a dash of bourbon (for the grown-ups, relax). Also, as a late-night snack with tea? So good. And if you need a drink pairing, Serious Eats has a decent chai roundup—I just try whichever sounds wildest.
Pro Tips (a.k.a. Learn From My Messes)
- Don’t rush pinching the seams closed—once, I got lazy and lost half my filling to the bottom of the air fryer basket. What a sticky headache.
- If the dough seems too sticky, chilling it for 5 minutes makes it more manageable. Found that one out after wrestling with gooey dough fingers.
- Using too much filling = trouble. Seriously, I know it’s tempting, but it just explodes everywhere. Less is truly more, at least here.
FAQ — What People Actually Ask Me (And Some I Wish They Would)
- Do I have to use store-bought dough? Nope. If you're feeling all Julia Child, by all means, make dough from scratch. But I’ve tried both, and honestly, the canned stuff is faster and still totally delicious.
- Can I freeze these bombs? Hmm—technically yes, but I find the texture’s not as good after reheating. You could try freezing before air frying, though; they'll need a few more minutes to cook.
- My bombs exploded in the air fryer! Help? Happens to the best of us. Try pinching the seams a little tighter, and dial back the filling (yeah, I know, boring advice).
- How do I make these vegan? Good question! There's vegan crescent dough (lots of brands now). And sub out butter for melted coconut oil, plus maybe a sprinkle of raw sugar.
- Can I double the recipe? For sure! But don't pile them on top of each other in the fryer—just do a few batches, which honestly means more chances to sneak a hot one when nobody's looking.
That’s it—my pie bombs adventure in a nut shell, mismatched British tea towel and all. If you end up making these, send me a photo or tell me what ridiculous combo you try (just don’t do what my cousin did and put in marshmallows—trust me, messier than you’d think). Happy snacking!


Ingredients
- 1 can (8 oz) refrigerated biscuit dough (8 biscuits)
- 1 cup apple pie filling, chopped
- 2 tablespoons melted butter
- ¼ cup granulated sugar
- 1 teaspoon cinnamon
- 1 tablespoon all-purpose flour (for dusting)
- Non-stick cooking spray
Instructions
-
1Lightly flour a clean surface and flatten each biscuit dough round into a 4-inch circle.
-
2Place about 1 tablespoon of chopped apple pie filling in the center of each circle.
-
3Pinch the edges tightly to seal and gently shape each filled dough into a ball.
-
4Spray the air fryer basket with non-stick cooking spray. Arrange the apple pie bombs in the basket, leaving space between each.
-
5Air fry at 350°F (180°C) for 8-10 minutes or until golden brown.
-
6Brush warm bombs with melted butter, then roll in a cinnamon sugar mixture. Serve warm.
Approximate Information for One Serving
Nutrition Disclaimers
Number of total servings shown is approximate. Actual number of servings will depend on your preferred portion sizes.
Nutritional values shown are general guidelines and reflect information for 1 serving using the ingredients listed, not including any optional ingredients. Actual macros may vary slightly depending on specific brands and types of ingredients used.
To determine the weight of one serving, prepare the recipe as instructed. Weigh the finished recipe, then divide the weight of the finished recipe (not including the weight of the container the food is in) by the desired number of servings. Result will be the weight of one serving.
Did you make this recipe?
Please consider Pinning it!!