
Let's Chat About This Chicken and Chickpea Curry
Alright, so, I think I’ve made this dish about a hundred times—give or take a few when I got distracted and ended up just ordering pizza instead (oops). The last time I cooked it, my neighbor wandered in because “something smelled way too good to ignore” (hi, Amanda). It’s one of those meals that, well, seems to draw people in—even the dog sat under the table, patiently waiting for any rogue chickpea to escape. But hey, that’s half the fun, right?
Oh, and fair warning: this is the kind of curry where the first spoonful is amazing, the second is better, and by the end, I’m scraping the pot and promising myself I’ll meal prep harder next week.
Why I Think You'll Love This Curry
I make this when I need a meal to stretch with leftovers, or when the weather decides to be British (a.k.a gray and moody). My family goes completely bonkers for this because it’s hearty but not heavy, and honestly, it doesn't cost an arm and a leg. (Except that one time I accidentally made it too spicy—let’s not revisit that drama.)
And if you’re like me and kind of tired of same-old chicken dishes, this one has a nice twist from the chickpeas; they soak up all the saucy goodness. Don't stress if your cumin’s looking a bit sad, I've used that supermarket-brand stuff and things still turn out fine. Actually, half the time I use whatever’s left in the back of the spice cupboard. You do you.
What You’ll Need (Substitutions and a Few Nods to Grandma)
- 2 chicken breasts (sometimes I swap thighs if I can’t be bothered to trim fat—up to you!)
- 1 can (400g) chickpeas, drained (tinned is faster for me, but dried soaks up more flavor if you've got the patience and the time; confession: I rarely do)
- 1 large onion, chopped (red, yellow, shallots... not fussed)
- 2 garlic cloves, minced (I use more when my parents are visiting... keeps them on their toes)
- 1 thumb-sized piece of ginger, grated (sometimes I just use ground, like a teaspoon, when I’m feeling lazy)
- 2 tablespoons curry powder (honestly, whatever's on hand—I’m not a purist)
- 1 teaspoon cumin (my grandad always insisted on whole seeds; I cheat with ground)
- 1 can (400ml) chopped tomatoes
- ½ cup water (give or take—you’ll know by eye!)
- ½ cup plain yogurt (I sometimes do coconut milk; changes the vibe but it's still lovely)
- Salt and pepper to taste (though I sometimes forget the pepper and no one's noticed yet)
- Handful fresh cilantro, chopped (parsley if you’re not a fan, or just skip it)
- Optional: chili powder or fresh chili for kick (paprika works in a pinch, just don’t overdo it—lesson learnt!)
So, How Do We Actually Make This?
- Heat a big pan or pot with a splash of oil—medium heat, nothing fancy. Toss in your onions. Cook until they’re soft and golden, but not burnt. (I know some folk like ‘em crispy; go wild, I guess!)
- Add garlic and ginger. Stir for about a minute; this is where the kitchen really starts smelling like you know what you’re doing.
- Tip in the curry powder and cumin—give it all a good stir. If you’re using chili, put that in now. If you cough, you’re doing it right! (Kidding. But seriously, open a window.)
- Now, chop your chicken into bite-sized bits and slide those in. Brown the outside but don’t panic about cooking it the whole way through just yet, we’ll sort that later.
- Add the tomatoes, chickpeas, and water. Honestly, don’t stress if it looks a bit soupy; it always does here. Turn the heat down, let it bubble gently for about 20ish minutes. This is honestly when I usually snack on something else. Or tidy up, if the mood strikes.
- Stir in the yogurt. Try not to let it boil too hard now, things get weirdly lumpy if it does. Taste (this is mandatory, of course)—add salt, more chili, whatever you fancy. Sometimes I squeeze in a bit of lemon juice for zing. (Totally optional, but worth a try.)
- Let it simmer another 5-10 minutes, stirring every so often. If it’s too thick, splash in a bit more water. Too thin? Let it bubble longer.
- Sprinkle cilantro on top, right before serving. Or don’t. Actually, sometimes I just throw it on the table with a spoon and let people help themselves.
Notes From My Dubiously Organized Kitchen
- I’ve burnt the spice base a couple of times—smells... memorable. If that happens, just start over. (I’ve tried to salvage, but nope. Not worth it.)
- Yogurt gives a little tang, but if all you have is cream or milk or coconut cream, it all works. Texture will be different but who’s judging?
- Chickpeas can be swapped with butter beans or even lentils if you’re feeling that way.
- The leftovers are, to me, better the next day. Flavors deepen and it’s like it all had time to have a little group meeting overnight.
Some Variations I’ve Messed Around With
- Bumped up the veg—spinach, kale, peas, whatever wilts or was lurking in my fridge.
- Made it fully veggie—skip the chicken, use double the beans, up the flavor.
- Tried pineapple once because someone on Serious Eats recommended it. Did NOT love. (But if you’re a pineapple-in-curry person, I respect the bold moves.)
- Sometimes a dollop of chutney or pickle on the side is fab. Not authentic probably, just tasty.
If You’re Short on Equipment: Don’t Panic!
All you really need is a pan or big pot and a wooden spoon. I’ve made this at uni in a battered old saucepan, so there’s that. No garlic press? Smash it with the flat of your knife, it feels therapeutic too. No fancy knife? Just go slow, no fingers in the curry, please!


Leftovers and Storage—As If…
Pop leftovers in a container and stick it in the fridge—should last 2 or 3 days, though honestly, in my house it never lasts more than a day. Freezes just fine, but the yogurt texture sometimes goes a bit odd (I don’t mind, but your mileage may vary!).
Serving—How We Do It Round Here
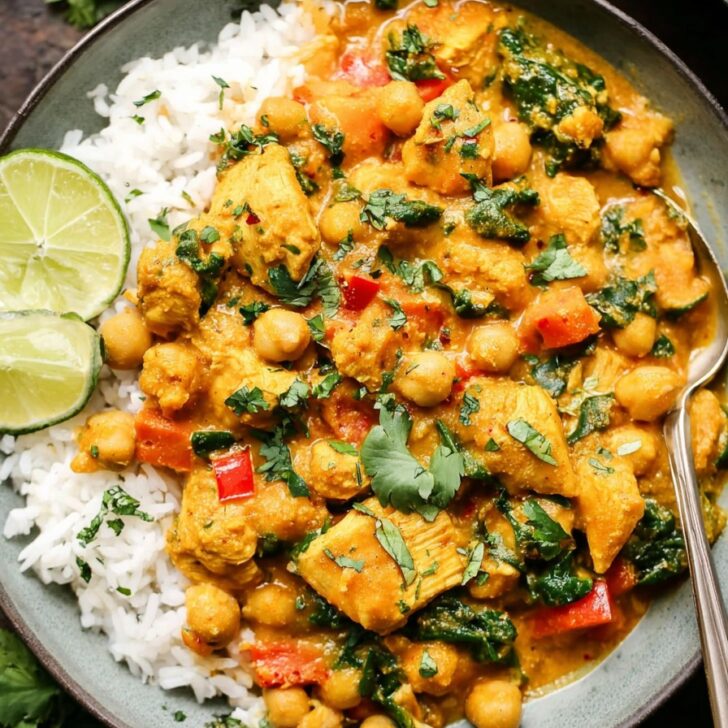
I probably serve this with basmati rice 80% of the time, but it’s lush with naan, or even just with a spoon straight from the saucepan (guilty). Sometimes we’ll make a quick cucumber raita—just yogurt, cucumber, pinch of salt. My friend John swears by extra lime wedges, but I’m more of a yogurt gal, maybe because it calms the inevitable chili slip-up.
Lessons Learned (Or: Stuff Not to Ignore)
- I once rushed the onion bit and the whole thing tasted weirdly sharp—not a vibe. Be patient there.
- Don’t tip yogurt in while it’s boiling, or you’ll get grainy, split sauce (unless you like surprise cottage cheese curry...)
- Actually, simmering slow and low makes all the difference. On second thought, I probably ought to make time for that more often!
FAQ (Because My WhatsApp Is Full of Them)
- Can I make this in a slow cooker? Absolutely, just toss everything in except yogurt, which you add at the end. Let it go for like, 4 hours? (I kinda forget to time it, but it’s forgiving.)
- Can I use leftover roast chicken? Oh yes! Shred and add right near the end so it doesn't dry out. You’ll save loads of time—and probably avoid the dreaded raw chicken call.
- I don’t have curry powder, what now? Just raid the spice rack: try a mix of turmeric, cumin, coriander, and paprika. Or check out the blends at Penzeys—those are brill, if you ask me!
- How spicy is it really? Only as much as you want. Like, my sister likes it mild as a May morning; I add hot sauce.
- What’s the best rice to go with this? I’m a basmati fan, but jasmine or whatever you’ve got works. Heck, serve with crusty bread if you want. I won’t tell.
Hijinks aside, this curry’s a proper crowd-pleaser—and if all else fails, there’s always extra naan. (Side story: last time I made naan, I charred it so badly my smoke alarm sang the song of its people. We laughed, opened a window, and ordered extra rice.) Cooking’s supposed to be fun, right? If you want a quick peek at the kind of curry inspiration I’m always chasing, check what the folks at BBC Good Food are doing. Sometimes I borrow an idea or two, but this mess of a recipe is all mine. Enjoy!


Ingredients
- 2 tablespoons vegetable oil
- 1 large onion, diced
- 3 cloves garlic, minced
- 1 tablespoon fresh ginger, grated
- 500g boneless chicken breast, cut into bite-sized pieces
- 1 can (400g) chickpeas, drained and rinsed
- 1 can (400g) diced tomatoes
- 200ml coconut milk
- 2 teaspoons curry powder
- 1 teaspoon ground cumin
- 1 teaspoon ground coriander
- ½ teaspoon chili powder
- Salt and pepper to taste
- Fresh cilantro, for garnish
Instructions
-
1Heat the vegetable oil in a large pot over medium heat. Add the diced onion and sauté until translucent, about 4 minutes.
-
2Stir in the garlic and ginger, cooking for another 1 minute until fragrant.
-
3Add the chicken pieces and cook, stirring, until browned on all sides, about 5 minutes.
-
4Sprinkle in the curry powder, cumin, coriander, chili powder, salt, and pepper. Stir well to coat the chicken and onion mixture with the spices.
-
5Pour in the diced tomatoes, coconut milk, and chickpeas. Stir to combine. Bring to a simmer, cover, and cook for 20 minutes until the chicken is cooked through and the sauce thickens.
-
6Taste and adjust seasoning if needed. Garnish with fresh cilantro before serving. Enjoy hot with rice or naan.
Approximate Information for One Serving
Nutrition Disclaimers
Number of total servings shown is approximate. Actual number of servings will depend on your preferred portion sizes.
Nutritional values shown are general guidelines and reflect information for 1 serving using the ingredients listed, not including any optional ingredients. Actual macros may vary slightly depending on specific brands and types of ingredients used.
To determine the weight of one serving, prepare the recipe as instructed. Weigh the finished recipe, then divide the weight of the finished recipe (not including the weight of the container the food is in) by the desired number of servings. Result will be the weight of one serving.
Did you make this recipe?
Please consider Pinning it!!