
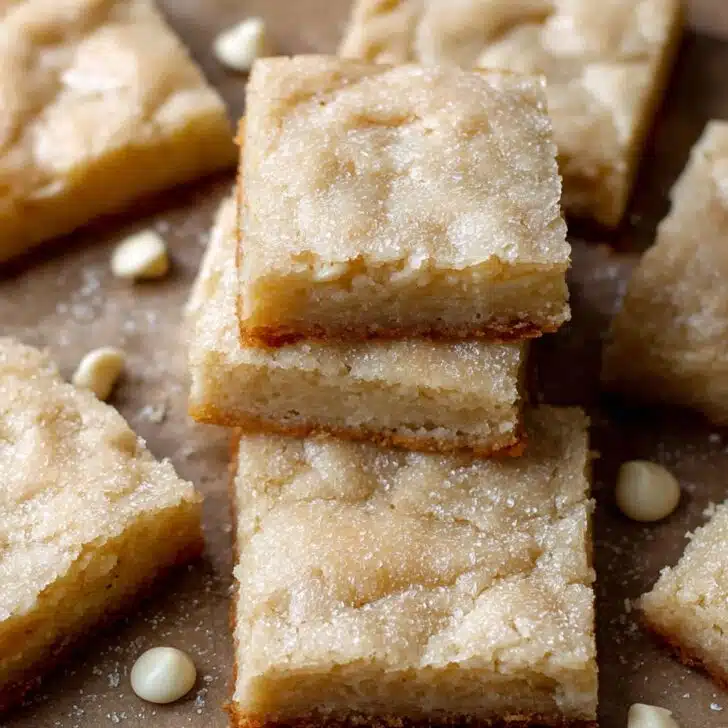
Let Me Tell You About White Chocolate Brownies...
Alright, so imagine this: it's raining, you're totally over your day, and all you want is something fudgey but—not the usual brownie. That's sort of how I stumbled into white Chocolate brownies for the first time. (Honestly, I just ran out of cocoa powder, and well, necessity is the mother of accidental brilliance, isn't it?) There's just something about mixing up a batch of these that feels like cheating on regular brownies, but in a good way. My cousin tried them once, promptly decided they should be called "blondies," and then ate nearly half the pan before dinner. Suffice it to say, they're oddly compelling.


Why You'll Love This (Or if Not, Why I Do!)
I usually make these when I'm craving something sweet without feeling like I'm just copying Chocolate brownies (which my husband would eat every day if left unsupervised, but me—variety is the spice of life). My family goes absolutely bananas for these. Sometimes, I use them as a sneaky base for fruit toppings, but, erm, the kiddos just pick off the strawberries and hunt for more white chocolate chunks. And if you've ever wondered if white chocolate is real chocolate—join the club; I did too, once. Doesn't matter. These are lush either way.
What You’ll Need (And Some Flexible Swaps)
- 200g white chocolate (I’m not fancy, so yes, store-brand is just fine. Once splurged on a posh bar, couldn’t taste the difference)
- 100g unsalted butter (I’ve gone halves with margarine once. Not the same, but, you do you if you’re out)
- 2 large eggs (had to use 3 small once, seemed fine – just a bit more scramble than bake but still tasted divine)
- 90g plain flour (or a heaped ⅔ cup, but if you use self-raising, just skip the pinch of baking powder)
- 50g caster sugar (sometimes I sub half brown sugar if I want extra chewiness – my nan always said to use golden caster but I can’t be faffed most days)
- 1 teaspoon vanilla extract (I tried using almond once... turns out I don’t care for it, but your mileage may vary)
- Pinch of salt (skip it, honestly, if you’re using salted butter – but I sometimes forget altogether and it doesn’t ruin anything)
- Optional: a handful of white chocolate chips or chopped nuts for some texture
How I (Sometimes) Make These
- Pre-heat your oven to 180°C (350°F, gas mark 4-ish). Grab a square tin—mine is about 8-inch but no one’s checking. Line it with baking parchment or, in a pinch, slap on a bit of butter and hope for the best.
- Melt the butter and the white chocolate together in a bowl over simmering water. Or, just nuke it for 30 seconds, give it a stir, then another 15. Don’t fret if it looks split the first time—it often does. Actually, turns out a bit of whisking brings it back. Trust me.
- Beat the eggs, sugar, and vanilla together in with a balloon whisk or, okay, a fork if it’s just been washed. Go for pale and fluffy if you can muster the energy.
- Pour in the mostly cooled chocolate-butter mixture. Now’s the point where I sometimes taste a bit—who’ll know? If it’s a bit grainy, that’s fine, it’ll come together in the bake.
- Sift in the flour and salt. I say "sift," but half the time I just sprinkle it straight from the bag. Fold gently, try not to overmix if you like ’em gooey in the middle.
- Stir in any extras: chips, nuts, whatever you fancy. Pour into the prepared tin, level it out (or don’t, it’ll sort itself out mostly).
- Bake for about 23–28 minutes. The top should be set but the very centre just barely wobbles when you nudge the tin. Knife comes out with a few crumbs? Good.
- Cool in the tin—or don’t, if you’re impatient like me and pry out a steaming edge piece within minutes (not really recommended, burnt tongues aren’t fun).
Things I’ve Learned the Hard Way
- One time, I used white chocolate chips instead of bars and they didn’t melt smoothly. Still tasted fine though! But it’s better with the bar stuff, there’s less, um, drama.
- If your brownies come out super dense, maybe ease back on the flour next time. I used to get a bit heavy-handed on that (whoops).
Variations I’ve Tried (with Mixed Results...)
- Swapping half the white chocolate for milk chocolate—actually, it tasted too sweet for me, but the kids loved it. Go figure.
- Raspberries pressed into the batter before baking. This is ace! The tart fruit against the sweet? Chef’s kiss. Never tried with blueberries, though. Maybe next rainy day.
- Once tried swirling in some peanut butter—seemed like a good idea at the time. Not for me, but you can’t say I didn’t try.


What If My Kitchen’s Missing Something?
If you don’t have a mixer—honestly, you’re not missing much. I’ve done the whole thing with a fork (elbow grease, mate) or even a wooden spoon. No square tin? Use a loaf pan or a round dish. The corners might be a bit wonky but it’s all going to the same place. Oh, and I think your life isn’t ruined if you forget baking parchment—it just means you get to scrape and snack on extra crispy bits.
Making Them Last... in Theory
In my house, these white chocolate brownies rarely see the sunrise of a second day, but if you’re more disciplined than me, seal them up in a tin or lidded box. They stay soft for 2–3 days at room temp. You can fridge them if you like them denser, or—random tip—freeze slices wrapped in foil. They thaw in about 15 minutes, but let’s be real, who’s planning that far ahead?
How I Like to Serve ’Em
A scoop of vanilla ice cream on warm brownies is basically my weakness. Sometimes a drizzle of salted caramel (I know, not traditional but just yum). My brother slathers on peanut butter, says it’s his ‘protein fix’—bit cheeky but hey, why not?
Things I’ll Never Rush Again
- Skipped cooling them once—ended up with a molten mess that burned my tongue and stuck to the foil. So now I (try to) let them cool before slicing. Patience isn’t my strong suit, but honestly, it’s worth it.
- Oh, and beating the eggs and sugar properly? Yeah, it’s a pain but it makes the brownies fluffier. Learned this the crumbly way.
White Chocolate Brownies: Actual Questions I’ve Gotten
- Can I double this recipe? Yep, but use a bigger tin or bake in two batches. If you try to squish it all into one, the middle’s gonna stay raw (trust me, I’ve tried; not great).
- Do these freeze well? They actually do, surprisingly! Slice first, so you don’t have to saw through a brick later on.
- Why is my brownie base all gooey? Might just need a tad more baking time, or maybe your oven runs cool? Happens to everyone (oven thermometers are a mystery to me, sometimes).
- Do they really taste better the next day? I think so, but only if you have the willpower to wait (I rarely do).
- What if I don’t have white chocolate? Erm—well, it won’t be white chocolate brownies then! Try milk or dark, but, I mean, it’s a different creature.
- Crumbly edges—fix? Maybe a smidge less flour or don’t overbake. Or, honestly, eat them over the sink like I do, let the crumbs fall where they may.
Quick side note: my mate once tried adding instant coffee to this—don’t. Stick with the classics, or at least don’t blame me if your kitchen smells suspiciously like a café gone rogue.
Ingredients
- 200 g white chocolate, chopped
- 115 g unsalted butter
- 120 g granulated sugar
- 2 large eggs
- 1 teaspoon vanilla extract
- 130 g all-purpose flour
- ½ teaspoon salt
- 60 g chopped walnuts (optional)
Instructions
-
1Preheat your oven to 350°F (175°C). Line an 8-inch square baking pan with parchment paper, leaving an overhang on the sides for easy removal.
-
2In a heatproof bowl, melt the white chocolate and unsalted butter together over a pot of simmering water or in the microwave in short bursts, stirring until smooth. Let it cool slightly.
-
3Whisk in the granulated sugar, eggs, and vanilla extract into the melted chocolate mixture until combined.
-
4Gently fold in the all-purpose flour and salt until just combined. If desired, stir in the chopped walnuts.
-
5Pour the batter into the prepared pan and spread evenly. Bake for 25-28 minutes or until the edges are set and the center is just slightly soft.
-
6Allow to cool completely in the pan before lifting out and slicing into squares. Serve and enjoy.
Approximate Information for One Serving
Nutrition Disclaimers
Number of total servings shown is approximate. Actual number of servings will depend on your preferred portion sizes.
Nutritional values shown are general guidelines and reflect information for 1 serving using the ingredients listed, not including any optional ingredients. Actual macros may vary slightly depending on specific brands and types of ingredients used.
To determine the weight of one serving, prepare the recipe as instructed. Weigh the finished recipe, then divide the weight of the finished recipe (not including the weight of the container the food is in) by the desired number of servings. Result will be the weight of one serving.
Did you make this recipe?
Please consider Pinning it!!