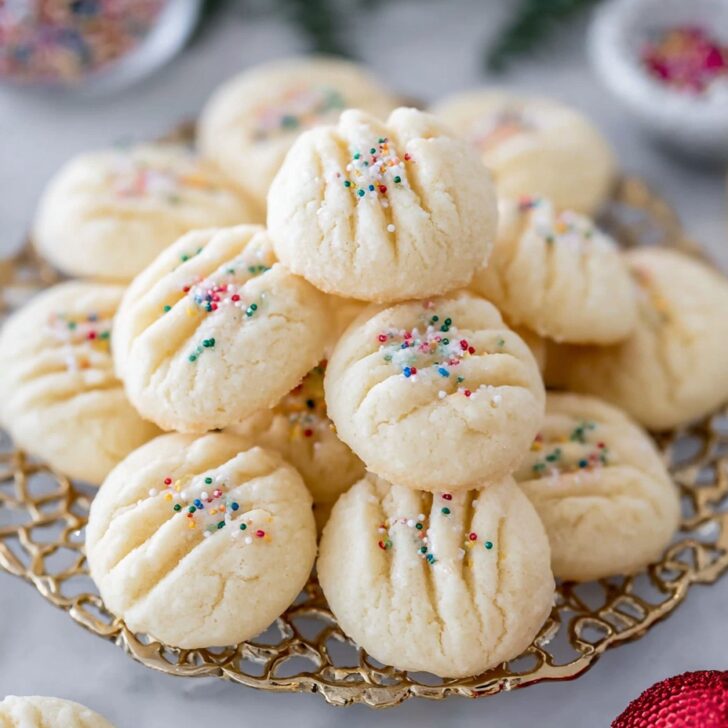
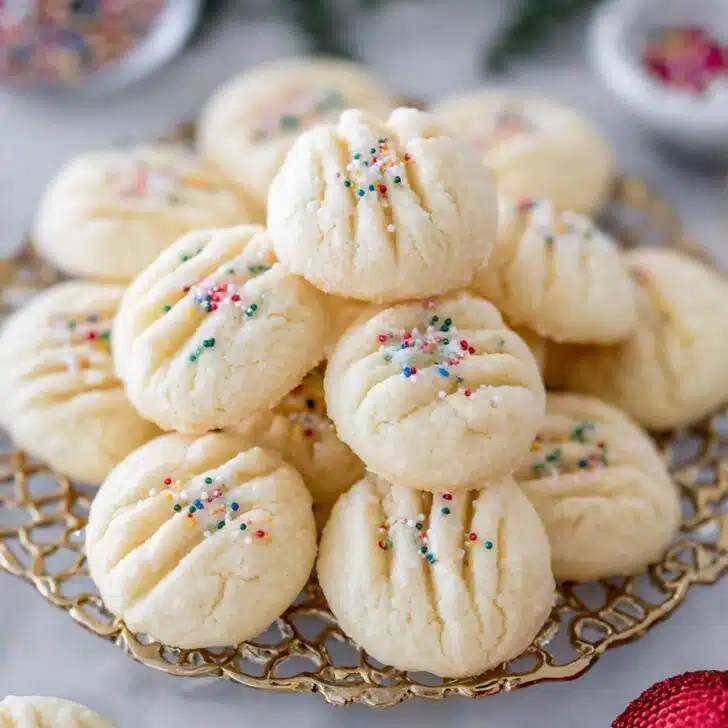
Let Me Tell You About These Cookies (Grab a Cuppa!)
I’ve probably made (and eaten!) more batches of whipped shortbread cookies than I should admit, but honestly, it started because I couldn’t get my grandma’s recipe quite right. The first time I tried, I ended up with something more like sugared sand. But one blustery winter afternoon—a blizzard outside, cat on the radiator, you know the vibe—I finally nailed it, and it’s been my go-to for holidays/late nights/well, Tuesday afternoons ever since. And, I mean, when your neighbor pops in unannounced and you offer these? Suddenly you’re the baking hero of the block. Funny how life works.
Why I Keep Making This Recipe (Even When I Shouldn't)
I make these whipped shortbread cookies anytime I want something that doesn’t make me drag out a fancy mixer or require a trip to the store. My kids are obsessed with these because they melt in your mouth (like, actual magic!). Also, if you’re the type who hates washing a ton of dishes—join the club—this one doesn’t create a mountain of bowls (bless). I used to think all shortbreads were kinda dry, but this one’s silky, and believe me, I tried skimping on the butter once. Disaster. Just don’t. Pour yourself a cup of tea, and let’s get into it.
What You’ll Need (and a Couple Swaps)
- 1 cup (225g) unsalted butter, soft but not squishy (if you accidentally over-microwave, just pop it back in the fridge for a tick)
- ½ cup icing sugar (some folks swear by powdered sugar; honestly, any works, but the grainier sugars don’t dissolve as well)
- 1 ½ cups all-purpose flour (I’ve used cake flour when I was out and it’s even lighter; self-raising… not so much)
- ¼ cup cornstarch (my grandma only used the classic yellow box, but store own-brand is fine; skips if you’re desperate, though they won’t be quite so fluffy)
- Pinch of salt
- Sprinkles, colored sugar, or cherries for topping (or, confession: sometimes I just raid the leftover Halloween candy)
Here’s How I Do It (A Little Mess Is Fine)
- Preheat your oven to 325°F (160°C). Line a couple baking sheets with parchment, or if you’re out—baking paper, tinfoil, or even a well-buttered tray have all worked in a pinch.
- In a big bowl, start whipping your butter. I mean really whip it—this is where the “whipped” part comes in. You can use a stand mixer (lucky you) or a hand mixer (what I usually do), but I've done it with a wooden spoon and some questionable language too. Whip until it’s basically cloudlike and pale, maybe 2-3 minutes. Don’t stop early; I used to and the cookies were just... meh.
- Sift in the icing sugar. Or, if you’re like me and hate sifting—dump it in, hope for the best, then mix until it disappears. You can taste-test here, but you’ll end up eating half the dough, so your call.
- Now add the flour, cornstarch, and salt. I do this in two goes so flour doesn’t end up on my shirt (or in my hair). Stir gently at first, then give it a proper mixing until it looks fluffy and thick.
- You’ll want to roll about a tablespoon-ish of dough into a ball, plop it on the tray, and give it a gentle press with a fork. If the fork keeps sticking, maybe dust it with flour or dip it in water—I always forget this part, but maybe you’ll remember.
- Sprinkle on whatever decorations you fancy. Sometimes a glacé cherry. Sometimes those rainbow sprinkles that seem to survive every kitchen purge.
- Bake 12-15 minutes. Edges should hardly color; if in doubt, take ‘em out at 12 since nothing’s worse than a rock-hard shortbread. Don’t panic if they seem soft—they’ll firm up as they cool.
Things I’ve Figured Out (Usually the Hard Way)
- If your dough’s too crumbly, add a tiny splash (teaspoon) of milk. But don’t overdo it, or it gets gluey.
- Sometimes my oven is a bit temperamental; if your first tray overbakes, knock the temp down by 5° and try again.
- Don’t put them hot on a wire rack or they’ll break (guess how I know).
Weird and Wonderful Variations I've Tried
- Lemon zest in the dough—delicious, like spring in a cookie.
- Chocolate chips: works, but small ones blend better than big chunks.
- Once I tried swapping half the butter for coconut oil… won’t do that again. Smelled great, but tasted a bit odd, like suncream (that’s sunscreen for non-Brits, ha!).
- A pinch of cardamom for a vaguely fancy twist (or at least it makes me feel like Nigella for a minute).
Don’t Have a Mixer? Here’s What I Do Instead
Honestly, a hand mixer is fab, but if you’ve only got a whisk and some elbow grease, that works too. I sometimes just mash everything together with a big fork or the back of a wooden spoon—it’s a bit of a workout, but hey, earns you a cookie afterwards. If you’re curious about gadgets, there’s a great rundown of mixers here from Serious Eats.


How to Store (If You Have Any Left)
In an airtight tin or Tupperware, they’ll last up to a week. I say “up to” because in my house, it never gets that far—by day two, all bets are off. Also, you can freeze them baked (just cool completely first, or you get ice crystals in the tin), which I learned from King Arthur Baking’s guide to freezing cookies.
How I Like to Serve These (and a Kid-Pleaser, Too)
We eat them with mugs of hot cocoa, usually watching some old movie reruns. At Christmas, I sometimes sandwich them around a sliver of chocolate ganache—decadent, I know, but worth every crumb. A friend of mine does a cookie swap every December and once, she drizzled these with white chocolate... gorgeous, even if it's a bit faffy.
Cringe-Worthy Lessons (So You Don't Have To)
- Once, I skipped the parchment and spent half an hour chiselling cookies off the tray. Never again.
- If you rush the creaming step, your cookies will end up tough rather than melt-in-the-mouth. Honestly—not worth the thirty seconds you save.
- I tend to tap my cookies down a bit too hard sometimes and then they’re a bit sad and flat. Gentle touch, trust me.
People Have Actually Asked Me These (No Kidding!)
- "Can I make these without cornstarch?"
- Yep! They’ll be a little denser, but still plenty tasty. Actually, I’ve forgotten the cornstarch once or twice (whoops) and still ate them.
- "Can you freeze the dough?"
- Sure can. Roll it into balls, freeze on a tray, then bag ‘em up. Bake ‘em straight from frozen—just add a minute or two to the bake time.
- "Why are my cookies spreading too much?"
- Probably your butter got too soft, or maybe you mixed them a bit more than is ideal. Chill the dough for half an hour—solves it most of the time.
- "Can I double the recipe?"
- Absolutely. I do this nearly every holiday, but make sure your mixing bowl’s big enough. Learned that one the messy way.
- "Can I use margarine instead of butter?"
- You can, but honestly, the flavor isn’t the same. Butter is what makes these taste like a big warm hug, in my opinion.
I think everyone should have a cookie recipe that’s foolproof and a bit forgiving. On second thought, maybe we all need two. But start with this one—it’s never let me down (well, except for that coconut oil incident). Anyhow, if you try it, let me know how it goes!


Ingredients
- 1 cup unsalted butter, softened
- ½ cup powdered sugar
- 1 ½ cups all-purpose flour
- ¼ cup cornstarch
- ¼ teaspoon salt
- 1 teaspoon vanilla extract
- Sprinkles or candied cherries for garnish (optional)
Instructions
-
1Preheat oven to 325°F (160°C). Line two baking sheets with parchment paper.
-
2In a large bowl, beat the softened butter with an electric mixer on high speed until very light and fluffy, about 3-4 minutes.
-
3Add powdered sugar and vanilla extract. Continue beating until well combined and airy.
-
4Sift in the flour, cornstarch, and salt. Mix on low speed until just incorporated. Do not overmix.
-
5Scoop or pipe tablespoon-sized portions onto the prepared baking sheets. If desired, top each cookie with sprinkles or a piece of candied cherry.
-
6Bake for 12-15 minutes or until cookies are set but not browned. Cool on the baking sheet for 5 minutes before transferring to a wire rack.
Approximate Information for One Serving
Nutrition Disclaimers
Number of total servings shown is approximate. Actual number of servings will depend on your preferred portion sizes.
Nutritional values shown are general guidelines and reflect information for 1 serving using the ingredients listed, not including any optional ingredients. Actual macros may vary slightly depending on specific brands and types of ingredients used.
To determine the weight of one serving, prepare the recipe as instructed. Weigh the finished recipe, then divide the weight of the finished recipe (not including the weight of the container the food is in) by the desired number of servings. Result will be the weight of one serving.
Did you make this recipe?
Please consider Pinning it!!