
Let Me Tell You About Heart-Shaped Cupcakes (And Why I Can’t Stop Making Them)
Alright, so you know how some people swear by store-bought chocolates on Valentine’s Day? Yeah, that’s not me. I mean, don’t get me wrong, I love a cheeky chocolate truffle, but there’s just something about baking these slightly wonky heart-shaped cupcakes that always feels more... I dunno, like you actually tried? I started making these a few years back after I totally botched a fancy dessert for date night—long story, involved a smoke alarm and a very confused cat. But honestly, now these little cakes are my Valentine’s Day go-to. And yes, sometimes the hearts look more like potatoes, but that’s part of the charm, right?


Why I Keep Coming Back to This Recipe
I make these when I want to show a bit of effort without, you know, breaking my own spirit in the kitchen. The magic trick? Everyone gets a kick out of the heart shape (even my sister, who pretends she’s "too mature" for cutesy food). My kids demolish them before I can even ice half the batch. Also, if you’ve ever accidentally dropped too much batter in the pan—don’t panic, I do it like, every time, but somehow they still taste fab. Plus, you can just eat the evidence, so win-win?
Here’s What You’ll Need (Swaps Welcome!)
- 1 ¼ cups (160g) all-purpose flour – though, when I’m out, I just go with half cake flour and hope for the best.
- ¾ cup (150g) granulated sugar. My gran always said to use caster sugar, but honestly, regular sugar is fine (I’ve done both, no difference I can tell).
- ½ cup (113g) unsalted butter, melted (or just zap it in the microwave till soft; don’t burn it like I totally have…)
- 2 large eggs
- ⅓ cup (80ml) milk (I’ll use oat or almond if I’m almost out of regular milk)
- 1 ½ teaspoons vanilla extract – or that fake vanilla stuff in a pinch, but the “good” stuff does make it smell better.
- 1 ¼ teaspoons baking powder
- ¼ teaspoon salt (I measure with my palm, usually)
- Red gel food coloring (I don’t recommend the liquid kind, makes the batter runny. Learned that the hard way.)
- For the frosting: I mix ½ cup softened butter, 2 cups icing sugar, 1 teaspoon vanilla, and milk till it's spreadable—but honestly? Store-bought frosting once saved my life at 11 PM.
- Sprinkles, edible glitter, whatever shiny stuff you like. My youngest once added crushed up pink sweets. Not bad!
How To Actually Make Them (Don’t Stress the Details)
- Preheat your oven to 350°F (180°C)—but if you forget, stick everything in the fridge while you wait. That’s what I do.
- Line a standard muffin tin with paper liners. Here’s the neat bit: To get the heart shape, nestle a marble or something similarly shaped (foil balls, hazelnuts, whatever’s handy) between the liner and the tin on one side to create an indentation. Looks janky at first; turns out cute, promise.
- In a big-ish bowl, whisk flour, baking powder, and salt.
- In a separate bowl, beat melted butter and sugar until it kind of looks like wet sand. Stir in eggs one at a time—try not to drop shells in. (I usually do but fish them out, no one’s noticed yet!)
- Add the vanilla and a splash of milk; scrape down the sides. Mix in the dry ingredients, then rest of the milk. Stir till just smoothish—don’t overthink it; if it’s lumpy you’re probably fine.
- Now comes the fun: Add red food coloring a bit at a time till you get that shade of pink or red you want. I always add too much then try to lighten it up with a spoonful of plain batter—works sometimes.
- Spoon batter into liners about two-thirds full (overfill and it goes everywhere, trust me). This is usually when I sneak a taste, oops.
- Bake for about 16-20 minutes, or until a skewer comes out clean. If your kitchen starts smelling like a bakery, they’re close. Let them cool in the tin a bit, then move to a rack or plate so they stop cooking.
- As for frosting, just beat everything together till fluffy and slap it on however you like—piped, smeared, or dolloped (my personal style: the messier the better).
Some Notes I’ve Learned the Weird Way
- If your hearts end up more triangle than heart, just call them “modern art.”
- Room temperature eggs mix way better, but honestly, half the time I forget and use them straight from the fridge—seems fine.
- Don’t bother with fancy marbles; kitchen foil balls work a treat (plus, you don’t end up losing your marbles—ha, sorry, couldn’t resist).
- The tops brown faster than you’d expect. Cover loosely with foil if you like ‘em paler, or just embrace the golden tops.
Cupcake Adventures & Variations
I’ve messed around a bit with this. Once, I swapped in cocoa for some of the flour and—well, the hearts turned murky brown. My best move was adding a handful of freeze-dried strawberries into the batter. Total gamechanger. Also, lemon zest in the frosting is wicked fresh. I did try putting a chocolate truffle in the middle once. Gloopy, but tasty (wouldn’t call it a classic, but hey, why not?).


Bits and Bobs You’ll Need (No Fancy Gadgets Required!)
- Muffin/cupcake tin (or, I suppose, bake them free-form on a tray if you like to live daringly).
- Papers for lining (or just grease the tin, but you’ll spend ages washing up after).
- Marbles, foil balls, something round-ish for shaping.
- Mixing bowls—old plastic is fine; I use the same one I’ve had since uni.
- Electric mixer, or just a whisk and strong arms (I once used a fork because nothing else was clean—it works, more or less!)
How To Store These (If You Even Get The Chance)
Pop them in a container with a lid. Countertop, they last two-ish days, fridge they’ll hold up for 4—though honestly, in my house it never lasts more than a day! If you frost but forget to cover, the icing crusts, which is kind of lovely actually.
How I Like To Serve Heart-Shaped Cupcakes
Usually, I just plop them on a plate, but for Valentine’s Day, my kids demand a pile in the middle of the table, and everyone grabs what they want. Sometimes we stick in little flags with cheesy messages. Or, posh it up on a cake stand if you're feeling extra.
Lessons I’ve Learned The Hard Way (So You Don’t Have To)
- Don’t try to frost when they’re still warm, unless you like runny icing rivers. Once, I was in a rush and... yeah. Messy.
- If you underbake, the middles sink. I’ve tried to call it “lava style” cupcakes—no one was convinced.
- Actually, I find it works better if you let them cool completely before you remove the paper liners. Less sticky that way.
Questions I’ve Actually Gotten About These Cupcakes
- Do I need special pans for the heart shape?
Not at all! That’s the beauty. Marbles, foil balls, even a giant dried bean shoved alongside the case works. It always looks a bit dodgy going in, but the hearts come out more or less, well, heart-y. - Can I use a cake mix?
Absolutely, mate. I’ve done it when I was low on time and energy. Just add the food coloring to the mix, and you’re golden. - How do I stop the cake from sticking to the papers?
Hang on, try letting them cool longer, or even brush a bit of neutral oil inside your papers before filling if you’re really having trouble. (Although usually, it’s just impatience, ha!) - Why did my cupcakes turn a weird shade of pink?
Oh, I’ve had that! Usually too much (or not enough) food coloring, or if your butter is super yellow, it can make the color a little off. Don’t stress, they’ll taste just as nice.
(Honestly, if you make these, let me know if you run into any weird issues. I’ve seen almost all of them—well, unless your dog eats half the batch. That one, I can’t help with.)
Ingredients
- 1 ¼ cups all-purpose flour
- ½ cup granulated sugar
- ¼ cup unsalted butter, softened
- 2 large eggs
- ½ cup whole milk
- 1 teaspoon vanilla extract
- 1 ¼ teaspoons baking powder
- ¼ teaspoon salt
- Pink food coloring
- 1 cup buttercream frosting
- Sprinkles, for decoration
Instructions
-
1Preheat oven to 350°F (175°C). Line a 12-cup muffin tin with cupcake liners. Place a marble or small rolled foil ball between the liner and the tin wall to create a heart shape.
-
2In a bowl, whisk together the flour, baking powder, and salt. Set aside.
-
3In a large bowl, cream the butter and sugar until light and fluffy. Add eggs one at a time, beating well after each. Mix in vanilla extract.
-
4Add the dry ingredients to the wet ingredients in three parts, alternating with the milk. Stir in a few drops of pink food coloring for a festive touch.
-
5Divide batter evenly between the prepared liners. Bake for 16-18 minutes or until a toothpick comes out clean. Let cool completely.
-
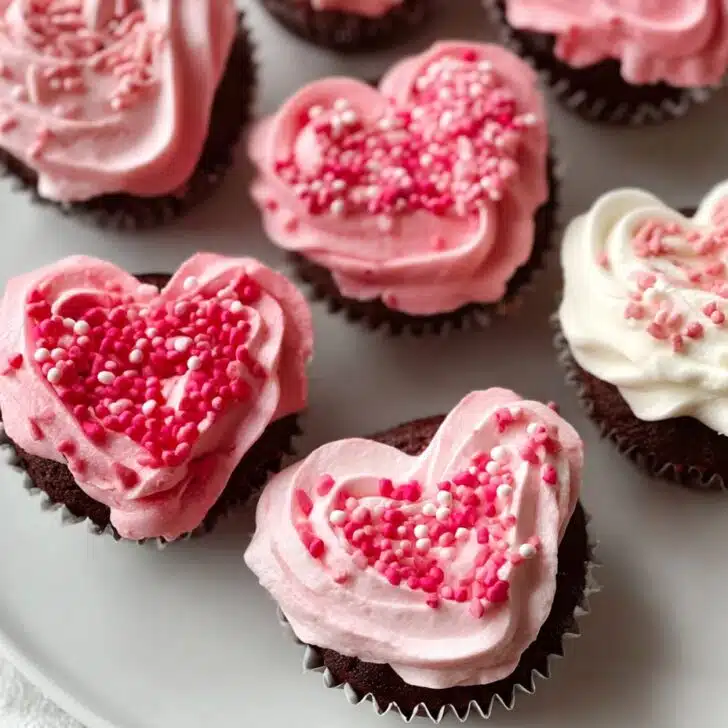
6Pipe pink buttercream frosting onto each cupcake and decorate with sprinkles. Enjoy your heart-shaped cupcakes!
Approximate Information for One Serving
Nutrition Disclaimers
Number of total servings shown is approximate. Actual number of servings will depend on your preferred portion sizes.
Nutritional values shown are general guidelines and reflect information for 1 serving using the ingredients listed, not including any optional ingredients. Actual macros may vary slightly depending on specific brands and types of ingredients used.
To determine the weight of one serving, prepare the recipe as instructed. Weigh the finished recipe, then divide the weight of the finished recipe (not including the weight of the container the food is in) by the desired number of servings. Result will be the weight of one serving.
Did you make this recipe?
Please consider Pinning it!!