
If you’d told me five years ago I’d be eating oats masquerading as tiramisu for breakfast, I probably would’ve laughed. Not a scoff, just one of those little huh, really? giggles. But here we are—my mornings now occasionally include a jar of tiramisu overnight oats, and my only regret is not trying this sooner. The first time I made it, my husband tried to swipe the jar before I’d even had a taste (the dog looked disappointed too, but oats definitely aren’t his thing). Anyway, I got to thinking: this is the sort of little treat that makes weekday mornings a bit less of a slog, know what I mean?


So What’s the Big Deal?
I make these oats when I want something that feels fancy but don’t have the time for, well, actually being fancy. My family goes absolutely bonkers for this (even my skeptical teenager, who still believes breakfast should just be toast). Honestly, I tried to skip the cocoa powder once, but was swiftly corrected and now never forget it. Sometimes, when I’ve had an especially lousy day, I might add a splash more vanilla or an extra spoonful of yogurt just because. And let’s be real—a breakfast that tastes a bit like dessert? Sold.
The Ingredients List—My Usual Suspects (With a Few Plot Twists)
- ½ cup rolled oats (I use the old-fashioned kind, but instant works in a pinch; steel-cut is a no-go unless you like jaw workouts)
- 1 tablespoon chia seeds (or flaxseed if the chia’s hiding—no biggie)
- ¾ cup milk (dairy or almond, though I’ve definitely forgotten and used oat milk and it was still delish)
- 1 tablespoon strong coffee (sometimes I get lazy and use instant espresso powder with water—it’s fine)
- 2 tablespoons thick Greek yogurt (full-fat is primo but use what you’ve got—plain regular yogurt works too if it’s all you have)
- 1-2 teaspoons maple syrup (or honey, or honestly, brown sugar works if you’re out—just dissolve it well)
- ½ teaspoon vanilla extract (real or imitation, I won’t tell)
- 1 tablespoon cocoa powder (unsweetened; sometimes I use a bit more for an extra punch, but my kid thinks I go overboard)
- Pinch of salt
- Optional: chocolate chips, a little grated dark chocolate for topping, or a bit of whipped cream if you’re feeling wild
Let’s Get Mixing—Directions (No Pressure)
- Start with a jar or a lidded container—doesn’t need to be fancy. Dump in the oats and chia seeds. Give it a quick shake or stir. You want to avoid the chia glue situation, trust me.
- Pour in your milk of choice. Then mix in the coffee, Greek yogurt, maple syrup, vanilla, cocoa powder, and that pinch of salt. If it looks a little messy—don’t panic. It’s always a bit weird-looking before it settles.
- Stir really well. This is the moment I usually sneak a taste, and yes, sometimes add a hair more syrup if it’s a Monday.
- Pop that lid on and stick it in the fridge overnight. Or at least 6 hours; sometimes I’m impatient and have it by lunchtime.
- Next morning, give it a good stir. Top with chocolate chips, extra yogurt, or whatever floats your boat. I’ve even tried a bit of whipped cream (no shame).


Notes from My Not-So-Scientific Experiments
- Actually, I find it works better if you give everything a really good stir before you refrigerate. Once I just kinda dumped and hoped—nope, patchy oats.
- Too thick in the morning? Add a splash of milk, no biggie. Too runny? Well…eat it anyway, it’ll still taste good—but next time, less milk.
- I like these best after a full night in the fridge (weirdly, day two is even better, but that almost never happens!)
Variations I’ve Tried (For Better or Worse)
- If I’m feeling particularly health-minded, I add a spoonful of protein powder. Tastes alright, though it can be a bit chalky.
- Tried dipping actual ladyfingers in coffee and layering them in. The texture was…let’s just say, way too soggy. Wouldn’t recommend unless you actually *like* breakfast pudding.
- Once I swapped the cocoa for cinnamon. Not tiramisu anymore, but still tasty (kinda more like a spiced latte vibe?)


The Gear—But You Really Don’t Need Much
A jar, or honestly, an old takeaway tub works fine. If you don’t have a whisk, just use a fork—it’s what I do when everything else is in the dishwasher.
How to Store (But It’s Usually Gone Fast!)
Technically, you can store these oats up to 3 days in the fridge. Though honestly, in my house it never lasts more than a day! If you’re prepping for the week, just line up a few jars. They keep best in airtight containers; sometimes I forget and just stick a plate on top. Works, sort of.
Serving—Get Creative Here!
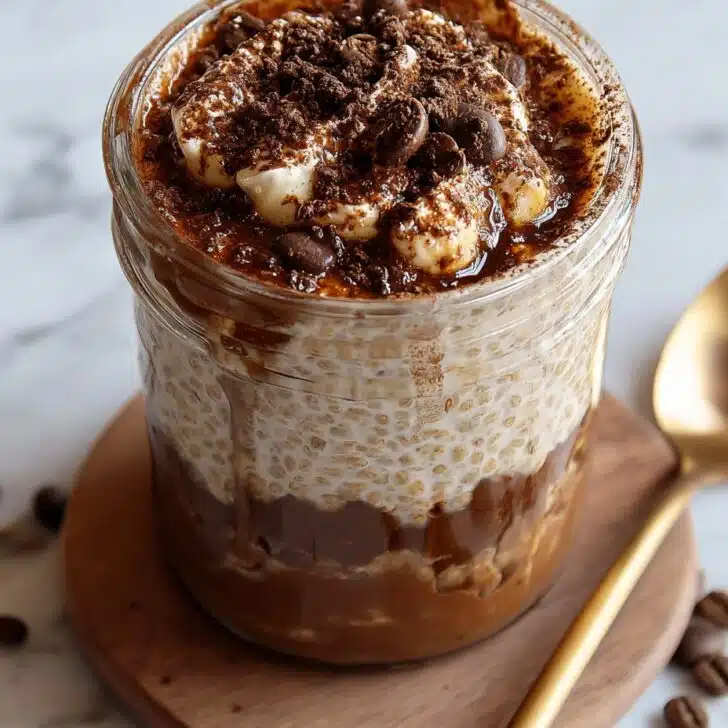
I love to sprinkle a little extra cocoa or grate some dark chocolate before serving. My kids have been known to ask for a “breakfast sundae” version, so I pop a dollop of whipped cream on top. On birthdays, a maraschino cherry may even appear. Go wild.
Some Hard-Earned Pro Tips
- I once tried rushing the soak time—yeah, the oats were half-crunchy. Never again.
- If you’re using regular yogurt instead of Greek, maybe cut back a bit on the milk (or not—depends how runny you like it, really)
- Don’t skip the tiny pinch of salt! It’s what makes the flavors pop, I swear.
FAQ—People Actually Ask Me These!
- Can I make this dairy-free? Yes! Use non-dairy milk and a plant-based yogurt. Works just fine; I think coconut yogurt is lush, actually.
- Is the coffee flavor really strong? Honestly, not unless you double it. You could skip it but then, is it still tiramisu? Up to you!
- Can I warm it up? Sure, but it’s better cold. Microwave in 20-second bursts if you want it cozy.
- Is it kid friendly? Mine don’t mind the small amount of coffee, but you could swap for extra milk if you’re worried.
- How sweet is this? It’s kind of up to you. I start with a teaspoon of maple syrup—add, taste, repeat as needed (the first go I made was a little too sweet, actually, but you learn!)
Anyway, if you ever need breakfast to feel like a small celebration or just want to trick your brain into thinking it’s dessert time at 7am, give these tiramisu overnight oats a go. If nothing else, you’ll have a good story to tell about that time you put coffee in your porridge.
Ingredients
- ½ cup rolled oats (I use the old-fashioned kind, but instant works in a pinch; steel-cut is a no-go unless you like jaw workouts)
- 1 tablespoon chia seeds (or flaxseed if the chia’s hiding—no biggie)
- ¾ cup milk (dairy or almond, though I’ve definitely forgotten and used oat milk and it was still delish)
- 1 tablespoon strong coffee (sometimes I get lazy and use instant espresso powder with water—it’s fine)
- 2 tablespoons thick Greek yogurt (full-fat is primo but use what you’ve got—plain regular yogurt works too if it’s all you have)
- 1-2 teaspoons maple syrup (or honey, or honestly, brown sugar works if you’re out—just dissolve it well)
- ½ teaspoon vanilla extract (real or imitation, I won’t tell)
- 1 tablespoon cocoa powder (unsweetened; sometimes I use a bit more for an extra punch, but my kid thinks I go overboard)
- Pinch of salt
- Optional: chocolate chips, a little grated dark chocolate for topping, or a bit of whipped cream if you’re feeling wild
Instructions
-
1Start with a jar or a lidded container—doesn’t need to be fancy. Dump in the oats and chia seeds. Give it a quick shake or stir. You want to avoid the chia glue situation, trust me.
-
2Pour in your milk of choice. Then mix in the coffee, Greek yogurt, maple syrup, vanilla, cocoa powder, and that pinch of salt. If it looks a little messy—don’t panic. It’s always a bit weird-looking before it settles.
-
3Stir really well. This is the moment I usually sneak a taste, and yes, sometimes add a hair more syrup if it’s a Monday.
-
4Pop that lid on and stick it in the fridge overnight. Or at least 6 hours; sometimes I’m impatient and have it by lunchtime.
-
5Next morning, give it a good stir. Top with chocolate chips, extra yogurt, or whatever floats your boat. I’ve even tried a bit of whipped cream (no shame).
Approximate Information for One Serving
Nutrition Disclaimers
Number of total servings shown is approximate. Actual number of servings will depend on your preferred portion sizes.
Nutritional values shown are general guidelines and reflect information for 1 serving using the ingredients listed, not including any optional ingredients. Actual macros may vary slightly depending on specific brands and types of ingredients used.
To determine the weight of one serving, prepare the recipe as instructed. Weigh the finished recipe, then divide the weight of the finished recipe (not including the weight of the container the food is in) by the desired number of servings. Result will be the weight of one serving.
Did you make this recipe?
Please consider Pinning it!