
You Know When You Just Need That One Classic?
Oh, the memories tied up in the humble Joe Ground Beef Sandwich! If I’m being honest, this was the first "fancy" hot sandwich I learned to make after moving out on my own (not counting the tragic canned-spaghetti-on-toast phase). I used to think it was just a Sloppy Joe, but—plot twist—this version, supposedly the real-deal original, has its own quirky flavor profile. There’s something comforting about browning up some beef, slapping it on bread, and calling it dinner. Plus, and this is important, the messiness feels like a feature, not a bug.
Why I Keep Making This, Even When I Should Probably Try New Things
I make this when it’s cold out and everyone’s cranky and hungry at the same time (so, like, Tuesday). My family goes nuts for this because it’s hearty and, I dunno, a little bit retro. I even have a neighbor who pops by at the sniff of onions sautéing. Oh, and I used to dread chopping onions (tears for days), but now I just accept it—I mean, it’s worth it for the flavor. My kids are suspicious of "green bits" so I sometimes sneak in spinach and they never notice. Parenting win!
(Full disclosure: once I tried ground turkey instead of beef and almost got a mutiny at the dinner table. Lesson learned.)
Here’s What You’ll Need (And What You Can Swap)
- 1 lb (about 500g) ground beef (80/20 is my go-to, but sometimes I use ground pork if it’s on sale)
- 1 small yellow onion, diced (red onion works in a pinch, though the flavor’s a bit punchier)
- 2 cloves garlic, minced (granulated garlic if you’re running low—it’s fine)
- ½ green bell pepper, diced (red works too, though I think it’s a bit sweeter)
- 1 can (about 15 oz) crushed tomatoes (my gran swore by San Marzano, but honestly, use whatever’s in the cupboard)
- 2 tablespoon tomato paste (this thickens things up, but you can skip it if needed)
- ½ teaspoon dried oregano
- ½ teaspoon dried basil (fresh is nice but not essential)
- 1 teaspoon Worcestershire sauce (no idea how to say it, still use it every time)
- Salt and pepper, to taste
- ½ teaspoon sugar (optional, but it tames the acidity a bit)
- 4-6 soft sandwich buns (any brand—I've used hot dog buns in a pinch!)
- Butter, for toasting buns (if you're feeling fancy)
How I Really Make The Original Joe Ground Beef Sandwich
- First, grab your biggest frying pan (I once tried a tiny skillet—don’t). Toss in the ground beef over medium-high heat. Break it up with whatever you have—a proper wooden spoon or just a spatula. Cook until it’s mostly browned, maybe 5-7 minutes. Don’t worry if there’s a little pink left, it’ll cook more later.
- Push the beef to one side, tip out most of the fat (but not all—flavor!). Now, add your onion, garlic, and bell pepper right into the same pan. Stir it around, scraping up any browned bits—those are gold. Let everything soften up, about 3-4 minutes.
- Stir in the crushed tomatoes and tomato paste. Now’s also the time for oregano, basil, Worcestershire sauce, and that pinch of sugar. Give it a good stir, bring to a gentle simmer. This is where I usually sneak a taste; don’t judge.
- Let the mixture simmer uncovered for 10–15 minutes. Stir occasionally. Don’t worry if it looks a bit weird at this stage—it always does. It thickens up as it goes.
- Meanwhile, butter your buns (not a life motto, just dinner advice). Toast them in a dry pan or pop them under the broiler. Watch them close! I’ve burnt more than I care to admit.
- Once the meat mixture is nice and thick—not soupy, but still juicy—season with salt and pepper. I tend to go heavy on the pepper. That’s just me.
- Spoon a hearty pile onto each bun. Serve hot. I dare you not to get it all over your shirt.
Notes from the School of Hard Sandwiches
- I used to add way too much tomato paste—turns out less is more here.
- If your sauce gets runny, just crank up the heat for a few minutes and stir. It thickens up.
- Actually, I find it works better if you let it sit for ~5 minutes before serving, so the juices soak in a bit. (But good luck waiting!)
- Forgot to thaw your beef? I’ve microwaved it on low—just don’t tell anyone.
Things I’ve Tried (Not All Winners!)
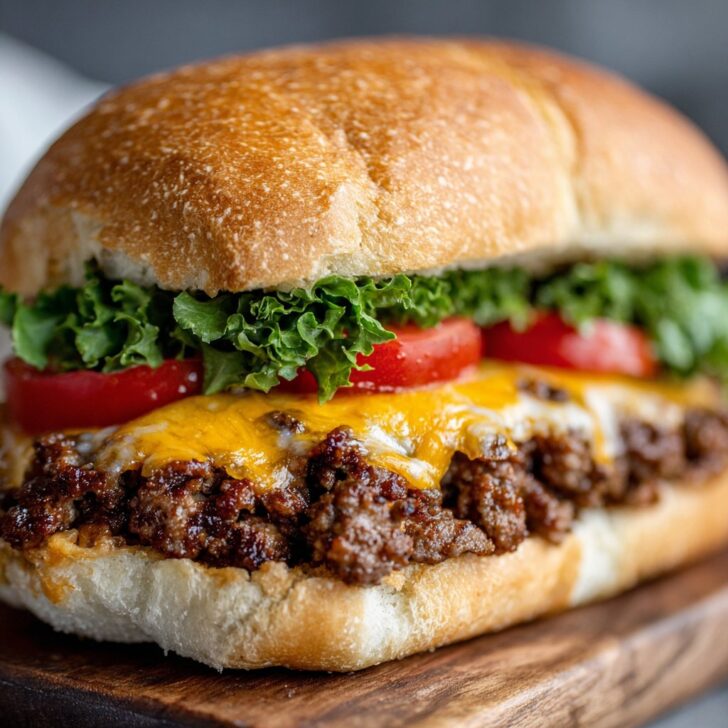
- With cheese: Melt a slice of cheddar on top. My partner loves it, though I think it competes with the sauce.
- Ground chicken version: Meh. Lacked oomph. Maybe more seasoning would save it?
- Extra veggies: Zucchini works, but don’t overdo it or it gets watery. Learned that the hard way.
- Spicy version: Crushed red pepper or a dash of hot sauce—solid move if you like heat.
Equipment (And How to Wing It)
- Large skillet or frying pan (if you only have a pot, that’s fine; just stir more often)
- Wooden spoon (or, honestly, even a plastic spatula works—just don’t melt it, I did that once)
- Bread knife for the buns (or just tear them with your hands; rustic, right?)


Keeping Leftovers—If You Get That Far
Just pop any leftover beef mix in a lidded container in the fridge. It’ll keep for 2-3 days, though honestly, in my house it never lasts more than a day! I think the flavors get deeper overnight, but no guarantees it'll survive until breakfast.
If You’re Wondering What to Serve With It
We’re purists—just a pile of kettle chips and some pickles on the side. Sometimes I’ll do a quick coleslaw if I’m feeling ambitious, but truthfully, most of the time it’s just whatever’s easy. My uncle used to insist on a dill pickle spear with every sandwich, and that’s become a weird little tradition in our house too.
Stuff I Learned the Hard Way (AKA Pro Tips)
- Don’t rush the simmering. I once tried to speed things up and the flavors just didn’t come together—bland city.
- If your buns are falling apart, toast them a bit longer. Soft is good, but mushy is not.
- Actually, on second thought, it’s better to under-season at first and then add salt at the end. The sauce reduces and can get salty quick.
Questions Folks Have Actually Asked Me
- Can you freeze the filling? Sure, just let it cool first and use an airtight container. I’ve thawed it (microwave again!) and it’s totally fine, though maybe a bit drier, so add a splash of water.
- Can I use a slow cooker? You bet, though I’d brown the meat first. The flavor’s better that way—trust me, I skipped that step once and it was "meh" at best.
- What’s the difference between this and a Sloppy Joe? Well, not much; some folks say it’s all about the herbs and less sweetness. You can read more on Serious Eats, they’ve got a whole debate about it! (I just call it dinner.)
- Any good bun brands? I like King Arthur's burger buns if I have time to bake. Otherwise, the store-brand ones work fine.
- Is it better the next day? I think so, yes. If you can keep your hands off it that long!
Oh, quick digression—has anyone else noticed how tiny onions have gotten at the store lately? Or maybe my hands are just getting bigger. Anyway, if you want more easy dinner ideas, I follow Budget Bytes—her stuff is easy and never lets me down.
Anyway, that’s how I make The Original Joe Ground Beef Sandwich. Not always pretty, but always tasty. Enjoy—just keep napkins handy!


Ingredients
- 1 lb ground beef
- 1 medium yellow onion, finely chopped
- 2 cloves garlic, minced
- ½ cup tomato sauce
- 2 tablespoons Worcestershire sauce
- 1 tablespoon olive oil
- Salt and black pepper to taste
- 4 sandwich buns, toasted
- Optional: sliced pickles and shredded lettuce for serving
Instructions
-
1Heat olive oil in a large skillet over medium heat. Add the chopped onion and cook until softened, about 3-4 minutes.
-
2Add the minced garlic and cook for 1 minute until fragrant.
-
3Add ground beef to the skillet. Cook, breaking it up with a spoon, until browned and cooked through, about 6-8 minutes.
-
4Stir in tomato sauce and Worcestershire sauce. Season with salt and black pepper. Simmer for 5-7 minutes until the mixture thickens slightly.
-
5Spoon the beef mixture onto toasted sandwich buns. Add pickles and shredded lettuce if desired. Serve immediately.
Approximate Information for One Serving
Nutrition Disclaimers
Number of total servings shown is approximate. Actual number of servings will depend on your preferred portion sizes.
Nutritional values shown are general guidelines and reflect information for 1 serving using the ingredients listed, not including any optional ingredients. Actual macros may vary slightly depending on specific brands and types of ingredients used.
To determine the weight of one serving, prepare the recipe as instructed. Weigh the finished recipe, then divide the weight of the finished recipe (not including the weight of the container the food is in) by the desired number of servings. Result will be the weight of one serving.
Did you make this recipe?
Please consider Pinning it!!