
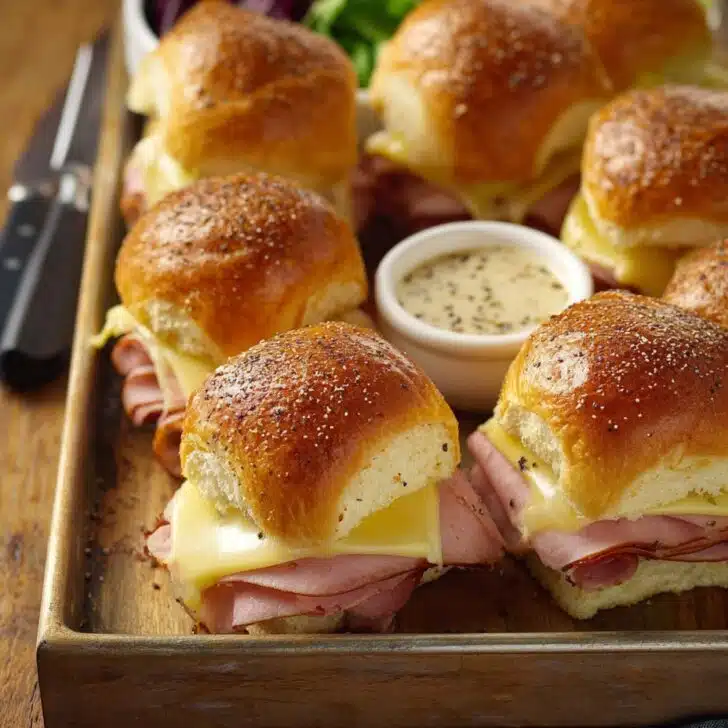
Pull Up a Chair—We're Talking About My Favorite Game Day Food
If you're anything like me, halftime is less about the analysis and way more about diving into something a little gooey, a little melty, and definitely finger-licking. Enter: The Game Day Half-time Ham And Cheese Sliders (With a Winning Mystery Sauce). I started making these years ago, after a—let's be honest—completely forgettable football party where the food was, well, not the real MVP. Since then, these babies have become a non-negotiable part of any big game at our place. And sure, my family's team doesn't always win, but these sliders always do.
")
")
So Why Do I Keep Making These?
I make this, honestly, whenever I need something everyone will crowd around (and possibly argue over who gets the last one). My family goes absolutely bonkers for this because it's a not-so-fancy-but-super-comforting recipe that disappears quicker than you can say 'touchdown.' Plus, the mystery sauce has become sort of a running joke—everyone tries to guess what's in it, and nobody ever gets it 100% right (but I've given up on keeping the secret from my cousin Dan, who just straight up watched me make it one day—classic Dan). Oh, and bonus: hardly any prep mess. You know how some recipes turn your kitchen into a disaster zone? Not this one.
What You’ll Need (With a Few Swaps I've Actually Done)
- 12 Hawaiian sweet rolls (King's Hawaiian is classic but store-brand totally works, too—I've even used regular dinner rolls in a pinch, though it's not quite as magical)
- 250g sliced deli ham (honey, smoked, or really whatever you like; sometimes I grab roasted turkey if that's what's in the fridge)
- 200g sliced Swiss cheese (Gruyère is dreamy if you want to be all fancy, or honestly, cheddar and mozzarella work fine too—don't stress it)
- 3 tablespoons unsalted butter, melted
- 1 tablespoon Dijon mustard (regular yellow is fine if that's all you've got; don't skip it though)
- 2 teaspoons Worcestershire sauce
- 1 tablespoon brown sugar (I once used honey instead—works but a little stickier)
- ½ teaspoon garlic powder
- 1 tablespoon poppy seeds (optional—I don't always bother if I can't find them, no big deal)
- Big pinch of salt and pepper
How To Make These (My Play-by-Play)
- Preheat your oven to 180°C (350°F). If your oven takes ages, now’s a good time to crank it, not later (I've forgotten, and trust me, cold sliders are a letdown).
- Without pulling the rolls apart, slice the whole package of sweet rolls horizontally. (Basically make one giant sandwich. Take care not to massacre the bottoms, that keeps ’em easier to pick up!)
- Layer the bottom half with all your ham, then all the cheese. Don’t stress about being exact—I usually just drape them over unevenly, looks rustic.
- Replace the top half of the rolls. Light pressing so it all stays put—no need to squish the life out of it though.
- In a smallish bowl, whisk together your melted butter, mustard, Worcestershire, brown sugar, garlic powder, poppy seeds, salt, and pepper. This is your MVP “mystery sauce.” (I always have a little taste here—it’s like, zingy and sweet. May as well check, right?!)
- Using a pastry brush or even a spoon, spread or drizzle the mystery sauce all over the tops of the rolls. Get into those corners—more sauce always makes it better, in my opinion.
- Cover with foil (I’ve tried skipping this but regretted it because the tops get way too crusty—learned my lesson).
- Bake for about 15 minutes covered, then uncover and bake another 7–10 minutes until gooey and golden. (Plus, your kitchen will start smelling amazing at this point, so peek in only if you can resist.)
- Remove from the oven, let them sit for maybe 3–5 minutes. Don’t try to move them right away or you’ll risk a molten cheese slide-off—which sounds fun, but isn’t, actually.
- Use a sharp knife to slice along the seams and serve. (Seriously: people will swarm. I usually grab one for myself before calling everyone in!)
")
")
Real Talk: Notes You'll Want To Read
- If you go heavy on the cheese, the bottoms might get a wee bit soggy. I sometimes line the baking tray with parchment; helps a bit, though it's not foolproof.
- If you only have salted butter, it's fine, just cut back on the extra salt.
- The brown sugar in the sauce is what gives that key sweet note—white sugar is okay in a pinch, but not as rich. Learned the hard way!
Variations—Some Genius, Some...Not So Much
- I tried jalapeño slices once (delicious but only for the spice-tolerant, so maybe leave a few kid-friendly ones plain).
- Someone asked for vegetarian, so I used sauteed mushrooms and spinach instead of ham—came out really nice, but much messier to cut, forewarning.
- Honestly, I tried pineapple once. I thought it’d be clever—ended up kind of weird (too much sweet-on-sweet), so maybe don’t follow me down that path!
")
")
Equipment: You Don’t Really Need Much
- Baking dish (I use a 9x13 inch, but I’ve shoved them into round pans before, and hey, they still tasted good)
- A bread knife (serrated is easiest)
- Pastry brush is nice, but if you don't have one, just use the back of a spoon or your (clean!) fingers—I've done it, it works
- Tinfoil (or a spare cookie sheet as a lid if your foil box is empty—story of my life)
Storage—But These Rarely Make It That Long
Store any lefties in an airtight container in the fridge. They’re best the day of, but honestly, I think this tastes better the next day, cold or reheated. Maybe it’s just me. Or maybe it’s the mystery sauce settling into the bread. Either way, in my house, they’re usually gone by the next morning, so I rarely get to test the limits.
Serving: How We Do It at My Place
You can serve them hot, obviously, or room temp if people keep wandering back and forth from the TV. I usually toss a bowl of pickles or kettle chips next to them on the table—old habit, no idea where I picked that up. But it works.
Learned the Hard Way: Pro Tips
- I once tried rushing the resting step and, wow, ended up with a lava flow situation (cheese was everywhere, not in a good way). So yeah, let them cool those few minutes.
- Don’t skip the foil. Seriously, I get impatient but uncovered right from the start is just a recipe for crispy, almost cracker-like tops. Kind of the opposite of what you want.
FAQ—People Actually Ask Me This Stuff
- Can I make these ahead of time? Kinda! You can assemble everything (sauce and all), cover, and refrigerate for a couple hours. Just bake right before serving—cold from the fridge might need an extra few minutes in the oven though.
- Do I have to use sweet rolls? Nah, regular dinner rolls work, just not as squishy/sweet. I tried with sourdough once, but that felt like it was trying to impress me and I wasn't buying it.
- Can I freeze these? I mean, technically? But I don't, because the rolls can get a bit weird and the cheese sometimes gets rubbery. Probably best fresh.
- What's actually in the mystery sauce? Okay, I'll spill: it's the Dijon, Worcestershire, brown sugar, and garlic. That's the flavor combo my guests always ask about, not the poppy seeds (surprise!)
- Is the poppy seed necessary? Not really, just looks fancy. If I'm out, I skip it. Still tastes ace.
Random but: once, my dog managed to swipe one off the cooling rack while my back was turned. So keep an eye out for opportunists—two or four-legged. Happy snacking and may your team (or snacks) win!
Ingredients
- 12 Hawaiian sweet rolls (King's Hawaiian is classic but store-brand totally works, too—I've even used regular dinner rolls in a pinch, though it's not quite as magical)
- 250g sliced deli ham (honey, smoked, or really whatever you like; sometimes I grab roasted turkey if that's what's in the fridge)
- 200g sliced Swiss cheese (Gruyère is dreamy if you want to be all fancy, or honestly, cheddar and mozzarella work fine too—don't stress it)
- 3 tablespoons unsalted butter, melted
- 1 tablespoon Dijon mustard (regular yellow is fine if that's all you've got; don't skip it though)
- 2 teaspoons Worcestershire sauce
- 1 tablespoon brown sugar (I once used honey instead—works but a little stickier)
- ½ teaspoon garlic powder
- 1 tablespoon poppy seeds (optional—I don't always bother if I can't find them, no big deal)
- Big pinch of salt and pepper
Instructions
-
1Preheat your oven to 180°C (350°F). If your oven takes ages, now’s a good time to crank it, not later (I've forgotten, and trust me, cold sliders are a letdown).
-
2Without pulling the rolls apart, slice the whole package of sweet rolls horizontally. (Basically make one giant sandwich. Take care not to massacre the bottoms, that keeps ’em easier to pick up!)
-
3Layer the bottom half with all your ham, then all the cheese. Don’t stress about being exact—I usually just drape them over unevenly, looks rustic.
-
4Replace the top half of the rolls. Light pressing so it all stays put—no need to squish the life out of it though.
-
5In a smallish bowl, whisk together your melted butter, mustard, Worcestershire, brown sugar, garlic powder, poppy seeds, salt, and pepper. This is your MVP “mystery sauce.” (I always have a little taste here—it’s like, zingy and sweet. May as well check, right?!)
-
6Using a pastry brush or even a spoon, spread or drizzle the mystery sauce all over the tops of the rolls. Get into those corners—more sauce always makes it better, in my opinion.
-
7Cover with foil (I’ve tried skipping this but regretted it because the tops get way too crusty—learned my lesson).
-
8Bake for about 15 minutes covered, then uncover and bake another 7–10 minutes until gooey and golden. (Plus, your kitchen will start smelling amazing at this point, so peek in only if you can resist.)
-
9Remove from the oven, let them sit for maybe 3–5 minutes. Don’t try to move them right away or you’ll risk a molten cheese slide-off—which sounds fun, but isn’t, actually.
-
10Use a sharp knife to slice along the seams and serve. (Seriously: people will swarm. I usually grab one for myself before calling everyone in!)
Approximate Information for One Serving
Nutrition Disclaimers
Number of total servings shown is approximate. Actual number of servings will depend on your preferred portion sizes.
Nutritional values shown are general guidelines and reflect information for 1 serving using the ingredients listed, not including any optional ingredients. Actual macros may vary slightly depending on specific brands and types of ingredients used.
To determine the weight of one serving, prepare the recipe as instructed. Weigh the finished recipe, then divide the weight of the finished recipe (not including the weight of the container the food is in) by the desired number of servings. Result will be the weight of one serving.
Did you make this recipe?
Please consider Pinning it!