
So, Why Air Fryer Chicken Thighs? (A Little Story)
Look, I'm not gonna pretend I always loved chicken thighs. I was a breast-only kinda person for ages (sounds weird, but you know what I mean). But then last winter, after a proper kitchen disaster involving burnt breadcrumbs and a smoke alarm with a mean streak, I tried popping thighs into my air fryer just to see. Fast forward, and now I make these every time there's a hint of a dinner slump. My kids come sniffing around the kitchen like it's some sort of fried chicken festival, and even my neighbor—who claims she doesn't like chicken—asked for the recipe. Go figure. Oh, and one time I grabbed the wrong spice and, well... let's just say curry powder is not the same as paprika (but actually, not terrible either!).
Why You'll Love This—No, Seriously
I make this when I need a dinner that's basically impossible to mess up. My family goes bonkers for these thighs (my son once tried to hide the leftovers in his backpack). They're super crispy on the outside and juicy inside, and you only need, like, 20 minutes. Plus, if you forget to defrost? No biggie; I've thrown frozen thighs in before and, shockingly, they still turn out pretty great. I mean, not chef-level—just honest-to-goodness good. The air fryer basically does all the work, so if you tend to wander off to fold laundry or, let's be real, scroll through TikTok, you're golden. Just set a timer!
What You Need (With My Usual Substitutions)
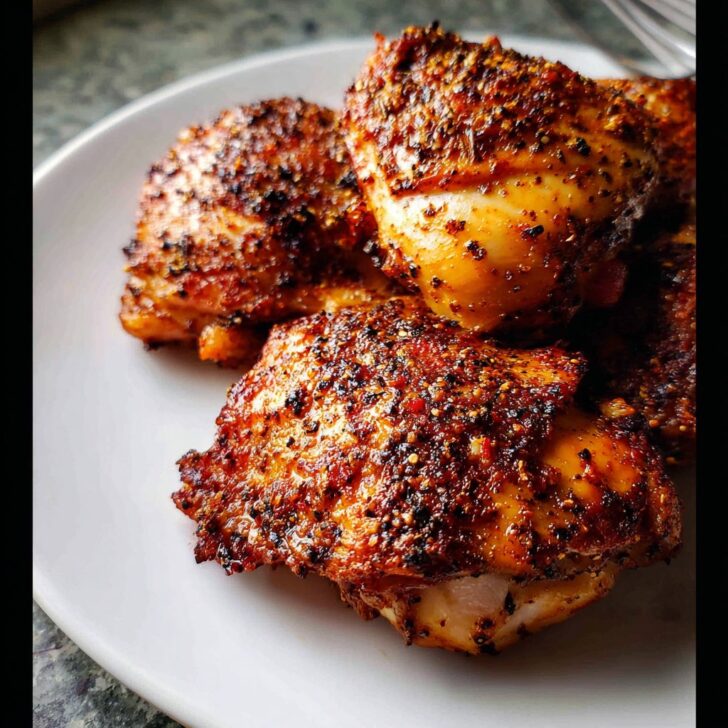
- 4-6 bone-in, skin-on chicken thighs (skinless works, but honestly, the skin is the best part; I've used boneless drumsticks in a pinch, too)
- 2 tablespoon olive oil (sometimes I use avocado oil if I'm feeling fancy, or just whatever's left in the cupboard)
- 1 ½ teaspoon smoked paprika (if you accidentally use sweet paprika, it's fine—just less smoky)
- 1 teaspoon garlic powder (fresh garlic works, but the powder's faster; my grandmother swore by Lawry's, but any brand's fine)
- 1 teaspoon onion powder
- ¾ teaspoon kosher salt (table salt is ok, but use a bit less)
- ½ teaspoon black pepper (or white pepper; but black is classic, right?)
- ½ teaspoon dried thyme (oregano works if that's all you've got)
- Optional: pinch cayenne pepper if you want a bit of fire
How I Actually Make Them (And What Happens in My Kitchen)
- Preheat your air fryer. (I mostly remember to do this, but if you forget, just add an extra minute of cook time). Set it to 400°F/200°C.
- Pat the chicken dry. Seriously, this helps with crispiness. Sometimes I use a clean dish towel if I'm out of paper towels. It works!
- Mix the spices and oil together. Toss everything in a small bowl. I use my hands to rub the mixture all over the chicken—yes, it's a little messy, but it's worth it. (This is usually when I start doubting myself, but trust the process.)
- Arrange the thighs in the air fryer basket. Give them a little breathing room, but if they touch slightly, don't panic. Sometimes I do two batches if they're huge.
- Cook for 10 minutes. Flip the thighs (tongs are easiest, unless you're brave—I've tried using a fork and, ouch). Cook another 8-12 minutes, depending on the size. I usually sneak a taste at 18 minutes—just to, you know, check for science.
- Check the temp. Should hit 165°F/74°C. If you don't have a thermometer, slice one open and peek—if it's not pink, you're probably good. The juices will run clear (almost always!).
Notes I Learned the Hard Way
- If you skip drying the chicken, the skin never crisps right (not that anyone around here complains... but still).
- Piling them on top of each other? Not ideal. I did it once when in a rush, and they just steam. Not bad, just not crispy.
- Actually, I find a little spritz of oil on top halfway through makes the skin extra gorgeous.
Variations (Some Hits, One Miss)
- Lemon-pepper: Add some grated lemon zest—makes everything taste fresh. Maybe too fresh for my husband, but he's picky.
- BBQ style: Brush on some BBQ sauce for the last 5 minutes. Watch out, it can get sticky (learned that the hard way—my air fryer still smells like hickory sometimes).
- Herb overload: Once I tried rosemary and sage together; honestly, it was a bit much. Stick to one herb if you're nervous.
If You Don't Have All the Gear
I use a basket-style air fryer, but I've borrowed a drawer-type from my sister (kinda noisy but it works). No air fryer? Oven's fine—just crank it up high and use a wire rack if you've got it. Or honestly, just use a sheet pan. It might not be the same, but it'll still hit the spot. Oh, and tongs make flipping easier but, in a pinch, I've used clean hands (just be careful, obviously!).


Storing (But Good Luck Actually Having Leftovers)
In theory, these keep in the fridge for 3 days. But honestly, in my house they barely make it to the next meal. If you do have some left, pop them back in the air fryer for 3-4 minutes to re-crisp. Sometimes I just eat them cold over salad—don't judge me!
How I Like to Serve Them
We go full comfort food—mashed potatoes, steamed broccoli, or sometimes just some crusty bread to mop up the juices. When I'm feeling lazy, I wrap them in a tortilla with a bit of slaw; my daughter calls it a "chicken taco night" and claims it's better than takeaway. Can't argue with that. If you fancy, check out some fun side ideas at Serious Eats for inspiration.
Pro Tips (AKA My Goofs)
- I once tried rushing the flip step and, whoops, the underside was totally soggy. Give it some love halfway through.
- Don't pack the basket too full—I've done it, you end up with steamed thighs instead of crispy ones. Not bad, but not peak chicken.
- Cleaning your air fryer while it's still warm is, actually, a lot easier. (Learned that after a night of "I'll just do it in the morning.")
FAQs (Real Questions, Real Answers)
- Can I use boneless thighs? Sure thing. They'll cook a bit faster, so check 'em at 15 minutes. Sometimes I miss the crispy skin though.
- What if my thighs are frozen? No worries—just add 5 or 6 minutes to the total cook time. It still works. (See, told you this recipe is forgiving!)
- Do I have to flip the chicken? Technically, you could skip it, but I think the skin's crispier if you do. And let's face it, it's fun to flip stuff.
- My air fryer is tiny—can I do these in batches? Yep! Just keep the cooked ones warm in the oven at 200°F/100°C.
- Where'd you get your air fryer? Oh, mine's form Wirecutter's recommendations. But honestly, any decently sized one will do.
For me, these chicken thighs are a weeknight hero and a crowd-pleaser, not to mention a solid excuse to put my feet up while the air fryer does the heavy lifting. On second thought, maybe I should make a double batch next time. If you're curious about more air fryer tips, check out The Kitchn's guide—they've got all sorts of clever hacks I wish I'd read before learning the hard way.
Ingredients
- 4 bone-in, skin-on chicken thighs
- 2 tablespoons olive oil
- 1 teaspoon garlic powder
- 1 teaspoon smoked paprika
- 1 teaspoon dried thyme
- ½ teaspoon salt
- ½ teaspoon black pepper
- ½ teaspoon onion powder
Instructions
-
1Preheat the air fryer to 400°F (200°C) for 3 minutes.
-
2Pat the chicken thighs dry with paper towels. Place them in a large bowl.
-
3Drizzle olive oil over the chicken thighs. Add garlic powder, smoked paprika, dried thyme, salt, black pepper, and onion powder. Toss to coat evenly.
-
4Arrange the chicken thighs in a single layer in the air fryer basket, skin side down.
-
5Cook for 10 minutes, then flip the chicken thighs and cook for another 10 minutes, or until the skin is crispy and the internal temperature reaches 165°F (74°C).
-
6Let the chicken rest for 5 minutes before serving. Enjoy!
Approximate Information for One Serving
Nutrition Disclaimers
Number of total servings shown is approximate. Actual number of servings will depend on your preferred portion sizes.
Nutritional values shown are general guidelines and reflect information for 1 serving using the ingredients listed, not including any optional ingredients. Actual macros may vary slightly depending on specific brands and types of ingredients used.
To determine the weight of one serving, prepare the recipe as instructed. Weigh the finished recipe, then divide the weight of the finished recipe (not including the weight of the container the food is in) by the desired number of servings. Result will be the weight of one serving.
Did you make this recipe?
Please consider Pinning it!!