
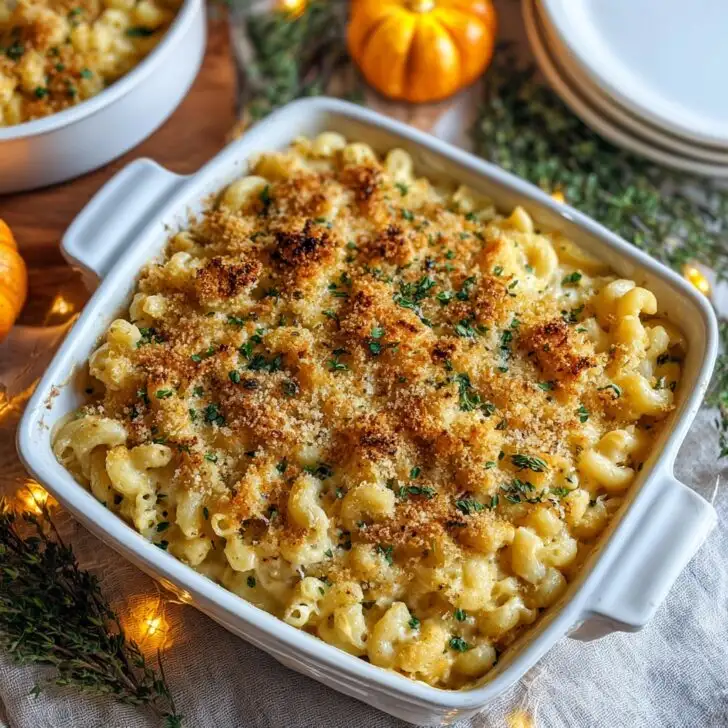
Let Me Tell You About This Thanksgiving Mac and Cheese...
If there’s one thing my family expects at Thanksgiving (besides my uncle’s all-too-honest opinions), it’s this Mac and Cheese. I still remember the first time I brought it; Aunt Debbie asked if I’d picked it up store-bought! (I didn’t know if I was supposed to take that as an insult or a compliment). Anyway, this dish is cheesy, it’s cozy, and it somehow always disappears before I manage to grab seconds. Also, fair warning—don’t try prepping this while wrangling a toddler and answering a group text. Learned that one the hard way.
Why You'll Love This Mac and Cheese (or at Least Not Regret It)
I whip this up whenever I want to avoid mashed potato duty. My family loses their minds for it because, well, it’s ridiculously creamy (can you really have too much cheese? Actually, yes—once I added an entire extra block and it came out like fondue soup). Plus, if you sneak in crispy breadcrumbs on top, everyone thinks you’ve turned pro. Oh, and when it bubbles up and the top gets just a little crunchy...*chef’s kiss*. The only problem is, I make enough for leftovers and yet somehow…poof. None left. The universe may never explain this.
What You’ll Need (But Don’t Stress if You Sub Something)
- 16 oz (about 450g) elbow macaroni (or shells — honestly, penne if that’s all you have. No pasta police will come for you.)
- 4 cups shredded sharp cheddar (bagged is fine, but, sigh, grating your own makes it silkier. Sometimes I mix in Gruyère if I’ve got some extra cash on hand)
- 2 cups whole milk (I’ve even used half-and-half—super rich, but nobody complained)
- 1 cup heavy cream (my gran always claimed this was unnecessary, but, uh, fair enough if you wanna skip and just up the milk)
- 4 tablespoons butter (I use salted, but that’s a running debate in my house)
- ¼ cup all-purpose flour (don’t stress if you’re a bit shy or heavy handed. I rarely measure exactly)
- 2 teaspoons mustard powder (sometimes I just squirt in some yellow mustard—with varying success!)
- ½ teaspoon smoked paprika (sweet is fine too, or just skip it if your spice drawer is a labyrinth)
- Salt and pepper to taste (uh, just taste it as you go)
- Optional: About 1 ½ cups panko or breadcrumbs + 2 tablespoon melted butter for topping (I literally once used potato chips on top because I ran out—no regrets)
Step-by-Step-ish Instructions
- Preheat your oven to 375°F (190°C). Or forget, like I do, and end up waiting while everyone hovers in the kitchen.
- Boil the pasta in a large pot of salted water until just shy of al dente. This is important—the oven will finish cooking it. Drain and set aside. If you forget to salt the water, it’s not the end of the world but it does make a subtle difference.
- In that same pot (less washing, thank me later), melt the butter over medium heat. Whisk in the flour and cook for, I don’t know, about a minute until it’s sort of frothy. Don’t let it brown!
- Pour in the milk and cream gradually, whisking constantly—don’t panic if you see lumps, just keep whisking. (This is the part where I usually take a call and come back to a mystery texture. Whisk. It. Out.)
- Whisk in mustard powder, paprika, salt, and pepper. Let it simmer until thickened, maybe five minutes or until it coats the back of a spoon. Or until you get tired of checking it every 10 seconds.
- Add in all the cheese except a big handful for topping. Stir until melted and smooth. This is where I sneak a little taste!
- Dump in your cooked pasta, stir to coat everything. Looks a bit gloppy at this point? That’s good. Go with it.
- Spoon the mixture into a greased 9x13 dish (or whatever fits—I’ve split it between a pan and a weird oven-safe bowl before).
- Mix breadcrumbs and melted butter, sprinkle over the top along with that saved cheese. (Or hey, try crushed crackers, I actually enjoyed it once by accident.)
- Bake uncovered for about 25-30 mins or until golden brown and bubbling away temptingly. Resist pulling it out early, even if you get impatient.
- Cool for 10 minutes before serving. My family never waits, but that’s how burned tongues happen. Learned by doing!
What I Wish I’d Known (Notes and Real Talk)
- Letting the pasta cool a little before mixing actually helps it stay less mushy – accidentally discovered that one last year.
- If you overbake, it gets “cakey” instead of gooey—unless you like it that way, then congrats, you are living right.
- I now always add a splash more milk if reheating. Keeps it from going all gluey.
- Don’t be shy about seasoning! Under-seasoned mac and cheese is what my sister calls “sinful.”
If You Feel Like Changing It Up (Some Were… Interesting)
- I tried adding bacon once—my cousin said it was “life changing.” (A bit much, but it was tasty.)
- Brussels sprouts chopped fine and roasted in? Underrated, but honestly, somewhat polarizing. Maybe not for picky eaters.
- I once attempted truffle oil. Regret. It tasted like an expensive candle.
- Hot sauce swirl on top? Not bad if you like a tiny kick!
What You'll Need (Don’t Panic, Improvise)
- 9x13 baking dish (but honestly, I’ve used two smaller pans when I couldn’t find mine)
- Large pot for boiling—if you only have a medium, just cook the pasta in two rounds; I won’t tell.
- Whisk (fork works in a pinch—I did it once, just takes longer and your arm gets tired)


Storing It, Realistically
Leftovers go in a covered container in the fridge; should be good for up to three days. Though honestly, it never lasts more than a day at my place. If people do leave some (unusual), it reheats best in the microwave with a little extra milk stirred in. Freezes OK but I think it gets a tad grainy, so I usually avoid it.
The Way I Like to Serve (And Maybe You Will Too)
As for serving, I love it straight-up, maybe with a sprinkle of chopped fresh chives or parsley if I’m feeling fancy. It's usually nestled in beside the turkey and stuffing, but sometimes I steal a scoop early with a spoon just out of the pan. Oh, and sometimes we eat it before the main meal. Don’t judge.
Tips I Learned the Hard Way
- I tried to rush the cheese melting one year—ended up grainy and kind of sad. Let it melt, don’t crank the heat.
- Forgetting to save cheese for the top is, frankly, a rookie error I made until last Thanksgiving. Just fish out a handful before you dump it all in.
- I used only skim milk once because it was all I had. Was it the end of the world? No. Was it as good? Nah.
Questions I Actually Get Asked
- Can I use gluten-free pasta?
Yep, I’ve done it; use a brand that doesn’t get mushy, and try not to overcook. It worked but didn’t keep quite as well. - Will pre-shredded cheese work?
Absolutely. Sometimes I just don’t feel like washing the grater. But if you want ultra-creamy, shred your own. Up to you! - Why does mine get dry?
Probably overbaked it or didn’t add enough sauce. Or maybe your oven runs hot like mine. Just add a splash more milk; it honestly helps. - Can I prep ahead?
Sure thing. I assemble it and refrigerate, then bake right before serving, but it needs a little extra bake time form cold. (That’s not a typo—spelling is tough when I’m hungry.)
And before I forget—if you love the food-science side of Mac and Cheese, Serious Eats does a cool deep-dive, and for cheese sauce troubleshooting, I once relied on The Kitchn’s guide. Also, did you know some folks in the South swear by adding a beaten egg? Still not sure how I feel about that.
Okay, I’ll quit yapping now. Go make some cheesy goodness—and if you drop noodles on the floor, just call it your kitchen's secret ingredient. Happy Thanksgiving, mate!


Ingredients
- 16 oz elbow macaroni
- 2 cups shredded sharp cheddar cheese
- 1 cup shredded Gruyère cheese
- ½ cup grated Parmesan cheese
- 3 cups whole milk
- ¼ cup unsalted butter
- ¼ cup all-purpose flour
- 1 teaspoon Dijon mustard
- ½ teaspoon ground nutmeg
- ½ teaspoon garlic powder
- Salt and pepper to taste
- 1 cup panko breadcrumbs
Instructions
-
1Preheat the oven to 350°F (175°C) and grease a 9x13-inch baking dish.
-
2Cook the elbow macaroni according to package directions until al dente. Drain and set aside.
-
3In a large saucepan, melt butter over medium heat. Stir in flour and cook for 2 minutes, then slowly whisk in milk until smooth and thickened, about 5-6 minutes.
-
4Reduce heat to low and stir in cheddar, Gruyère, and Parmesan cheeses until melted. Add Dijon mustard, nutmeg, garlic powder, salt, and pepper. Mix well.
-
5Add the cooked pasta to the cheese sauce and stir to coat. Transfer to the prepared baking dish.
-
6Sprinkle panko breadcrumbs evenly over the top. Bake for 30-35 minutes until golden and bubbling. Let cool slightly before serving.
Approximate Information for One Serving
Nutrition Disclaimers
Number of total servings shown is approximate. Actual number of servings will depend on your preferred portion sizes.
Nutritional values shown are general guidelines and reflect information for 1 serving using the ingredients listed, not including any optional ingredients. Actual macros may vary slightly depending on specific brands and types of ingredients used.
To determine the weight of one serving, prepare the recipe as instructed. Weigh the finished recipe, then divide the weight of the finished recipe (not including the weight of the container the food is in) by the desired number of servings. Result will be the weight of one serving.
Did you make this recipe?
Please consider Pinning it!!