
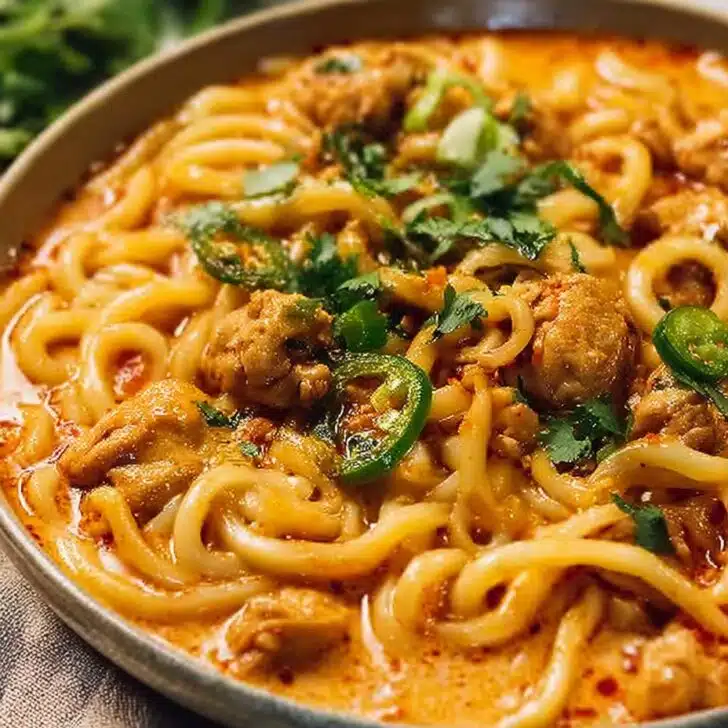
Quick Story—How I Ended Up Making This Udon Bowl
Okay, confession time: my first attempt at Thai curry noodles was honestly a kitchen circus. There was coconut milk on the counter (and, let’s be real, on the dog), I mixed up the curry paste with harissa (oops, fiery surprise), and my udon stuck together into one chewy mass. But the smell filling the house? Totally magic. Ever since then, I’ve tinkered and tweaked my way into a bowl of Thai-Inspired Coconut Red Curry Chicken Udon that now makes my family ask if it’s a special occasion (spoiler: it’s usually a Wednesday night!)


Why I Keep Coming Back to This Bowl
I make this when I want to feel a bit fancy without actually spending hours, or every time I crave something cozy but refuse to order takeout—again. My family goes a bit bananas for this because that creamy coconut sauce seems made for the chewy udon (and yes, it’s definitely not traditional Thai or Japanese, but mashups are my jam). Oh and, if I let the kids help, there's always a stray noodle slapping the backsplash. It’s just part of the process, I guess?
Here’s What You’ll Need (Or Sort Of Need)
- 400g fresh (or frozen, won't tell) udon noodles – I sometimes use dried, but fresh is so bouncy
- 2 big chicken breasts (about 350g), sliced thin – thighs are juicier, but I rarely remember to buy them
- 1 tablespoon vegetable oil – any neutral oil, really
- 2 heaping tablespoons Thai red curry paste – Mae Ploy is what my grandmother swore by, but my wallet likes store brands
- 1 can (400ml) full-fat coconut milk – light coconut works, but why skimp?
- 2 teaspoons fish sauce – soy sauce if you’re in a pinch and/or accidentally ran out (like me last week)
- 1 tablespoon brown sugar – palm sugar is excellent if you have it, but regular is fine
- 1-2 cups mixed veggies, chopped (bell peppers, carrots, snap peas, whatever’s lonely in the fridge)
- 1 teaspoon grated ginger – or just a good squirt from a tube, nobody’s judging
- 2-3 cloves garlic, minced – unless you adore garlic, then go wild
- Green onions, sliced, for garnish (optional but cheerful)
- Lime wedges, for serving
- Fresh cilantro or Thai basil, to sprinkle on top (also optional, but honestly, so pretty)
- Chili flakes or sliced red chili, if you want it spicier
Let’s Get Cooking (Don’t Sweat the Small Stuff)
- First up, prep your noodles: If you’re using fresh udon, give them a quick rinse under warm water to loosen up. Dried ones? Boil as per packet and drain. Set ‘em aside, maybe sneak one, for... quality control.
- Heat oil in a biggish skillet or Dutch oven over medium-high heat. Pop in the chicken and cook until it’s no longer pink—about 4-5 min. Give it a little stir here and there, but I never get all the pieces perfectly brown, to be honest.
- Shove your cooked chicken to the side of the pan, then throw in curry paste, ginger, and garlic. Let it sizzle for a minute, until the kitchen smells like the best takeout place in town. I usually inhale way too deeply right here.
- Mix everything up, then pour in that whole can of coconut milk. Stir until the curry paste melts in (sometimes it looks a bit funky at this stage—don’t worry, it sorts itself out).
- Add fish sauce and brown sugar; give it a taste-test. Sometimes I need a pinch more sugar or a dash more sauce; maybe it's just my mood.
- Toss in your veggies. Let ‘em simmer in the sauce for about 5 mins—until just tender. If you forgot to chop them tiny, they’ll take a smidge longer, no harm done.
- Slip in those cooked udon noodles. Stir them gently—don’t go wild or they break up.
- Once everything’s cozy and steamy, squeeze over some lime, top with green onions, cilantro, and a few chili flakes if you’re feeling bold. Now pause... admire your work. Or just dig in straight away (I can never wait).


Notes from My Totally Imperfect Kitchen
- I tried with light coconut milk and it’s okay in a pinch, but honestly, full-fat gives a much dreamier sauce.
- Don’t panic if your curry paste separates in the oil at first—the coconut milk brings it all together. Promise.
- Actually, I find this tastes even better reheated the next day, though that's rare because leftovers disappear fast around here.
“Experiments” (a.k.a. Variations that Sometimes Work)
- I once threw in prawns instead of chicken. YUM. Beef, on the other hand... eh, not my favorite—got a bit tough. Maybe it was just my cut though?
- Extra veg (baby corn, mushrooms, zucchini), always welcome. No rules here.
- If you’re veggie, tofu works. Press it well or it’ll go wobbly in the sauce.


Do You Need Fancy Gear? Nah.
Look, a wok is ideal for this, but I’ve made it in my old soup pot plenty of times—just use what you’ve got. No need to splash out on new gear (unless you want to, obviously).
How to Store—But Good Luck Having Leftovers
Stick leftover curry udon in an airtight container in the fridge (I mean, if there is any left). Should be good up to 2 days—though honestly, in my house it never lasts more than a day! To reheat, I add a splash of water or coconut milk, stir gently, and zap in the microwave.
How I Love to Serve This (and a Family Quirk)
I pile mine high in a bowl, extra lime on the side (my husband actually squeezes the whole wedge, I like just a squirt). Sometimes we eat with chopsticks... sometimes, just a fork and a big spoon for the slurpy sauce. Oh! And a cold beer on the side. Because, priorities.
If I Could Do It Over Again (Pro Tips From Mistakes)
- I once tried rushing the curry paste step—didn’t let it fry long enough, ended up with oddly bland sauce. Patience is worth it here.
- If your noodles stick together while waiting, dunk them in hot water before adding to the pan. Learned that the sticky way.
- Cutting veggies too thick? They’ll still cook, just needs a bit longer—check with a fork, no shame.
Questions I’ve Actually Gotten About This Recipe
- Do I really need fish sauce? Honestly, it gives that something-something, but if you hate it, soy sauce works, it’s just a bit less funky (in a good way, I mean!).
- Can I use other noodles? Sure! I’ve done rice noodles and even spaghetti in a pinch. Totally edible, just not as chewy and fun as udon.
- Can this be made spicy? Oh absolutely—toss in extra curry paste or fresh chili at the end. Or not, if you’re chili-shy.
- Is this freezer-friendly? Eh, not super. The noodles get a bit mushy. But, the sauce and chicken, yes—you can freeze those separately.
- How do I avoid overcooking the veggies? Just add ‘em near the end; a quick simmer is plenty. And actually, sometimes I add them raw to my bowl and pour hot curry over—bit of crunch, bit of tradition-breaking.
So there it is! A bowl you can play with, mess up a little, and still feel like a kitchen hero at the end. If you try it, let me know how it goes—unless it goes poorly, in which case, blame the curry paste, not me. Cheers!
Ingredients
- 400g fresh (or frozen) udon noodles
- 2 big chicken breasts (about 350g), sliced thin
- 1 tablespoon vegetable oil
- 2 heaping tablespoons Thai red curry paste
- 1 can (400ml) full-fat coconut milk
- 2 teaspoons fish sauce
- 1 tablespoon brown sugar
- 1-2 cups mixed veggies, chopped (bell peppers, carrots, snap peas, etc.)
- 1 teaspoon grated ginger
- 2-3 cloves garlic, minced
- Green onions, sliced, for garnish (optional)
- Lime wedges, for serving
- Fresh cilantro or Thai basil, to sprinkle on top (optional)
- Chili flakes or sliced red chili (optional)
Instructions
-
1First up, prep your noodles: If you’re using fresh udon, give them a quick rinse under warm water to loosen up. Dried ones? Boil as per packet and drain. Set ‘em aside, maybe sneak one, for... quality control.
-
2Heat oil in a biggish skillet or Dutch oven over medium-high heat. Pop in the chicken and cook until it’s no longer pink—about 4-5 min. Give it a little stir here and there, but I never get all the pieces perfectly brown, to be honest.
-
3Shove your cooked chicken to the side of the pan, then throw in curry paste, ginger, and garlic. Let it sizzle for a minute, until the kitchen smells like the best takeout place in town. I usually inhale way too deeply right here.
-
4Mix everything up, then pour in that whole can of coconut milk. Stir until the curry paste melts in (sometimes it looks a bit funky at this stage—don’t worry, it sorts itself out).
-
5Add fish sauce and brown sugar; give it a taste-test. Sometimes I need a pinch more sugar or a dash more sauce; maybe it's just my mood.
-
6Toss in your veggies. Let ‘em simmer in the sauce for about 5 mins—until just tender. If you forgot to chop them tiny, they’ll take a smidge longer, no harm done.
-
7Slip in those cooked udon noodles. Stir them gently—don’t go wild or they break up.
-
8Once everything’s cozy and steamy, squeeze over some lime, top with green onions, cilantro, and a few chili flakes if you’re feeling bold. Now pause... admire your work. Or just dig in straight away (I can never wait).
Approximate Information for One Serving
Nutrition Disclaimers
Number of total servings shown is approximate. Actual number of servings will depend on your preferred portion sizes.
Nutritional values shown are general guidelines and reflect information for 1 serving using the ingredients listed, not including any optional ingredients. Actual macros may vary slightly depending on specific brands and types of ingredients used.
To determine the weight of one serving, prepare the recipe as instructed. Weigh the finished recipe, then divide the weight of the finished recipe (not including the weight of the container the food is in) by the desired number of servings. Result will be the weight of one serving.
Did you make this recipe?
Please consider Pinning it!