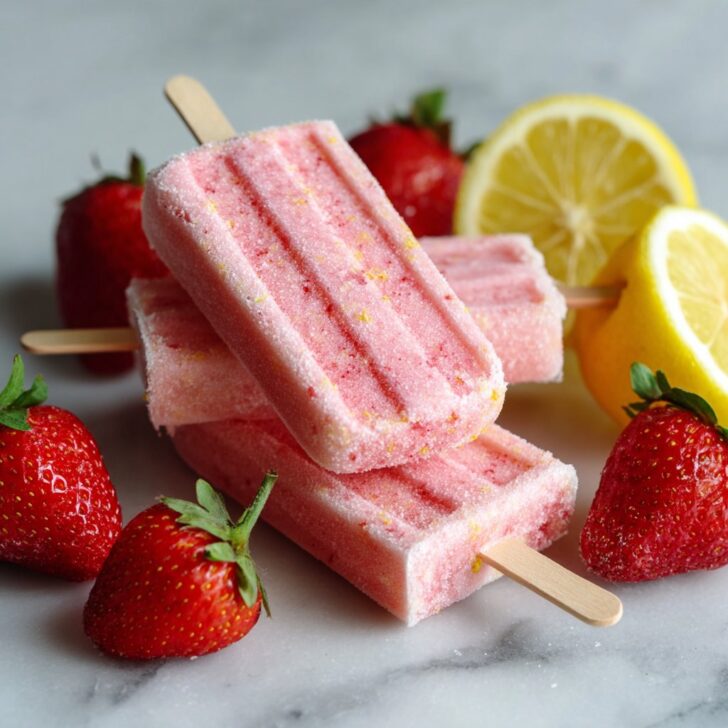
Let Me Tell You About These Popsicles
Okay, so picture this: it’s the middle of July, the dog’s panting on the cool kitchen tiles, and my kids are sticking their heads in the freezer hoping for something, anything, remotely refreshing. That’s how these Strawberry Lemonade Popsicles were born! I remember the first batch—half-sloshed lemonade all over the counter, strawberries rolling onto the floor (where the dog, bless her, took care of them). But they tasted like summer, and now it’s become kind of a tradition. I still make a mess, but at least now I call it "rustic charm." Oh, and if you hear the ice cream truck in the background while you’re making these, just ignore it—you’ve got the better treat anyway.
Why You'll Love This Recipe (At Least, I Do!)
I make these when the strawberries at the market smell like actual candy and lemons are going for a song. My family goes a bit wild for them (sometimes I have to hide a couple at the back of the freezer—don’t tell). These are my go-to for backyard BBQs, partly because they're easy, and partly because people actually ask for the recipe! Honestly, I struggled to get the sweetness right at first—one time it tasted like pure lemon juice, which, eh, wasn’t my finest hour. But if you’re after something zingy, cold, and not too fussy, these are your guys.
What You'll Need (And What You Can Sneak In Instead)
- 2 cups fresh strawberries, hulled and sliced (I sometimes use frozen if I forgot to buy fresh—the texture is a bit different, but still good!)
- ⅓ cup granulated sugar (my gran insisted on caster sugar, but I can’t tell the difference, can you?)
- ½ cup freshly squeezed lemon juice (about 2–3 lemons, or use the bottled stuff if you’re in a rush—I won’t judge)
- 1 cup cold water
- Optional: handful of mint leaves (my neighbour swears by this but it’s not essential)
How I Throw These Together
- In a blender, throw in your strawberries and sugar. Blitz until it’s all pretty smooth—this is usually where I sneak a little taste. If it’s too tart, add a smidge more sugar. If it’s too sweet, a splash more lemon juice will sort it.
- Add the lemon juice and water, then blend again. Sometimes this looks a bit weird and foamy—don’t worry, it settles down once frozen.
- If you’re feeling fancy, chuck in the mint and give it another quick blend. Or, just skip it. (I forget half the time, to be honest.)
- Pour the mixture into popsicle molds. If you don’t have molds, honestly, little paper cups and old teaspoons work just fine. Pop in the sticks. (I always lose the fancy reusable ones and end up using wooden coffee stirrers. They work great!)
- Freeze for at least 4 hours, or until solid. Overnight is best, but who has that kind of patience?
Notes from a (Somewhat) Seasoned Popsicle Maker
- If you overfill the molds, the tops get all icy and hard to pop out—ask me how I know.
- Actually, I find it works better if you run the mold under warm water for a few seconds before trying to get the popsicle out. Saves your wrist.
- Once, I forgot the sugar entirely. Not recommended unless you really like tart things.
Some Variations I’ve Tried (And a Couple I Wouldn’t Repeat)
- I once swapped half the strawberries for raspberries—delicious, if a bit more tangy.
- My friend tried adding coconut milk... honestly, it looked pretty but the flavor was a bit odd (maybe too tropical for me? You might love it though).
- If you’re feeling brave, a splash of limoncello (for the grown-ups) makes a fun twist. Just don’t overdo it or they won’t freeze right; learned that the sticky way.
What If You Don't Have Popsicle Molds?
Honestly, any small cup will do—shot glasses, muffin tins, even empty yogurt pots. Just cover with foil and poke a stick through. I once used a muffin pan and toothpicks (not ideal, but desperate times...).


How to Store These (Or, How to Make Them Last More Than a Day)
Technically, they’ll keep in an airtight container in your freezer for up to a week, but in my house, they’re usually gone by the next afternoon. If you make a big batch, just wrap extras in a bit of parchment or wax paper so they don’t stick together.
Serving Them Up (The Only Real Rule Is: Cold!)
I like to bring them out on a big platter filled with ice cubes, just to show off. My cousin dips hers in a tiny bit of sugar (it’s a bit much, but you do you). These are also perfect for cooling down after a game of rounders in the garden, which is now a family tradition—mainly because it’s the only way I can get everyone to help tidy up afterwards.
Things I’ve Learned the Hard Way (AKA Pro Tips)
- Don’t try to rush the freezing. I once pulled them out after two hours—ended up with slush on a stick. Not the worst, but not what I was going for.
- Actually, letting the popsicles sit for five minutes before serving makes them easier to unmold. But if you forget and they break in half, just call it “deconstructed popsicles”—it sounds fancier.
- Oh, and if you spill the mixture on your shirt, lemon juice and cold water helps get the stains out. Don’t ask how I know, just trust me.
FAQ: Stuff People Actually Ask Me
- Can I use honey instead of sugar?
Sure! I’ve done it, but the flavor is a bit deeper and less "bright" somehow. Just warm it a little so it blends in. Or use agave, if you’ve got that hanging around. - What if my strawberries aren’t super sweet?
No worries—just add a bit more sugar or even a splash of apple juice. Or, if they’re really flavorless, maybe just save them for a smoothie and wait for the good ones to come in. - Can I make these vegan?
They already are, unless you use honey. But double-check your sugar, because some brands are a bit weird about processing (see this handy PETA article if you’re curious). - Do I need to strain out the seeds?
I never bother, but if you’re picky, you can pour the mixture through a sieve before freezing. (I did it once, but it took ages and honestly, didn’t seem worth the faff.) - Where do you get your popsicle molds?
Got mine off Amazon, but I’ve seen cute ones at the pound shop. Honestly, whatever you’ve got will work! Here’s another review roundup if you’re in deep: Serious Eats' recommendations.
So, there you go—my not-so-secret recipe for Strawberry Lemonade Popsicles. Whether you follow it to the letter or just use it as a jumping-off point, I hope it brings a little chill to your summer. If you end up with pink fingers and a sticky floor, well, welcome to the club!


Ingredients
- 2 cups fresh strawberries, hulled and sliced
- ½ cup freshly squeezed lemon juice
- ⅓ cup granulated sugar
- 1 cup water
- 1 tablespoon honey
- 1 teaspoon lemon zest
- ½ teaspoon vanilla extract
- Pinch of salt
Instructions
-
1In a blender, combine strawberries, lemon juice, sugar, water, honey, lemon zest, vanilla extract, and a pinch of salt.
-
2Blend until the mixture is completely smooth and the sugar is dissolved.
-
3Pour the blended mixture evenly into popsicle molds, leaving a little space at the top for expansion.
-
4Insert popsicle sticks and freeze for at least 6 hours, or until fully set.
-
5To release, run the molds under warm water for a few seconds and gently remove the popsicles.
Approximate Information for One Serving
Nutrition Disclaimers
Number of total servings shown is approximate. Actual number of servings will depend on your preferred portion sizes.
Nutritional values shown are general guidelines and reflect information for 1 serving using the ingredients listed, not including any optional ingredients. Actual macros may vary slightly depending on specific brands and types of ingredients used.
To determine the weight of one serving, prepare the recipe as instructed. Weigh the finished recipe, then divide the weight of the finished recipe (not including the weight of the container the food is in) by the desired number of servings. Result will be the weight of one serving.
Did you make this recipe?
Please consider Pinning it!!