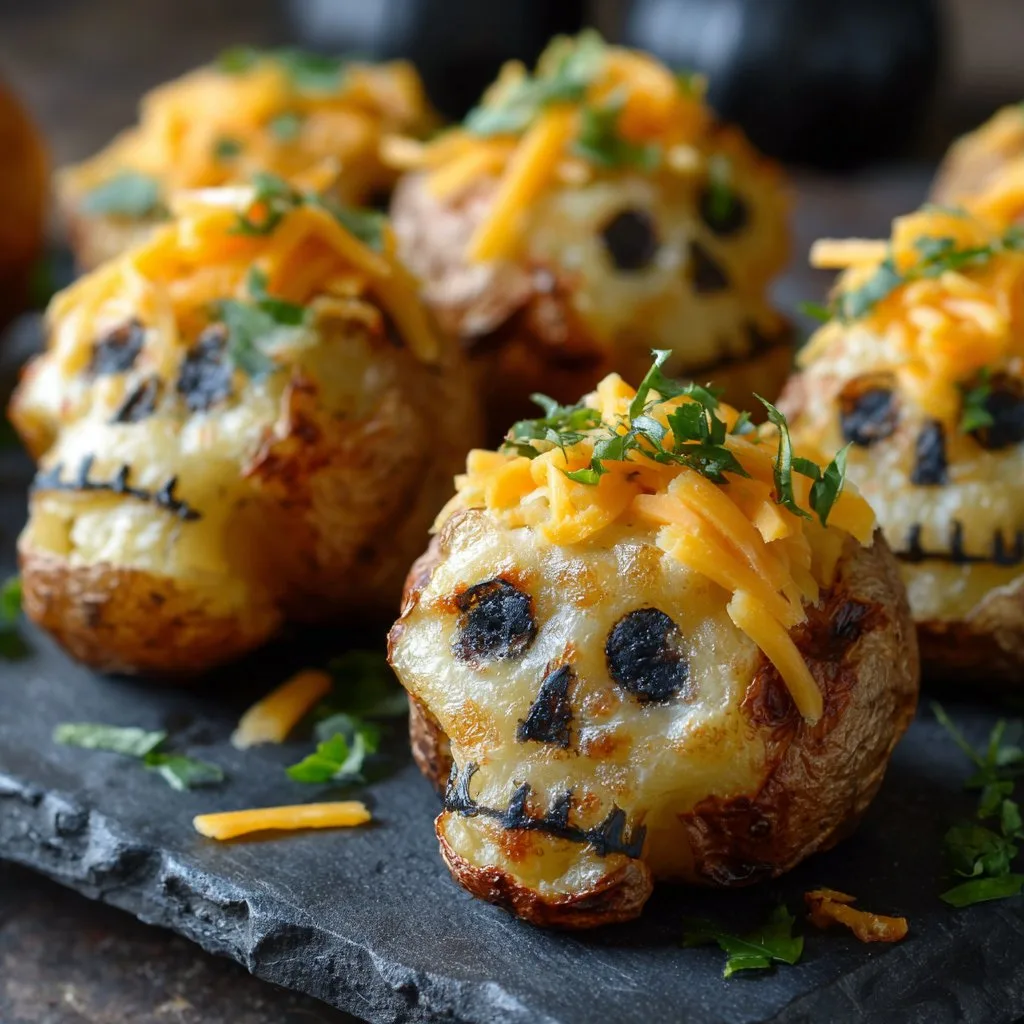
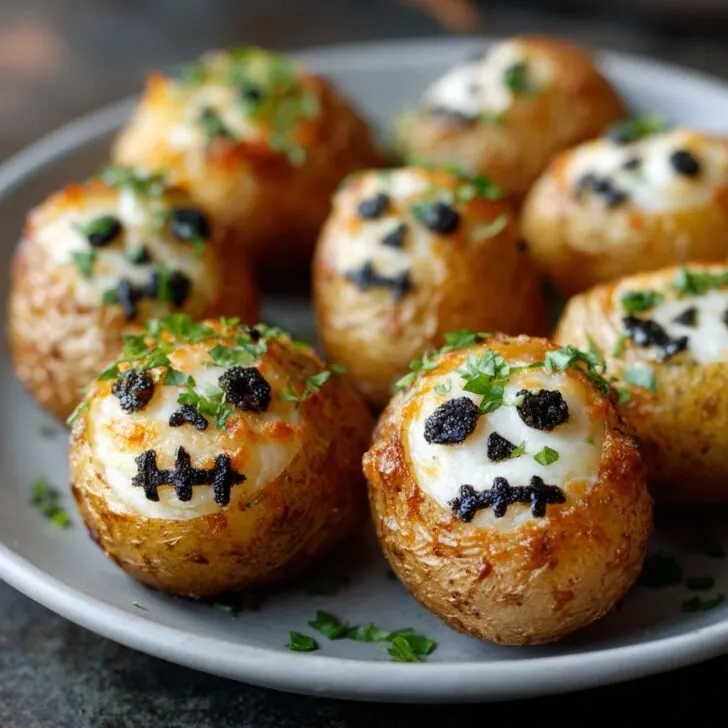
So, About These Potatoes...
Alright, let me set the scene: It's the week before Halloween, the kids are bouncing off the walls, my partner's asking how much dry ice is too much for a punch bowl, and I'm trying to remember where I shoved the plastic cauldron last year. That's usually when I remember these Spooky Halloween Skull Potatoes. Honestly, the first time I tried them, I was mostly just looking for an excuse to use this weird silicone skull mold my cousin gave me (cheers, Jake!). I didn't expect them to be such a hit — but here we are, several Halloweens later, and I swear, the anticipation for these little guys is the real reason for the season. Anyway, if you've ever wanted your kitchen to look like a mad scientist's lab but still end up with something edible, this is for you.
Why You'll Love This (Or at least why I do)
I make these whenever I want to freak out my friends just a bit (they're potato skulls, not real ones, relax), and my kids lose their minds for anything that's both food and a prop (they once put these on toothpicks for marionette battles, no joke). They're crispy on the outside, fluffy inside, and just the tiniest bit unnerving if you shape them right. And bonus: they double as a conversation starter. I used to stress about getting them out of the mold in one piece, but honestly, even the slightly mushed ones look creepier. Win-win?
What You'll Need (or what I can usually find in my fridge)
- About 1 kg (or 2-ish pounds) starchy potatoes like Russets (sometimes I use Yukon Golds — they're a bit creamier. My grandma swore by King Edwards, but let's be real, any potato will do in a pinch)
- 2 tablespoons melted butter (or olive oil if you're feeling virtuous — sometimes I just grab whatever’s on the counter)
- ½ cup grated cheddar cheese (optional; I've used mozzarella, or even left it out when the fridge was looking bare)
- ¼ cup milk (or cream for extra decadence, or plain non-dairy milk — honestly, you won’t taste a huge difference)
- 1 teaspoon garlic powder (or smash a clove, or skip it if you’re not a garlic fan)
- Salt and pepper to taste
- Skull-shaped silicone mold (here’s the one I have: skull silicone baking molds — or see the notes for what to do if you don’t have one)
- Optional: Paprika, chives, or black sesame seeds for accents (in case you want your skulls to have eyebrows)
How To Make 'Em (Step by Step... sorta)
- Prep the potatoes: Peel 'em (unless you want extra texture; sometimes I just give them a good scrub and leave the skins on, don't tell my mother-in-law), chop into chunks, and boil in salted water until they're soft. This usually takes about 15-20 minutes, but I've totally forgotten them and they turned out fine.
- Mash and mix: Drain well and let them steam dry for a few minutes — makes 'em fluffier. Then mash with butter, milk, cheese, garlic powder, salt, and pepper. Taste it now! (This is always where I sneak a bite. Or three.)
- Into the molds: Preheat your oven to 200°C (about 400°F). Grease the skull molds lightly (seriously, don't skip this, they stick like nothing else). Spoon in the mashed potatoes, pressing down to get all the creepy details. Smooth the tops (which'll be the bottoms when you flip them out, but who's judging?).
- Bake: Pop the molds on a tray and bake for 25-30 minutes, until the tops are golden and maybe a bit crispy around the edges. If they look a bit weird at this stage, don't stress — they always do.
- Unmold and decorate: Let 'em cool for 5-10 minutes before flipping out (the potato skulls, not you). If you've got black sesame seeds or chives, stick them in for eyes or cracks. Sometimes I dust with paprika for a "rusty" look. If they break, just squish them back together. Trust me, nobody will care.
Notes From My Many (often messy) Attempts
- Actually, I find it works better if you let the mashed potato cool a little before packing into the molds; they hold their shape more.
- Don't stress if the edges look ragged — makes 'em spookier!
- Bought the wrong kind of potato? Eh, it'll still work. Just maybe don't use new potatoes, they get a bit gummy.
- If the mold looks dodgy coming out, pop them in the freezer for a few minutes before unmolding — learned this one the hard way.
Things I've Tried (and Sometimes Regretted)
- Once tried stuffing them with bacon bits — good in theory, but they sort of exploded out the eyes. Maybe not worth the mess.
- Parmesan on top is pretty tasty, but watch it doesn't burn. Or do burn it, if you’re into the whole charred look.
- For vegan friends, swapped in olive oil and non-dairy cheese. No major complaints. Maybe a bit less creamy, but who's judging?
What You'll Need (But don't freak out if you don't have everything)
- Skull silicone mold (if you don’t have one, you can try shaping the potatoes by hand and poking eyes in with a chopstick — not the same, but still fun)
- Baking tray
- Mixing bowl (or sometimes I just mash straight in the pot)
- Potato masher or fork (once used the bottom of a mug — totally doable!)

How To Store (if you don't eat them all immediately)
Pop any leftovers in an airtight container in the fridge — they’ll keep for a couple days. Though honestly, in my house, they never last more than a night. Reheat in the oven to crisp them back up (microwave makes 'em a bit sad, in my opinion).
How We Serve These (and some weird traditions)
I usually pile them on a platter with little bowls of ketchup and sriracha (the kids call it "blood dip"), but last year my partner made a giant veggie graveyard for them to "haunt." You can also put them on toothpicks for creepy party snacks — or just eat 'em off the tray with your fingers. I won’t tell.
The Stuff I Learned The Hard Way (Pro Tips)
- I once tried rushing the unmolding step because I was impatient — ended up with a tray of potato rubble. Let them cool, trust me.
- Don’t overfill the molds or they won't bake evenly. Actually, I find it works better if you understuff them just a smidge.
- Don’t skip greasing the molds, unless you want a skull extraction operation on your hands.
FAQ (Real Questions, Real Answers...and One Rant)
- Can I make these ahead?
- Yep — chill in the fridge, then reheat in the oven. They crisp up again pretty well. (I think they taste even better the next day, but maybe that's just me.)
- Do I need a skull mold?
- Not really. You can freehand them, or shape with a spoon, or even use a cookie cutter. But the mold does make 'em extra creepy. Found mine online — check this round-up of baking molds if you're looking for options.
- What if I don't eat dairy?
- No worries — swap butter for olive oil, cheese for vegan cheese or just skip it. Still yum. (Though, you might want to up the seasoning a bit if skipping the cheese.)
- Could I freeze these?
- Sort of. They'll freeze fine after baking, but they do lose some texture. Still edible, just not quite as fluffy. If you figure out a better way, let me know!
- Do they have to be baked?
- Actually, on second thought, you could probably broil them for a crispier top — but watch 'em close, they go from golden to burnt before you know it.
Oh, and one last thing: don't be afraid to make a mess. Halloween is all about a little chaos, isn't it? If you want more spooky inspiration, I stumbled across these fun Halloween recipes at Delish and honestly, some of them are just bonkers.
Anyway, if you try these, let me know how it goes — or what wild variations you come up with. Happy haunting!
