
If you haven't tried Sourdough Onion Rings before, you're in for a treat (and probably a mess on your counter, just warning you). Honestly, I first made these on a sticky summer afternoon when I was craving something crunchy, but my bread starter was smugly sitting in the fridge, begging to be used for more than just bread. So I thought, "Why not onion rings?" and just went for it. I remember the first batch being a bit more glue than goo, but once I sorted out the batter thickness, even my neighbor, who usually makes a face at anything with sourdough, came back for seconds. So hey, sometimes the experiments pay off!


Why You'll Love This (Or At Least I Hope You Do)
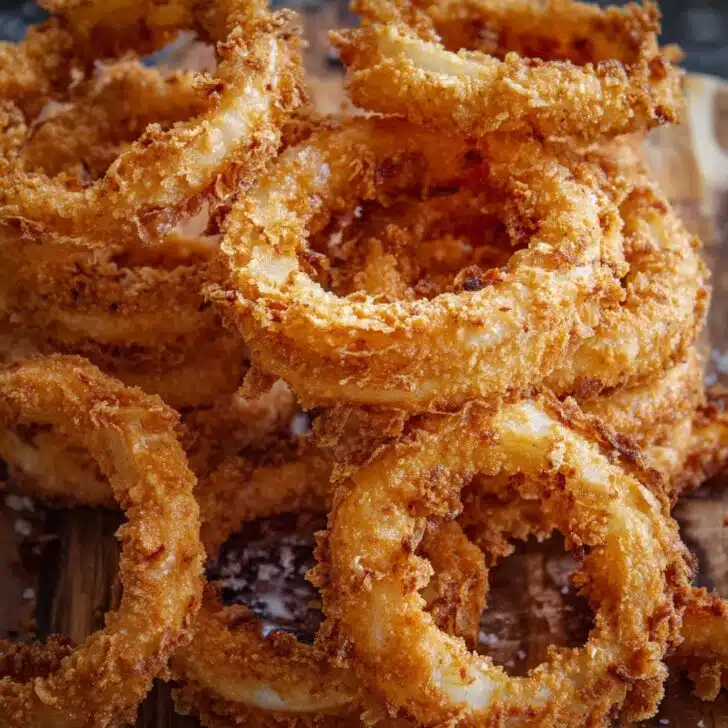
I whip these up when I've got leftover sourdough starter staring at me—I mean, waste not, want not, right? My family goes absolutely bananas for these (especially served up with a heaping pile of ketchup—don’t judge!). They're impossible to eat quietly, so if you’re watching TV, abandon all hope. Also I love how the tang of the sourdough starter makes the coating super flavorful, and honestly, after one too many soggy attempts, this one is finally crispy. (Just don't ask me about the oven-baked version. We'll get to that…)
What You’ll Need (aka Ingredients I Had on Hand)
- 2 large yellow onions (or red onions if you want it a bit sweeter; I sometimes grab red when I'm out of yellow—and they’re prettier, too)
- 1 cup bubbly sourdough starter (mine’s about 100% hydration, but don't sweat it—thicker or thinner works, just adjust the flour a smidge)
- ½ cup all-purpose flour (to start with; sometimes I sneak in a couple tablespoons more if it looks runny—my grandma swore by King Arthur but honestly just use what’s in your cupboard)
- ¼ cup cornstarch (I’ve skipped it in a pinch, but it really does make 'em lighter)
- 1 teaspoon baking powder (I’ve forgotten this before… don’t skip it, or they get pretty dense)
- 1 teaspoon kosher salt (table salt is fine, just use a little less)
- ½ teaspoon black pepper (or smoked paprika if you’re feeling wild)
- Up to ¾ cup cold seltzer water (or regular water, but I think the fizz makes it better—maybe it’s all in my head)
- Vegetable oil, for frying (enough for about 2 inches in your pan)
How I Throw These Together (a.k.a. Directions)
- Peel your onions and slice them into rings about ⅓ inch thick. (Don’t fuss with a ruler here, just not paper-thin or too chunky.) Separate the rings gently. This is where I eat the tiny inside bits—chef’s treat!
- In a biggish bowl, whisk together the sourdough starter, flour, cornstarch, baking powder, salt, and pepper until it’s mostly smooth, kinda like pancake batter. If it looks like sludge, splash in some of the seltzer, a bit at a time, until it’s thick but loose enough to coat a ring without racing off.
- Heat the oil in a deep skillet or a saucepan (medium-high-ish—aim for about 350°F, but hey, I just drop in a battered crumb and see if it sizzles happily).
- Toss your onion rings in a spoonful of flour if you want (this helps the batter stick, or so I’ve read, but I sometimes forget—still works).
- Dunk rings into the batter a handful at a time. Pull them out letting the excess drip off, then gently lower them into the hot oil. Maybe do a test one first. Don’t crowd the pan or you’ll have a big stuck-together blob (been there).
- Fry for about 2–3 minutes per side, flipping once, until gorgeously golden and crunchy. If they look pale, leave ‘em a hair longer. Drain on a wire rack or paper towels (or frankly, just on an old baking sheet—it all works).
- Repeat with the rest, working in batches. And yes, I totally sneak one right off the rack—just blow on it first. Burnt tongues are real, folks.
- Sprinkle extra salt while they’re still hot, then eat them ASAP. They start to lose their snap after a while (though honestly they never last long in my house!).


Notes From My So-Called "Experimentation"
- The batter should clump gently on the onion—if it barely sticks, add a smidge more flour; if it’s cement, extra seltzer helps.
- I once tried half-and-half sourdough starter and beer instead of seltzer. Not bad, but a little softer. But, on second thought, more fun if you’re cooking for a crowd.
- And if you’re out of cornstarch—potato starch is decent too!
If You Want To Mix Things Up
- Used rye starter once, thinking I was clever. Tasted earthy, but maybe too earthy for onion rings?
- Spice it up! A pinch of cayenne, or a little smoked paprika in the batter changes the whole vibe.
- Actually tried baking these at 425°F… not my greatest moment. They just went limp (the dog liked them, at least!)
- Oh, tried soaking the onions in buttermilk first and it made them a little sweeter, but also made everything messier—I’m undecided.


Gear You *Think* You Need (but Probably Don’t)
A deep-fry thermometer is nice if you have it; but honestly, throwing in a little bit of batter to test the oil works just as well. Don’t have a wire rack? A big plate with paper towels is my usual move. Also, tongs are helpful, but I’ve burnt my fingers and survived (not recommended, obviously).
How To Store 'Em (If They Last That Long)
Technically, you can keep any leftovers in an airtight container in the fridge for a day or two, and re-crisp in the oven at 400°F for about 8 minutes. That being said, in my house, a tray doesn’t ever see sunrise. They do get a little less crunchy after a day, but I kind of like them that way for late-night munching.
Serve It Up—Family Style!
We pile these in a big bowl and let everyone grab their own (watch the last handful—elbows may fly). Best with cold beers, lemony aioli, or just classic ketchup. My sister likes them with hot sauce, but I can’t handle the heat. Sometimes, we have them with burgers or even a salad, if we’re pretending to be balanced.
Lessons Learned (So You Don't Have To Repeat My Blunders)
- Don't rush the batter—one time I skipped whisking and ended up with the world's most floury bites. Not cool.
- Letting the onion rings drain well after frying is key; stacking them right away just turns everything sad and floppy.
- I once tried using twice as much sourdough—came out like doughnuts. Delicious, but not what I was aiming for; maybe next time as dessert?
People Actually Ask Me… (And I Don't Mind!)
- "Can I use discard sourdough starter?" Yep! Actually, I like discard better sometimes—gives more zing, less rise.
- "Is there a way to make these gluten-free?" Sure, swap the flour for a 1:1 gluten-free blend and double-check your starter is gluten-free.
- "Oil temperature, really?" If you’ve got a candy thermometer, great. If not, just look for strong bubbling but not crazy smoke. (Been there, had to open all the windows.)
- "Can I air-fry these?" Probably, but they need a much thicker coating or they look patchy—I wasn’t wowed, but maybe you’ll have better luck?
- "Are they better the next day?" I think so (if you like soft, tangy leftovers), but for best crunch, eat 'em fresh.
If you made it this far, thanks for sticking with my rambling! I’ll be over here, scraping batter off my counter and plotting my next kitchen adventure. Cheers!
Ingredients
- 2 large yellow onions (or red onions if you want it a bit sweeter; I sometimes grab red when I'm out of yellow—and they’re prettier, too)
- 1 cup bubbly sourdough starter (mine’s about 100% hydration, but don't sweat it—thicker or thinner works, just adjust the flour a smidge)
- ½ cup all-purpose flour (to start with; sometimes I sneak in a couple tablespoons more if it looks runny—my grandma swore by King Arthur but honestly just use what’s in your cupboard)
- ¼ cup cornstarch (I’ve skipped it in a pinch, but it really does make 'em lighter)
- 1 teaspoon baking powder (I’ve forgotten this before… don’t skip it, or they get pretty dense)
- 1 teaspoon kosher salt (table salt is fine, just use a little less)
- ½ teaspoon black pepper (or smoked paprika if you’re feeling wild)
- Up to ¾ cup cold seltzer water (or regular water, but I think the fizz makes it better—maybe it’s all in my head)
- Vegetable oil, for frying (enough for about 2 inches in your pan)
Instructions
-
1Peel your onions and slice them into rings about ⅓ inch thick. (Don’t fuss with a ruler here, just not paper-thin or too chunky.) Separate the rings gently. This is where I eat the tiny inside bits—chef’s treat!
-
2In a biggish bowl, whisk together the sourdough starter, flour, cornstarch, baking powder, salt, and pepper until it’s mostly smooth, kinda like pancake batter. If it looks like sludge, splash in some of the seltzer, a bit at a time, until it’s thick but loose enough to coat a ring without racing off.
-
3Heat the oil in a deep skillet or a saucepan (medium-high-ish—aim for about 350°F, but hey, I just drop in a battered crumb and see if it sizzles happily).
-
4Toss your onion rings in a spoonful of flour if you want (this helps the batter stick, or so I’ve read, but I sometimes forget—still works).
-
5Dunk rings into the batter a handful at a time. Pull them out letting the excess drip off, then gently lower them into the hot oil. Maybe do a test one first. Don’t crowd the pan or you’ll have a big stuck-together blob (been there).
-
6Fry for about 2–3 minutes per side, flipping once, until gorgeously golden and crunchy. If they look pale, leave ‘em a hair longer. Drain on a wire rack or paper towels (or frankly, just on an old baking sheet—it all works).
-
7Repeat with the rest, working in batches. And yes, I totally sneak one right off the rack—just blow on it first. Burnt tongues are real, folks.
-
8Sprinkle extra salt while they’re still hot, then eat them ASAP. They start to lose their snap after a while (though honestly they never last long in my house!).
Approximate Information for One Serving
Nutrition Disclaimers
Number of total servings shown is approximate. Actual number of servings will depend on your preferred portion sizes.
Nutritional values shown are general guidelines and reflect information for 1 serving using the ingredients listed, not including any optional ingredients. Actual macros may vary slightly depending on specific brands and types of ingredients used.
To determine the weight of one serving, prepare the recipe as instructed. Weigh the finished recipe, then divide the weight of the finished recipe (not including the weight of the container the food is in) by the desired number of servings. Result will be the weight of one serving.
Did you make this recipe?
Please consider Pinning it!