
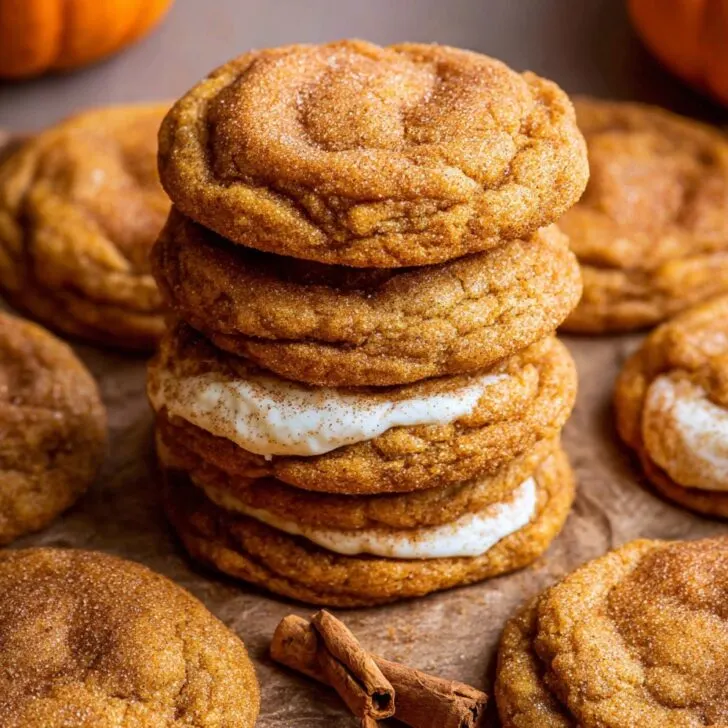
So, Ready for Some Pumpkin Cheesecake Cookies?
I have to laugh, because the first time I made these, I was elbows-deep in pumpkin puree and managed to drop a spatula right into the batter. Still, when my cousin came over and tried one, she just went "Who cares about spatulas? Make these again." So here I am, sharing my fall (or honestly, anytime) cookie obsession with you. If you hear me humming John Denver while baking, just ignore it. Or hum along! These cookies are cozy, squishy, and have just enough cheesecake filling to make you forget whatever it was you were supposed to be doing instead.


Why You'll Love This (No, Really)
Listen, I whip up a batch of these when it's rainy, or—full disclosure—when I find half a block of cream cheese staring at me from the fridge. My brother-in-law, who claims he "doesn't like pumpkin," can eat a half-dozen before dinner (he blames the dog for the missing cookies, but the dog is not that sneaky). These are basically what would happen if cheesecake and pumpkin pie had a lovechild, and then it grew up to be a rebellious, slightly underbaked cookie. Sometimes the filling oozes out a bit. So what? More for me to lick off the parchment.
Here's What You'll Need (Plus a Few Swaps)
- 1 ½ cups all-purpose flour (Or use oat flour if you're feeling fancy; I've tried it, it's fine. My neighbor uses gluten free—works okay but a bit crumbly.)
- ½ teaspoon baking soda (I've accidentally used baking powder instead. The world did not end, but they're puffier.)
- ½ teaspoon salt (Some days, a pinch more.)
- 1 teaspoon pumpkin pie spice (Or mix of cinnamon, nutmeg, clove, if you're the spice-blending type. My grandmother swore by a splash of ground ginger, but it's not a deal breaker.)
- ½ cup unsalted butter, room temp (Salted is OK, just skip a little of the extra salt.)
- 1 cup brown sugar, packed (I've used coconut sugar. Different vibe, still sweet.)
- ¼ cup granulated sugar
- ¾ cup pumpkin puree (Canned is honestly easiest. But roasted and mashed works if it’s what’s in your pantry.)
- 1 large egg
- 1 teaspoon vanilla extract
- Filling: 4 oz cream cheese, softened (Light works, but never feels as rich. Go full-fat if you can.)
- 3 tablespoons sugar (I've forgotten and used icing sugar before—no disaster.)
- ¼ teaspoon vanilla extract
How To Make Them (Chaos Optional)
- Start with the filling. Mix cream cheese, sugar, and vanilla in a bowl (I use a fork, less washing up). Mash until smooth—lumpy is normal if your arm gets tired. Scoop teaspoon-sized blobs onto a plate and freeze while you do the dough. They need like 20 minutes, but honestly, just until firm-ish.
- Now, the dough. In a big mixing bowl, cream butter and both sugars together till it's light and fluffy, or your patience runs out (I use a wooden spoon; mixer is for overachievers). Add pumpkin, egg, and vanilla. Stir till combined. It'll look a bit odd or separated—don't panic.
- In a separate bowl (or, just a heap on the countertop—kidding; use a bowl), whisk flour, baking soda, salt, and pumpkin spice. Fold dry into the wet stuff. Dough will be stickier than regular cookies? That's normal. I sometimes pop it in the fridge for 15 min if it's too gooey to handle.
- Assembly: Take a dough blob (about 2 tbsp), flatten a bit in your hand, and plop a frozen cream cheese bit in the middle. Wrap the dough around it—don’t stress if the filling peeks out. They look rustic, and, let's be real, anyone judging your cookie aesthetics is missing the point.
- Arrange on lined baking sheet, spaced because they spread a bit. I usually get 12-16, depending on my generosity per cookie.
- Bake at 350°F (175°C) about 12-15 minutes. Edges set but middles soft, that's your mark. If you're unsure, just poke one. If it's not soupy, it's done (or almost; overbaked is sad). Cool for as long as you can wait—but really, who can?
Notes That Might Save Your Sanity
- If you add too much pumpkin (easy mistake), just throw in a little more flour—eyeball it. They'll be fine.
- The dough sometimes sticks like glue. Rubbing a bit of oil on your hands helps. Or just accept sticky fingers as part of the journey.
- I once doubled the filling and ended up with goo everywhere. Lovely, but not tidy.
Alternate Experiments (Some Hits, One Miss)
- Swapped half the flour for ground pecans once—tasted amazing, but cookies fell apart. Wouldn't recommend unless you like crumbs.
- Threw in a handful of chocolate chips. Worked surprisingly well. White chocolate? Not so much; too sweet, in my opinion.
- Used maple extract instead of vanilla. Made it smell like pancakes, which I’m not mad about.


Gear (But Don't Sweat It)
A mixer is nice, but elbow grease works. No parchment? Butter the tray well, or use foil (it sticks a bit but hey, cookie bits are still cookie bits). My measuring cups are all missing, so when desperate, I use a clean coffee mug and guess. No complaints yet.
How to Store (But Why Would You?)
Technically you can store these in an airtight box in the fridge 4 days. In reality, they've never survived longer than 24 hours in my home (my neighbor's "just stopping by" is a dead giveaway). If you do manage leftovers, pop them in the microwave for 10sec to get the cheesecake soft again. Freezer option works too—thaw before eating but they're great cold.
How I Like to Serve 'Em
Warm from the oven, always—sometimes with a scoop of vanilla ice cream if I'm feeling extra. My cousin dunks hers in chai. At Thanksgiving, these round out dessert after pumpkin pie (yes, we double-pumpkin; no apologies).
Things I've Learned the Hard Way
- Once tried baking at a higher temp to "save time"—only got sad, burnt bottoms and raw insides.
- Chilling the dough really does help with shaping, even if you're impatient like me.
- The prettiest cookies sometimes ooze. More flavor, less glamour—embrace it.
FAQ (For Real, People Have Asked!)
- Do I have to freeze the filling?
- Short answer: yes, or you'll have a total mess. But even with half-frozen it works—just messier than Instagram would like.
- Can I use homemade pumpkin puree?
- Sure can! Just strain it a bit so it's not watery. One time, mine was too runny and I had to add a ton more flour. Lesson learned.
- Why do my cookies look funky?
- They sometimes come out odd-shaped—happens to me all the time. Still tasty. If you want them perfectly round, chill the dough longer and use a cookie scoop. But, you know, life is short.
- Are these cookies super sweet?
- Not overly, I think. But if you're really sensitive, drop the brown sugar by a couple tablespoons. Or toss in a pinch more salt like I do sometimes.
- Can I double this recipe?
- Yup, especially if you're feeding a crowd. Keep an eye on the first batch—every oven's weird. Oh, and you'll need a bigger bowl. Once I tried making 3x as much and ran out of counter space... Not my most organized moment.
Oh, before I forget—if you notice your cat prowling the cooling rack, that's not for flavor, it's for mischief. (Ask me how I know...)
Ingredients
- 1 ¾ cups all-purpose flour
- ½ teaspoon baking soda
- ¼ teaspoon salt
- 1 teaspoon ground cinnamon
- ¼ teaspoon ground nutmeg
- ½ cup unsalted butter, softened
- ¾ cup granulated sugar
- ¼ cup light brown sugar, packed
- ¾ cup pumpkin puree
- 1 large egg
- 1 teaspoon vanilla extract
- 4 oz cream cheese, softened
- 2 tablespoons powdered sugar
Instructions
-
1Preheat oven to 350°F (175°C). Line a baking sheet with parchment paper.
-
2In a medium bowl, whisk together flour, baking soda, salt, cinnamon, and nutmeg.
-
3In a large bowl, cream together the butter, granulated sugar, and brown sugar until light and fluffy. Add egg, vanilla extract, and pumpkin puree, and mix until combined.
-
4Gradually add the dry ingredients to the wet ingredients and mix until just combined.
-
5In a small bowl, blend the softened cream cheese with powdered sugar until smooth. Scoop small spoonfuls of cookie dough onto the prepared sheet. Flatten slightly, place a dollop of cheesecake filling in the center, then cover with a bit more dough and seal edges.
-
6Bake for 10-12 minutes, or until edges are set. Allow to cool slightly before transferring to a wire rack.
Approximate Information for One Serving
Nutrition Disclaimers
Number of total servings shown is approximate. Actual number of servings will depend on your preferred portion sizes.
Nutritional values shown are general guidelines and reflect information for 1 serving using the ingredients listed, not including any optional ingredients. Actual macros may vary slightly depending on specific brands and types of ingredients used.
To determine the weight of one serving, prepare the recipe as instructed. Weigh the finished recipe, then divide the weight of the finished recipe (not including the weight of the container the food is in) by the desired number of servings. Result will be the weight of one serving.
Did you make this recipe?
Please consider Pinning it!!