
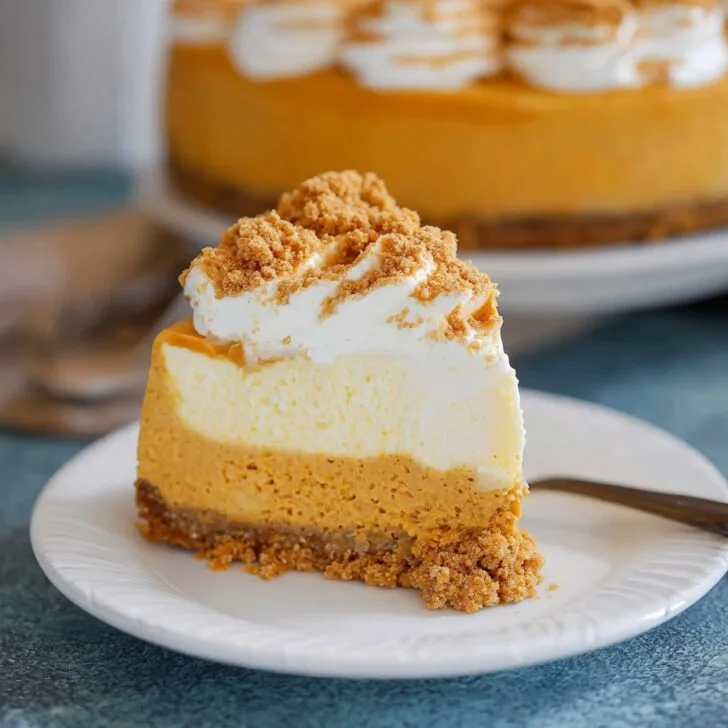
Let's Talk About Pumpkin Biscoff Cheesecake, Friend
You know those times when you've got the urge to bake something that tastes like autumn wrapped up in a snuggly blanket? That's when I go rummaging for the pumpkin purée and a packet of Biscoff (and, shocker, sometimes the jar of Biscoff spread too—don't judge). This Pumpkin Biscoff Cheesecake isn't just a crowd-pleaser—it's literally started arguments over the last slice in my house. True story: last Thanksgiving, my usually pretty chill cousin tried to barter his Spotify password in exchange for the last wedge. No dice. Also, once my cat tried to eat the leftover crust crumbs, which, if you knew her, you'd realize that's high praise.
Sometimes, when I'm feeling extra nice (or plant-based!), I whip up the vegan version. There was a learning curve—you don't wanna know what happened the first time I tried vegan cream cheese, let's just say it was more abstract art than cheesecake—but now I've cracked it.
Why You'll Genuinely Love This (Or: Why I Make It Way Too Often)
Honestly, I make this whenever I want to be the baking hero without totally melting down over a complicated recipe. My family goes nuts for it, especially because the combination is kind of like "pumpkin pie but with a plot twist"—and that cinnamon Biscoff crust? Oh man, if I had a quid for every time someone asked for the recipe at a party... (Or a dime, or a buck—pick your currency!) And between us, I've had my share of cheesecake cracks and sunken middles—it happens. That's what whipped coconut cream is for.
What You'll Need (Plus a Few Cheeky Swaps)
- 250g (about 2 ½ cups) Biscoff cookies (Lotus brand is the classic, but the Aldi dupe works fine, promise)
- 80g (about 6 tbsp) vegan butter or regular unsalted butter—honestly, I've even used coconut oil in a pinch
- 400g (roughly 1 ¾ cups) vegan cream cheese (Violife, Tofutti, or just regular if you're not bothered)
- 200g (just under 1 cup) pumpkin purée—not pie filling (I made that mistake once and wow, was the result sweet enough to make my teeth hurt)
- 120g (½ cup plus a bit) caster sugar (sometimes I go half brown sugar for a caramelly vibe)
- 3 tablespoon cornstarch (or arrowroot—my grandmother swore by cornstarch though)
- 2 teaspoon pumpkin spice mix (or: 1 teaspoon cinnamon, ½ teaspoon ginger, ¼ teaspoon nutmeg, and the smallest whisper of cloves)
- 1 teaspoon vanilla extract (the real stuff if you can swing it; otherwise, supermarket own-brand will do)
- Pinch of salt—don’t skip this! Makes the flavors pop
- Optional: vegan Biscoff spread (¼ cup for swirling on top, I mean, who are we kidding, extra is never bad)
Here’s What to Do (or, How I Usually Bungle and Then Fix It)
- Blitz Your Biscuits: Smash those Biscoff cookies into a powder. Food processor is ideal but stick ‘em in a bag and bash with a rolling pin if you want a bit of kitchen therapy.
- Mix in Butter: Melt your vegan butter (or regular, or that coconut oil if, like me, you forgot to buy butter) and stir it into the crumbs until it’s like damp sand. Press it into the bottom of a 9-inch springform tin. Don’t sweat it if the edges aren’t perfect—I certainly don’t.
- Bake the Base: Give it 10 mins at 170°C (340°F). Don't wander off to watch TV—I forgot once and, well, smoky kitchens are not part of this recipe.
- Whip Up the Filling: Beat the cream cheese, pumpkin purée, sugar, cornstarch, spice, vanilla, and salt together. Taste it for spice (and sneak a spoonful, you won’t regret it). If it looks weirdly lumpy at first, don’t worry, it’ll smooth out.
- Assemble: Pour the filling over the cooled crust. Dollop or swirl some Biscoff spread on top for bonus points—sometimes I skip this if I’m in a hurry. The swirl never looks perfect but somehow gets prettier after baking.
- Bake: 45-55 minutes at 160°C (320°F). It’ll jiggle slightly in the middle—you do not want to bake till totally set or it gets rubbery. This is where I get nervous every. single. time.
- Cool (And Chill): Let it cool down slooowly to room temp (open the door just a crack; I know it takes ages). Then refrigerate at least 4 hours, preferably overnight. I always think it tastes even better the next day. Patience isn’t my strong suit though.
Stuff I've Learned By Messing It Up
- Once I put in too much pumpkin and it just wouldn't set—I mean, it was still delicious as spoon pudding, but not much of a cheesecake.
- If your crust feels oily, chuck the tin in the fridge for about half an hour pre-bake. Trust me, it works.
- Cornstarch does the job but arrowroot actually gives a silkier set, if you want to get a bit fancy.
Cheesecake Tweaks (Some Winners, Some...Less So)
I once tried this with ginger nut biscuits instead of Biscoff—too spicy for my taste, actually. But digestive biscuits work pretty well for a milder base (a mate of mine swears by Hobnobs, so that’s another option). If you love chocolate, a swirl of vegan chocolate spread isn't half bad, and adding chopped pecans on top gives some lovely crunch. One time I tried making it with a walnut crust because I was out of cookies...let’s just say walnuts belong in brownies, not cheesecakes (my humble opinion, anyway).
Bits and Bobs You'll Need (Or Not)
- Springform tin (but honestly, I once used a deep cake pan lined with parchment and pried it out—messy but it worked)
- Stand mixer or just a whisk and some elbow grease—good arm workout
- Food processor for crumb base, though see my bag-and-rolling-pin trick above
")
")
How to Store It So It Even Survives (Not Likely in My House)
Keep it covered in the fridge for up to 5 days. Though honestly, in my place it’s usually inhaled within 24 hours. You can also freeze individual slices—wrap in foil, then stash in a box, just don’t expect it to taste quite as dreamy after defrosting, though still decent. For more on freezing vegan cheesecakes, Lazy Cat Kitchen does a good roundup.
How We Like to Serve (A Family Quirk or Two)
I usually serve this with a big dollop of coconut whipped cream, and if it’s feeling like an extra snazzy day, a little drizzle of maple syrup does wonders. Once my nephew piled on mini marshmallows and called it "campfire cheesecake"—it was messy but kind of adorable. Coffee on the side is basically non-negotiable in our house. Oh, and here's a great tutorial for coconut whipped cream if you've never done it!
Mistakes I Genuinely Regret (And You Might Too)
- Don't skip cooling properly. I tried to cheat and stuck it straight in the fridge once—ended up with condensation and a soggy crust. Sad times.
- Bake on a tray. The first time my springform leaked pumpkin filling oozing into the oven, let's just say my kitchen did not smell delicious after.
- Resist the urge to slice before it's fully chilled. I know, it’s hard, but it just turns to mush otherwise.
Burning Questions I’ve Actually Heard People Ask
- Can I use fresh pumpkin instead of tinned? Sure thing! Just roast and mash—make sure it’s not watery, I learned that the hard way. Squeeze out any liquid with a kitchen towel first.
- Is Biscoff vegan? Yup, the classic biscuits and spread are! But always double-check the label 'cause companies love to change things up.
- Can I make it gluten-free? I've tried with gluten-free cookies (the Schär ones do alright). Texture’s a hint different but still gets hoovered up at home.
- Do I have to use a springform pan? Nah, but it makes life easier. If not, just line whatever dish you use with lots of parchment so you can sort of lift it out, even if it looks wonky.
- Why is my filling a bit wobbly? That’s normal! It’ll firm up in the fridge. If it’s still soup after a good chill, probably too much pumpkin or not enough starch—done that myself before.
Phew, that’s me done! Think of this as a choose-your-own-adventure cheesecake. Have fun, take a few risks, and if you end up eating it right out of the tin with a spoon at midnight... well, I certainly wouldn’t judge.
")
")
Ingredients
- 250 g Biscoff cookies (about 2 cups), crushed
- 80 g vegan butter or regular unsalted butter, melted
- 400 g vegan cream cheese or regular cream cheese
- 200 g pure pumpkin puree
- 120 g granulated sugar
- 100 g Biscoff spread (cookie butter)
- 1 teaspoon ground cinnamon
- ¼ teaspoon ground nutmeg
- 2 tablespoon cornstarch
- 1 teaspoon vanilla extract
- Pinch of salt
Instructions
-
1Preheat your oven to 170°C (340°F). Grease a 9-inch springform pan and line the bottom with parchment paper.
-
2Combine crushed Biscoff cookies and melted vegan butter in a bowl. Mix until you have a damp sand-like texture. Press firmly into the bottom of the pan to form the crust.
-
3In a large bowl, blend vegan cream cheese, pumpkin puree, granulated sugar, Biscoff spread, cinnamon, nutmeg, cornstarch, vanilla extract, and a pinch of salt until smooth.
-
4Pour the filling over the prepared crust and smooth the top. Bake for 45-50 minutes, or until the center is just set but still slightly wobbly.
-
5Remove from oven and allow to cool completely at room temperature. Chill in the refrigerator for at least 4 hours, or overnight, before serving.
-
6Optional: Decorate the chilled cheesecake with dollops of whipped coconut cream and extra Biscoff cookie crumbs before slicing.
Approximate Information for One Serving
Nutrition Disclaimers
Number of total servings shown is approximate. Actual number of servings will depend on your preferred portion sizes.
Nutritional values shown are general guidelines and reflect information for 1 serving using the ingredients listed, not including any optional ingredients. Actual macros may vary slightly depending on specific brands and types of ingredients used.
To determine the weight of one serving, prepare the recipe as instructed. Weigh the finished recipe, then divide the weight of the finished recipe (not including the weight of the container the food is in) by the desired number of servings. Result will be the weight of one serving.
Did you make this recipe?
Please consider Pinning it!!