
Let Me Tell You About My Basmati Rice Obsession
So, here's the thing—I used to stink at cooking rice. Like, truly. My first few attempts were either gluey mush or weirdly crunchy (not a vibe). Once, I actually forgot to rinse it and wondered why my rice tasted like, well, the inside of a cardboard box. But! A few rice-tastrophes later, I finally figured out a method for perfect basmati rice—fluffy every time. Now, making this is second nature. I put on some good tunes, get my favorite saucepan out, and honestly, it's almost meditative (unless my cat jumps up on the counter again, but that's another story).
Why I Keep Coming Back to This Recipe
I make this basmati rice when I want something comforting but still impressive (my uncle thinks I have a secret chef hiding in the pantry—he's wrong). My family goes crazy for it on curry night, especially since I finally figured out how not to turn it into a gluey mess. If you’ve ever gone from too-dry to too-soggy in one week, hey, you’re not alone—I think we’ve all been there, with that little cloud of starch dusting the stove.
Here's What You'll Need
- 1 cup basmati rice (I’m partial to Tilda, but if you're in a hurry, supermarket own-brand totally works)
- 1.5 cups cold water (sometimes I wing it and use a little less—depends how humid the day is, weirdly)
- ½ teaspoon salt (or just a pinch, depending on your saltiness level; sometimes I skip it and no one's complained yet)
- 1 teaspoon oil or butter (optional—but it gives a nice sheen; sometimes I use ghee if I’m feeling fancy)
Optional extras for adventure: 2-3 green cardamom pods (if you want a perfume-y kick), a bay leaf (because my gran swore by it), or a pinch of saffron (expensive but wow, the color!).
How I Make It (With Wobbles and All)
- Rinse the rice really well. I mean really—until the water runs almost clear. I used to skip this and, well, no one should eat that much starch. You can use a fine sieve or just swirl it in a bowl a few times.
- Soak, if you can be bothered. About 20 minutes in cold water. But honestly? If you’re pressed for time, just give it an extra rinse and carry on.
- Combine rice, water, salt, and oil/butter in a saucepan. Medium pan, lid that actually fits. If you’re using cardamom or bay leaf, toss them in now.
- Bring to a gentle boil. I sometimes get distracted here, so keep an eye out or you’ll have a foamy rice geyser. As soon as you see bubbles, drop the heat way down and slam the lid on.
- Simmer, don’t peek! 12 minutes on the lowest heat you’ve got. Seriously, don’t lift the lid. (Though I get tempted every time.) If it sounds like it’s hissing angrily, that’s probably too high—turn it down.
- Let it rest. After 12 minutes, take it off the burner. Keep the lid on and let it steam for 5-10 minutes. This is where I usually sneak a taste, but try not to—resist the urge! It helps the last bits of steam settle in.
- Fluff it up. Fork, not spoon. Don’t mash! Just gently rake it so it’s all separated and cloud-like. (If it looks a bit weird at this stage, don’t panic—it magically sorts itself out.)
Things I Learned the Hard Way
- Don’t skip the resting stage. I once did, thinking I was saving time—nope, sticky mess.
- If you use too much water, the rice will get soggy. Actually, I find it works better if you err on the side of less water and add a splash at the end if needed.
- Even if you forget the oil or butter, it still turns out okay. Just less glossy.
Fun Variations I’ve Tried (for Better or Worse)
- Coconut Rice: Sub half the water for coconut milk. Really lovely for Thai curries, though one time I forgot to shake the can and it got weirdly chunky. Lesson learned.
- Lemon Rice: Stir in zest and a squeeze of lemon after cooking. Zippy!
- Add peas or corn: My kid loves it, but last time I tried it with frozen peas, I ended up with a bit of a mush. So maybe add them in the last 5 minutes only.
What You Need… Or Don’t
- Saucepan with tight lid: If yours is a bit wobbly, wrap a tea towel around the lid (old school trick, but watch for the flame!)
- Fork for fluffing: Spoons just make it clumpy, but I’ve used chopsticks in a pinch. On second thought, forks are easier.


How I Store Leftovers (If We Ever Have Any)
Let it cool, then chuck it in a container and pop it in the fridge. Supposedly good for up to 3 days, though honestly, in my house it never lasts more than a day! If it dries out, a splash of water and a quick zap in the microwave brings it right back.
What Goes Well With Fluffy Basmati Rice?
I love this with a big bowl of dal, but my other half swears by a spoonful of mango chutney and an extra-fried egg on top. My go-to is a simple chicken curry (here’s a great one). Or scoop some up with leftover roasted veg. Oh, and for something different, try it with rajma—trust me, it’s a classic.
Pro Tips (AKA: What I’ve Messed Up Before)
- I once tried rushing the resting step and regretted it—sticky, sad rice. Just wait the extra five minutes.
- Don’t crank the heat under the pot after adding the lid or you’ll get a burnt bottom (been there; had to soak the pan for ages).
- If you forget to salt the rice at the start, just stir in a little melted butter with salt at the end—it’s not the same, but hey, still tasty.
Some Totally Real Questions I’ve Gotten (or Made Up)
- "Can I double this recipe?" Yep! Just keep the rice-to-water ratio the same, but use a bigger pot. It takes a wee bit longer to cook (not much though).
- "Why is my rice still crunchy?" Either you didn’t use enough water, or you lifted the lid too early (I’ve done both, so you’re not alone!).
- "Do I have to soak the rice?" Not strictly. I usually do, unless I forget (which is often), and it still turns out fine.
- "Can I use brown basmati?" You can, but the timing and water are different—needs more of both. Actually, I find it works better if you check a dedicated brown rice guide, like this one.
Anyway, enough of my rice rambling. I hope this helps you get perfect basmati rice—fluffy every time. If not, let me know what went wrong and maybe we’ll troubleshoot together (or just order takeout, honestly—it happens!).


Ingredients
- 1 cup basmati rice
- 1 ¾ cups water
- 1 tablespoon unsalted butter or oil
- ½ teaspoon salt
- 1 bay leaf (optional)
- ½ teaspoon lemon juice (optional)
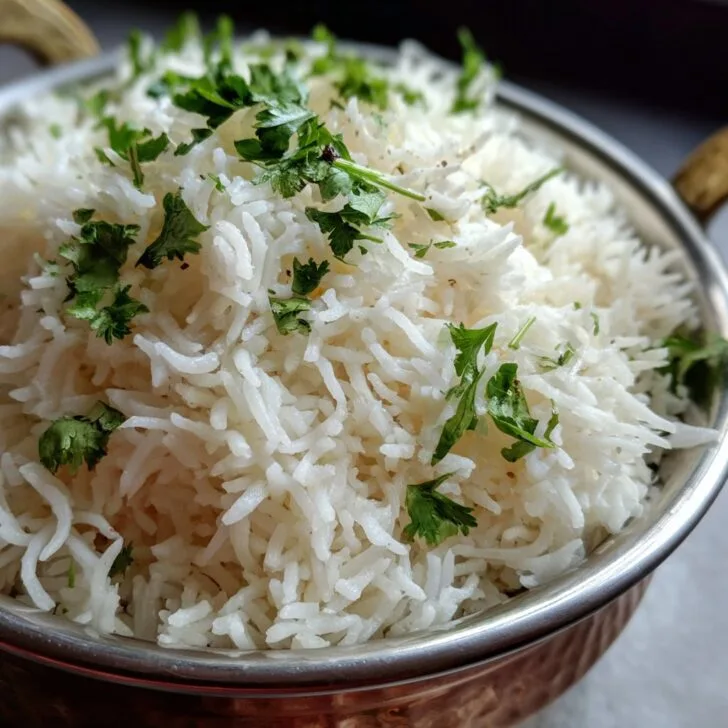
- Fresh cilantro for garnish (optional)
- 1 small cinnamon stick (optional)
Instructions
-
1Rinse the basmati rice under cold water until the water runs clear to remove excess starch.
-
2In a medium saucepan, combine the rinsed rice, water, salt, butter or oil, and optional bay leaf and cinnamon stick.
-
3Bring to a gentle boil over medium-high heat, then reduce the heat to low, cover tightly with a lid, and simmer for 12-15 minutes until the water is absorbed.
-
4Remove from heat and let the rice sit, covered, for 5 minutes to steam. Fluff gently with a fork.
-
5Add lemon juice and garnish with fresh cilantro if desired. Serve warm.
Approximate Information for One Serving
Nutrition Disclaimers
Number of total servings shown is approximate. Actual number of servings will depend on your preferred portion sizes.
Nutritional values shown are general guidelines and reflect information for 1 serving using the ingredients listed, not including any optional ingredients. Actual macros may vary slightly depending on specific brands and types of ingredients used.
To determine the weight of one serving, prepare the recipe as instructed. Weigh the finished recipe, then divide the weight of the finished recipe (not including the weight of the container the food is in) by the desired number of servings. Result will be the weight of one serving.
Did you make this recipe?
Please consider Pinning it!!