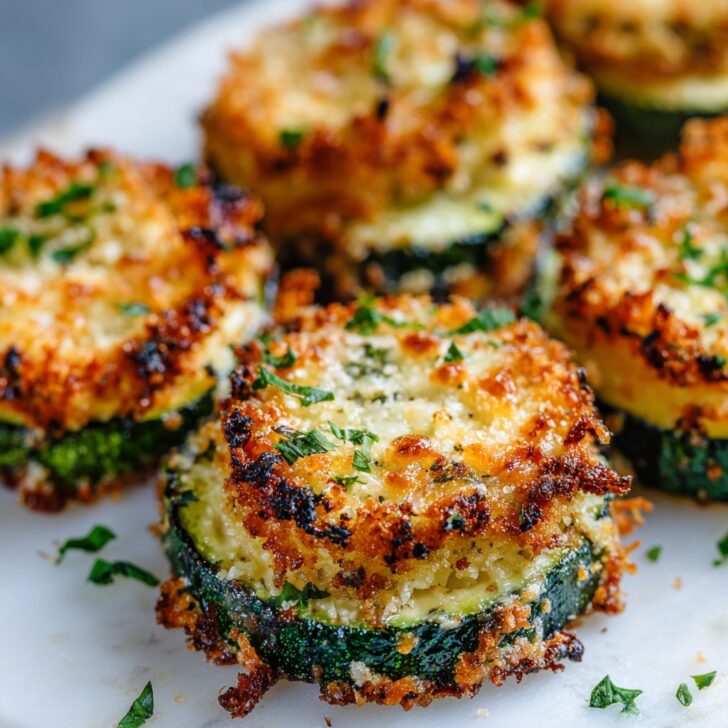
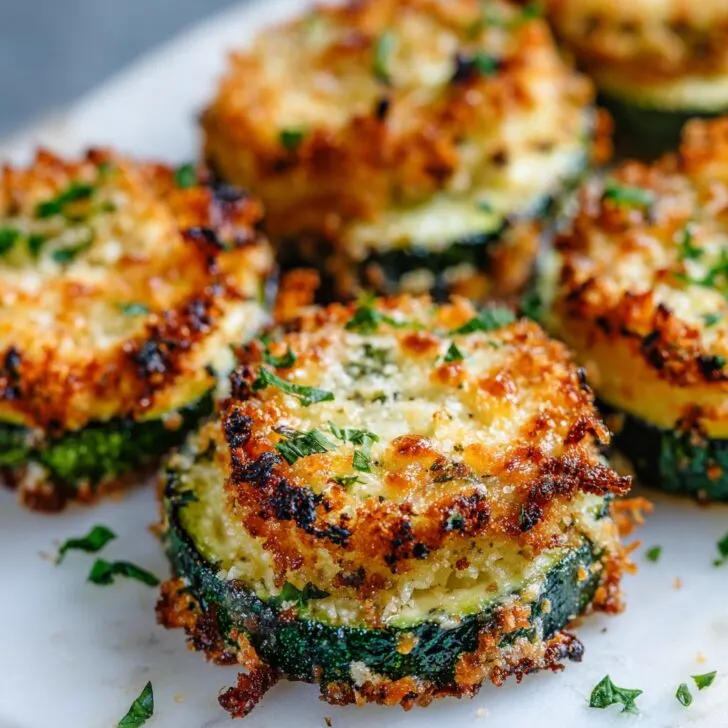
So Let Me Tell You About These Zucchini Rounds…
Alright, so—I only started making these Parmesan Crusted Zucchini Rounds a couple summers ago, when my neighbor basically forced a basketful of zucchini on me (she’s lovely, but wow, can she grow stuff). I was skeptical because, you know, zucchini can be a bit... bland. But then I remembered that cheese fixes most things, and well, here we are. Now, every time zucchini season rolls around, I’m practically begging her for more. My kids call these 'zucchini cookies,' which is technically wrong but honestly, it’s cute. Also, side note: don’t try making these if you’re wearing white pants. I learned that one the hard way—cheese crumbs everywhere.
Why I Actually Make These (And My Family Eats Them!)
I make this when I need a snack that feels a little healthy, but let’s be real, the cheese is doing most of the heavy lifting. My family goes crazy for this because it’s crunchy but not deep-fried, and I don’t have to stand over the stove all day (my patience has a limit—especially when it’s hot out). Oh! And it’s one of those rare veggie snacks that doesn’t inspire groans from the peanut gallery. I used to get really annoyed that the rounds would slide off the tray sometimes, but if you use parchment paper, it’s mostly fine now. Or just eat the weird ones yourself, which is what I do.
Here’s What You’ll Need (With Some Options)
- 2 medium zucchini (longer ones are easier to slice evenly, but honestly, any misshapen ones work fine—you’ll just have some funky-shaped rounds)
- 1 cup grated Parmesan cheese (I’ve used the bagged kind in a pinch, but the real stuff you grate yourself is next-level. My grandma swore by Kraft, but, you know, she also put ketchup on eggs...)
- 1-2 tablespoons olive oil (I’ll use canola if I’m out, but olive’s better flavor-wise)
- ½ teaspoon garlic powder (fresh garlic is great, but I don’t always want to bother—no shame there)
- ¼ teaspoon black pepper
- Pinch of salt (go easy if your cheese is salty)
- Optional: A little paprika, Italian seasoning, or red chili flakes for a kick. I throw in oregano when I’m feeling vaguely Mediterranean.
How I Actually Make Them (With Occasional Chaos)
- Preheat your oven to 425°F (that’s 220°C for my metric mates). Line a baking sheet with parchment paper—this step matters, trust me on this one.
- Wash the zucchini, slice into rounds about as thick as a pound coin or just under half an inch. Don’t stress if they aren’t perfect; honestly, some crispy bits are the best part.
- Toss the slices in a bowl with the olive oil, garlic powder, salt, and pepper. I usually use my hands, but a spoon works if you hate getting messy.
- Spread the rounds out on your tray, single layer. Sprinkle the Parmesan liberally over each slice—don’t be shy. This is where I sneak a few bits of cheese for myself, because, why not?
- If you’re adding extra seasonings, sprinkle those on now. Or don’t. I sometimes forget entirely and nobody complains.
- Bake for 13-15 minutes, until the cheese is golden and bubbly at the edges. Sometimes I turn on the broiler/grill for another minute if I want them really crisp, but watch closely or you’ll get little black hockey pucks (been there).
- Let them cool for a few minutes before moving. They firm up as they cool and are less likely to fall apart—though if they do, just call it ‘rustic’ and serve anyway.
Some Notes I Wish I’d Known Sooner
- Parmesan will stick better if the zucchini is dry—so maybe pat it with a paper towel, but I usually forget and it’s fine.
- If you use pre-grated cheese, it melts a little differently. Tastes the same, but texture is slightly less fancy.
- I once tried making these in the air fryer and they flew all over the place. On second thought, best stick to the oven!
Things I’ve Tried (And What Didn’t Quite Work)
- Adding breadcrumbs: Sometimes I mix in a handful of panko with the Parmesan for extra crunch—it’s good, but not essential.
- Using egg wash: Tried dunking the slices in beaten egg first. Too much hassle and kind of soggy. Wouldn’t recommend.
- Trying with yellow squash: Works fine! Tastes pretty much the same, just looks sunnier.
- Chili flakes: Good for a little heat, but my youngest will stage a protest if I overdo it.
What If I Don’t Have the Right Equipment?
A good knife is easiest for slicing, but I’ve used a cheese slicer in a pinch (don’t ask, it was a long day). No parchment paper? Grease the tray well, but be ready for a little sticking. No oven? I hear some folks use a toaster oven, but I haven’t tried it—let me know if you do!


Storing Leftovers... If That Ever Happens
Pop any leftovers in an airtight container in the fridge; they’ll keep for about two days. Though honestly, in my house it never lasts more than a day! They’re surprisingly good cold, too—I swear, I think they taste even better after a night in the fridge. But maybe that’s just me.
How We Serve These at My Place
I love these as a little starter when we have friends over, but they also work as a side with grilled chicken or even just with a dollop of sour cream (my weird little tradition). My husband likes them with sriracha, which, sure, go wild. Also, they’re great on top of a salad if you have leftovers—toss them in for a bit of crunch.
Tips I Learned the Hard Way
- I once tried rushing the baking step, setting the oven higher—ended up with charred cheese and sad zucchini. Just be patient, it’s worth it.
- If you pile the cheese too high, it’ll melt off and make a mess. Just a light blanket is plenty.
- Arrange the rounds with a bit of space—if they’re too close, you’ll get cheesy ‘zucchini bark’, which sounds fun but is basically just a stuck-together sheet.
FAQ—Because I Get Asked These All the Time
- Can I make these ahead?
Yeah, but they’re really best fresh. Still, leftovers are tasty cold or reheated in a toaster oven. - What if I don’t have Parmesan?
I mean, you can use Pecorino Romano or another hard cheese. Once I tried cheddar and it sort of worked, but went a bit greasy. Maybe steer clear of the soft stuff. - Is this recipe gluten-free?
Yup, as long as you don’t add breadcrumbs. If you do, use gluten-free panko. Here’s a handy DIY gluten-free breadcrumb guide if you need one. - Can I freeze them?
Technically yes, but they get a bit soggy when thawed. I don’t love frozen zucchini in general; your mileage may vary. - Got any other ways to use up zucchini?
Oh, Love & Lemons has some creative ideas—I’m partial to their zucchini muffins.
Also, if you’re curious about different types of Parmesan (and why the real Italian stuff is so pricey), this cheese guide is surprisingly interesting. Not that you need fancy cheese for these, but hey, food trivia is fun.


Ingredients
- 2 medium zucchinis, sliced into ¼-inch rounds
- 1 cup grated Parmesan cheese
- ½ cup breadcrumbs
- 1 large egg
- ½ teaspoon garlic powder
- ½ teaspoon dried Italian herbs
- ¼ teaspoon salt
- ¼ teaspoon black pepper
- 2 tablespoons olive oil (for greasing or drizzling)
Instructions
-
1Preheat the oven to 425°F (220°C). Line a baking sheet with parchment paper and lightly brush with olive oil.
-
2In a shallow bowl, combine the grated Parmesan cheese, breadcrumbs, garlic powder, dried Italian herbs, salt, and black pepper.
-
3In another bowl, beat the egg. Dip each zucchini round into the egg, then coat both sides with the Parmesan-breadcrumb mixture.
-
4Arrange the coated zucchini rounds in a single layer on the prepared baking sheet. Drizzle or lightly spray with olive oil.
-
5Bake for 18-20 minutes, flipping halfway through, until golden brown and crispy. Serve warm.
Approximate Information for One Serving
Nutrition Disclaimers
Number of total servings shown is approximate. Actual number of servings will depend on your preferred portion sizes.
Nutritional values shown are general guidelines and reflect information for 1 serving using the ingredients listed, not including any optional ingredients. Actual macros may vary slightly depending on specific brands and types of ingredients used.
To determine the weight of one serving, prepare the recipe as instructed. Weigh the finished recipe, then divide the weight of the finished recipe (not including the weight of the container the food is in) by the desired number of servings. Result will be the weight of one serving.
Did you make this recipe?
Please consider Pinning it!!