
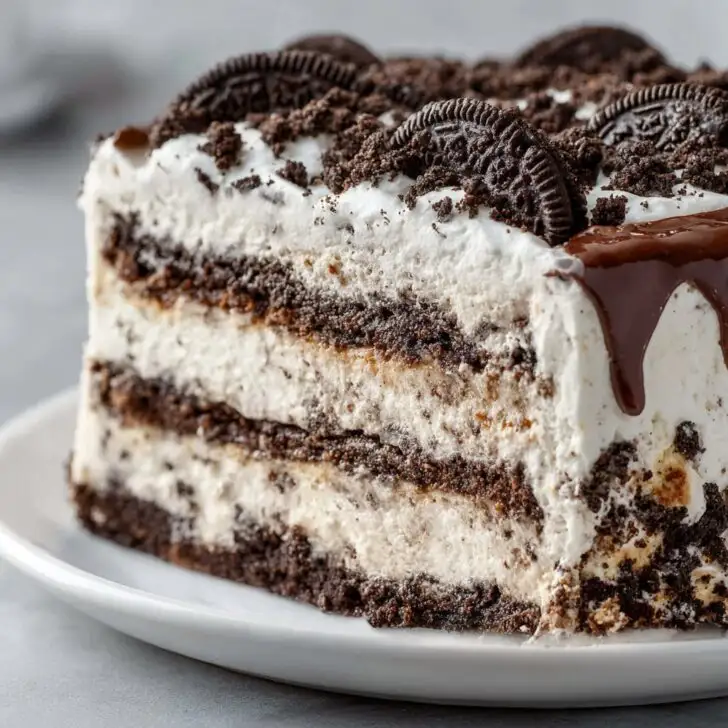
So, Let Me Tell You About This Oreo Ice Cream Cake
You know, there are days when you just want to eat something that doesn’t care about calories, class, or even dignity. Enter my Oreo Ice Cream Cake with Layers of Fudge and Crunch. I first made this on a whim for my nephew's birthday (he's obsessed with Oreos, but who isn't?) and it has basically haunted our family gatherings ever since. Not gonna lie: the first time around, I forgot to freeze one layer, and we ate it half-melted with spoons like animals. Still delicious, but maybe don't do that unless you're aiming for chaos. Anyway, this cake is now my failsafe for any party where I want to look like I tried way harder than I actually did. And, okay, sometimes I make it for absolutely no reason except that I need an excuse to buy a giant package of Oreos.
Why You’ll Love This (Or At Least Why I Do)
I make this when the weather is hot, the oven scares me, or when I want my family to think I've gone all-out on dessert without actually putting in that much effort. My sister claims the fudge layer is addictive (she’s not wrong), and my youngest always tries to eat the crunchy bits before I can layer them in. And if you mess up a step or two? It’s one of those forgiving recipes—it’ll still taste like a million bucks. I once forgot the butter in the crust; still, people ate it so fast I barely got a bite. (So, I guess that frustration turned out okay.) Honestly, it’s just fun to smash Oreos and get a little messy.
Here’s What You’ll Need (And a Few Cheeky Swaps)
- 1 family-size package of Oreos (or, I sometimes use store-brand cookies if I'm being thrifty—shh, don’t tell my nephew)
- ½ cup melted butter (salted, unsalted, even margarine in a pinch—my grandmother swore by Land O' Lakes, but I’ve used whatever's hiding in the fridge)
- 1.5 quarts vanilla ice cream, slightly softened (sometimes I use chocolate or cookies and cream if I’m feeling wild)
- 1 jar hot fudge sauce (about 12 ounces; homemade is amazing, but honestly, Smucker’s works and I won’t judge)
- 2 cups whipped topping (like Cool Whip, or go fancy and make your own—sometimes I do, sometimes I don’t)
- Optional: crushed chocolate sandwich cookies or chocolate chips for extra crunch
Let’s Build This Thing – Directions (Don’t Stress, Really)
- Smash the Oreos: Put all but 6 Oreos in a big zip-top bag and go to town with a rolling pin or your hands. (I’ve even used a mug in a pinch—works fine, just don’t break your mug.) Get them crushy, not dusty. Set aside those 6 for later.
- Make the Crust: Mix the crushed cookies with melted butter until it looks sort of like wet sand. Scoop half into a 9x13-inch pan and press it down. It doesn’t have to be perfect. This is where I usually sneak a bite (quality control, right?). Stick it in the freezer for 10 minutes or until you remember it’s there.
- Layer One – Ice Cream: Spread half the softened ice cream over the crust. If it’s too hard, let it sit a tad longer—don’t fight it. Freeze again for at least 15 minutes. Or longer if you get distracted (like I always do).
- Chill Out with the Fudge: Warm your fudge sauce just enough so it’s pourable (like, 20-30 seconds in the microwave). Drizzle or blob it over the ice cream layer. Don’t worry if it’s not even. Sprinkle a handful of extra crushed cookies or chips here if you want. Freeze again for 15 minutes or so.
- Second Ice Cream Layer: Spread the rest of the ice cream over the fudge. I promise, it gets easier as you go and the layers don’t need to be perfect.
- Crunchy Top & Whipped Topping: Add the remaining cookie/butter mix (reserve a bit for sprinkling, if you want). Then slather on the whipped topping. Smash up the leftover 6 Oreos and decorate however you want—big pieces, little bits, just dump them on, whatever.
- Final Freeze: Pop the whole thing back in the freezer for at least 4 hours (overnight is best, but I rarely make it that long without someone sneaking a piece).
Some Notes from the Battlefield
- The crust can get a bit too hard if you freeze it for ages, so let the cake sit out a few minutes before slicing. Actually, I find it works better if I run my knife under warm water first.
- Sometimes, I forget a layer or mix up the order, and you know what? No one has ever complained. (Maybe don’t skip the fudge layer though. That’s sacred.)
- Don’t try to rush the freezing—you’ll just end up with a melty mess. I learned that the sticky way.
Variations I’ve Tried (Plus One That Flopped)
- Swap the vanilla ice cream for mint chip or peanut butter swirl—total game changer.
- I once added caramel sauce instead of fudge. Not bad, but honestly, it got weirdly sweet and I missed the chocolate (lesson learned).
- Use gluten-free sandwich cookies if you’ve got celiac friends coming. Works fine, though you might want to up the butter a smidge.
What You’ll Need (Or, How I’ve Faked It)
- 9x13-inch baking pan (I’ve used two bread pans when my big pan was MIA)
- Mixing bowl
- Sturdy spatula (though a big spoon is just as good—don’t overthink it)
- Freezer space: clear a spot, or if you’re like me, stack things on top and hope for the best


How Do I Store This? (If It Lasts That Long...)
Keep it covered in the freezer, preferably in the pan, for up to a week. Though, honestly, in my house it never lasts more than a day! If you need to make it ahead, it holds up really well. (Just watch for freezer burn—cover it tight.)
How We Like to Serve It
I usually let it sit for 5-10 minutes so it’s easier to slice, and then serve big slabs with extra fudge or some fresh berries on the side. Occasionally, we’ll do birthday candles even when it’s no one’s birthday (don’t ask). My brother likes his with coffee, which I thought was odd, but actually, it’s pretty great. Oh! And sometimes we do a drizzle of homemade magic shell because, why not?
If I Could Give You One Pro Tip...
I once tried to spread the ice cream while it was still too cold, and basically ended up flinging chunks of crust everywhere. Let your ice cream soften, but don’t let it melt to soup. That’s the sweet spot. Also, don’t even try to use a weak spatula—trust me, it’s not worth the mess. Oh, and if you’re feeling extra, check out the fudge sauce recipe at Sally’s Baking Addiction; it’s fantastic, but store-bought will do in a pinch.
FAQ – Real Questions I’ve Actually Gotten
- Can I use different cookies? Yep! I’ve done it with chocolate chip cookies, and once by accident, with graham crackers. It’s a bit softer, but still tasty.
- How long do I really have to freeze between layers? You can probably get away with 10 minutes if you’re in a rush, but it’s less messy if you wait longer. I tend to get impatient and then regret it.
- What if my fudge sauce is super thick? Warm it up a touch more—don’t stress if it glops, it’ll settle as it freezes. Or just swirl it around; who cares?
- Is it okay to make this a day ahead? Actually, I think this tastes better the next day. Just wrap it up tight.
- Do I have to use Cool Whip? Not at all! Whipped cream, coconut cream, or whatever fluffy stuff you love works. If you skip it, just know the top won’t be as soft and creamy.
So there you go—that's my not-so-secret, always-a-hit Oreo Ice Cream Cake. If you end up with extra crumbs, sprinkle ‘em on breakfast yogurt. No shame in my game. Happy eating!


Ingredients
- 36 Oreo cookies, divided
- ¼ cup unsalted butter, melted
- 1.5 quarts vanilla ice cream, softened
- 1 cup hot fudge sauce
- 1 cup whipped topping (such as Cool Whip)
- ½ cup mini chocolate chips
- ¼ cup chopped nuts (optional)
Instructions
-
1Line a 9x13-inch baking dish with parchment paper. Crush 24 Oreo cookies into fine crumbs and mix with melted butter. Press the mixture firmly into the bottom of the dish to form the crust.
-
2Spread half of the softened vanilla ice cream evenly over the Oreo crust. Freeze for 30 minutes until firm.
-
3Warm the hot fudge sauce slightly and spread it over the ice cream layer. Sprinkle with half of the mini chocolate chips and chopped nuts if using. Freeze for another 30 minutes.
-
4Spread the remaining vanilla ice cream over the fudge layer. Crush the remaining 12 Oreo cookies and sprinkle them, along with the rest of the chocolate chips, over the top.
-
5Top with whipped topping, spreading it evenly. Cover and freeze for at least 3 hours or until fully set. Slice and serve chilled.
Approximate Information for One Serving
Nutrition Disclaimers
Number of total servings shown is approximate. Actual number of servings will depend on your preferred portion sizes.
Nutritional values shown are general guidelines and reflect information for 1 serving using the ingredients listed, not including any optional ingredients. Actual macros may vary slightly depending on specific brands and types of ingredients used.
To determine the weight of one serving, prepare the recipe as instructed. Weigh the finished recipe, then divide the weight of the finished recipe (not including the weight of the container the food is in) by the desired number of servings. Result will be the weight of one serving.
Did you make this recipe?
Please consider Pinning it!!