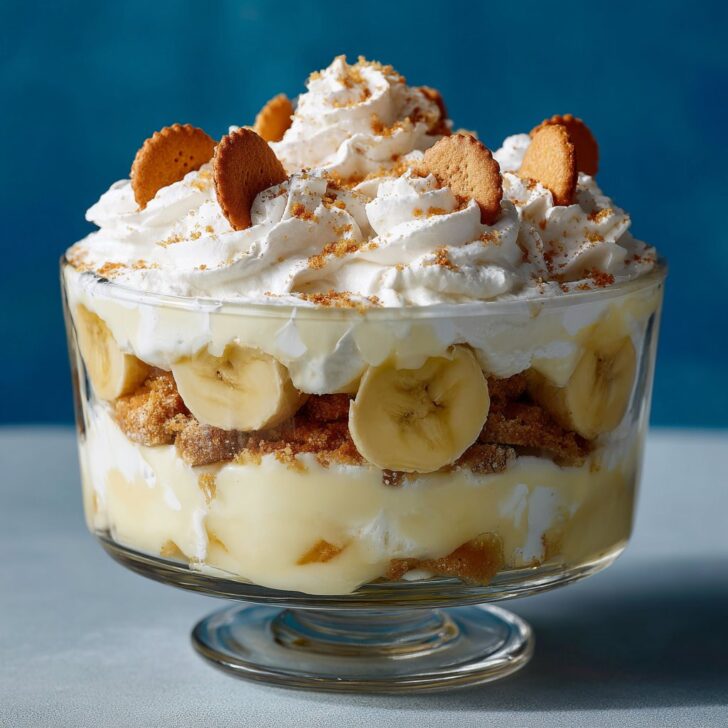
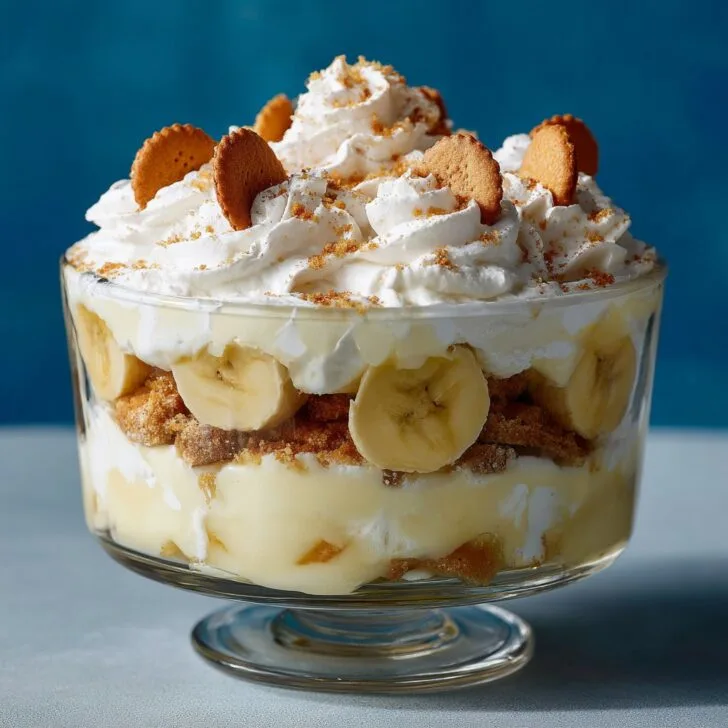
Let's Talk Banana Pudding (But Not the Boring Kind)
Alright, so you ever have one of those desserts that just takes you back? For me, Not Yo Mama's Banana Pudding with Nilla Wafers is that dish. I first made this for my cousin's Fourth of July picnic (after swiping the idea from an old friend who swears she invented it—she didn't). Anyway, everyone kept sneaking spoonfuls before dinner even started. I mean, who can blame them? It's bananas, pudding, and cookies—it's like the holy trinity of easy desserts. Also, can I just say, this is the only kind of "pudding" I can make without accidentally burning milk to the bottom of the pan? True story.
Why You'll Love This Recipe (Seriously!)
I whip this up whenever I want a dessert that feels homey but doesn't take a culinary degree. My family goes absolutely bonkers for this (especially my dad, who claims he doesn't even like bananas—liar). It's creamy, sweet, and the Nilla Wafers get all soft and cake-like, which is honestly what dreams are made of. Plus, no stovetop drama or mystery lumps. If you're ever in a rush (been there), it comes together fast. And let me tell you, my picky eater nephew? Even he wolfed it down. If that's not a win, I don't know what is.
What You'll Need (and Some Substitutions)
- 1 box (about 12 oz) Nilla Wafers (I've used store-brand vanilla cookies in a pinch—no one noticed, promise)
- 5-6 ripe bananas (go for the spotty ones—my grandma always said those are the sweetest)
- 2 cups cold milk (whole milk is creamier, but honestly, I've used 2% and it turned out fine)
- 1 package (5.1 oz) instant vanilla pudding (banana pudding flavor works too if you're feeling wild)
- 1 can (14 oz) sweetened condensed milk (I once tried the fat-free version—don't recommend, it's just... sad)
- 1 tub (8 oz) frozen whipped topping, thawed (like Cool Whip—I tried making real whipped cream once, but it melted weirdly, so back to basics)
- Optional: a splash of vanilla extract (if you're feeling fancy) or a handful of toasted coconut (my aunt's weird idea, but it's kind of good)
How to Throw It All Together
- First, grab a 9x13 dish (or whatever's clean, honestly). Line the bottom with a layer of Nilla Wafers—sometimes I get artistic and make patterns, sometimes I just dump them in.
- Slice those bananas right over the cookies. I use about half the bananas for this layer. If you sneak a slice, no one's watching.
- In a big bowl, whisk together the instant pudding mix and cold milk. Give it a solid two minutes (set a timer if you're like me and get distracted). It'll thicken up nicely—if it looks lumpy, just keep whisking, it'll smooth out.
- Now, stir in the sweetened condensed milk. This is where I usually sneak a little taste. I mean, it's basically liquid gold.
- Fold in the whipped topping gently—no need to go crazy, just mix until it's all combined and fluffy. Actually, I find it works better if you use a spatula instead of a whisk here.
- Pour about half the pudding mixture over the banana/cookie layer. Then repeat: more cookies, more bananas, rest of the pudding.
- Top with a few more Nilla Wafers or crumbled cookies (or get wild and sprinkle with a little coconut). Cover and pop it in the fridge for at least 4 hours (overnight is even better—trust me, the flavors meld like magic).
Things I've Learned (The Notes Section)
- If you use super-ripe bananas, it tastes sweeter but might look a bit mushy. Don't stress, it still tastes amazing.
- I once forgot to let it chill, and it was still tasty, just a little runnier—probably wouldn't serve to guests, but hey, family doesn't care.
- Pudding gets better the second day, but if you wait too long, bananas go brown. There's a sweet spot (pun intended).
What Else Can You Try? (Variations That Sort of Worked)
- I tried layering in mini chocolate chips once—good, but a bit weird with the banana flavor. Maybe not my best idea.
- If you're out of Nilla Wafers, shortbread cookies work. Graham crackers are okay, but honestly, not my favorite for this.
- One time I tried peanut butter between the layers... Let's just say, it was a bit much. But if you're a PB fiend, go for it!
What If You Don't Have All the Tools?
Look, if you don't have a 9x13, use whatever dish fits. I've even made these in mason jars for a picnic (looked pretty cute, actually). Don't have a proper whisk? A fork works—just takes a little elbow grease.


How to Store This (If You Have Leftovers, Ha!)
Pop it in the fridge, covered with foil or a lid. It'll keep for 2-3 days, but honestly, in my house, it never lasts more than a day! Bananas will brown a bit if left too long, but the flavor holds up well.
How We Like to Serve It
I usually scoop big spoonfuls into bowls, maybe with an extra sprinkle of crushed cookies on top. My aunt insists on adding a mint leaf for "fanciness" (not required, obviously). Sometimes we eat it straight from the dish, especially after midnight. Hey, no judgment.
Lessons Learned (Pro Tips Form Trial and Error)
- Don't rush the chill time. I once tried serving after an hour and regretted it because the cookies were still crunchy—not in a good way.
- If you use homemade whipped cream, the pudding can get a bit soupy, especially by day two.
- Layer your bananas so they're not right against the top—saves you from brown, sad-looking slices.
You've Got Questions? I've Got (Real) Answers
- Can I make this ahead of time?
- Yep, and actually, I think it tastes better the next day. Just don't leave it more than 48 hours or so—bananas start to go iffy.
- Can I use almond milk or oat milk?
- I've tried almond milk, but the pudding didn't set right—maybe it was just the brand I used? You could check out Silk's suggestions for dairy-free puddings.
- Is there a way to keep the bananas from browning?
- Some folks brush them with lemon juice, but I find it changes the taste a bit. If you have a trick, let me know!
- What if I don't have instant pudding?
- Honestly, you could try making homemade pudding (if you're braver than me). Sally's Baking Addiction has a good recipe, but... it's a bit more work.
- Can kids help with this?
- Absolutely! Let them layer the cookies and bananas (and maybe sneak a cookie or two, who cares?).
Oh, and one last thing—I once tried to make a "healthier" version with Greek yogurt and stevia. Let's just say it was...educational. Some things are meant to be a treat, ya know?
Hope you love this as much as I do! And if you figure out a way to keep the pudding from mysteriously vanishing overnight, let me know. Happy snacking!


Ingredients
- 2 boxes (3.4 oz each) instant vanilla pudding mix
- 3 cups cold milk
- 1 can (14 oz) sweetened condensed milk
- 1 package (8 oz) cream cheese, softened
- 1 container (12 oz) frozen whipped topping, thawed
- 5-6 ripe bananas, sliced
- 1 box (11 oz) Nilla Wafers
- 1 teaspoon vanilla extract
Instructions
-
1In a large mixing bowl, beat the softened cream cheese until smooth.
-
2Add sweetened condensed milk and vanilla extract to the cream cheese and mix until well combined.
-
3In a separate bowl, whisk together the instant pudding mix and cold milk for about 2 minutes until thickened.
-
4Fold the pudding mixture into the cream cheese mixture, then gently fold in the whipped topping until fully incorporated.
-
5In a 9x13 inch dish, layer Nilla Wafers on the bottom, followed by a layer of sliced bananas, then spread half of the pudding mixture over the bananas. Repeat the layers, finishing with the pudding mixture on top.
-
6Cover and refrigerate for at least 4 hours before serving to allow the flavors to meld and the dessert to set.
Approximate Information for One Serving
Nutrition Disclaimers
Number of total servings shown is approximate. Actual number of servings will depend on your preferred portion sizes.
Nutritional values shown are general guidelines and reflect information for 1 serving using the ingredients listed, not including any optional ingredients. Actual macros may vary slightly depending on specific brands and types of ingredients used.
To determine the weight of one serving, prepare the recipe as instructed. Weigh the finished recipe, then divide the weight of the finished recipe (not including the weight of the container the food is in) by the desired number of servings. Result will be the weight of one serving.
Did you make this recipe?
Please consider Pinning it!!