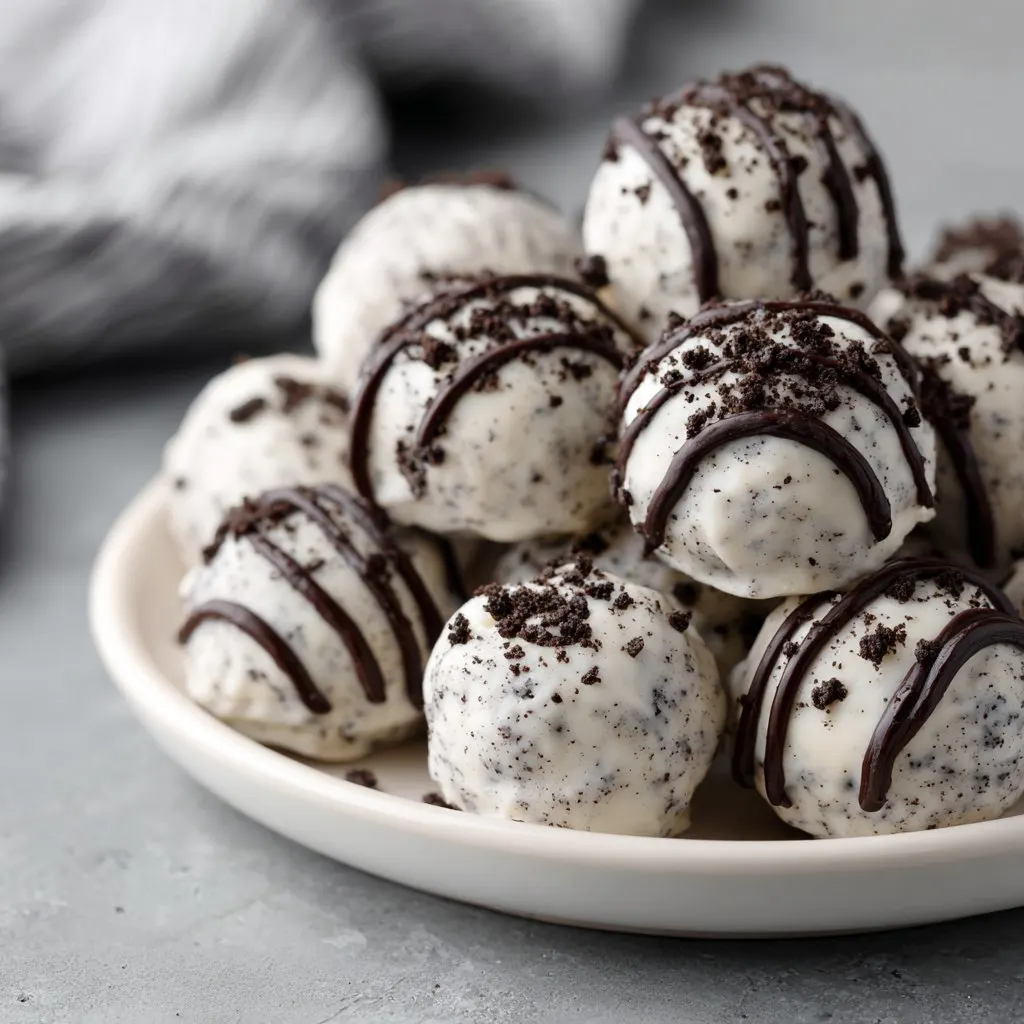
Okay, Let's Talk About These Ridiculously Easy Oreo Balls
So, picture this: it's 10pm, there's a potluck tomorrow, and I completely forgot to make something. Enter these no-bake Oreo balls. Honestly, I've lost count of how many times these little treats have saved my bacon (or is it saved my sweet tooth?). First time I made them, I was convinced it was some kind of kitchen witchcraft; three ingredients for something this moreish? Surely not. But, here we are, and now they're a staple whenever I need a last-minute, crowd-pleasing dessert. Also, my niece calls them 'Oreo snowballs', which is way cuter than anything I could've come up with.
Why I Keep Making These (And Why You Probably Will Too)
I make this when I want the taste of homemade dessert but can't face cranking up the oven, or when my family gets that wild-eyed look, you know the one, when you mention Oreos. My sister-in-law always tries to snag a few for the 'road', as if they're going to last beyond the afternoon. (Spoiler: they never do.) Oh, and if you hate messy hands, just, uh, embrace them for this recipe. It’s part of the fun, kinda like making mud pies as a kid, but you get to eat these.
What You Need (Substitutions? Absolutely)
- 1 standard 14oz (about 36 cookies) package of Oreos. Honestly, store-brand chocolate sandwich cookies work okay too. My grandma swore by the name-brand, but I’ve gone off-brand in a pinch and no one noticed.
- 8oz (225g-ish) cream cheese, softened. Sometimes I use the reduced-fat one if that's what’s in the fridge, and it’s still delicious. You could try mascarpone but, actually, it gets a bit too soft.
- 12oz (340g) chocolate for coating (chips or bars, milk or dark—whatever you like). White chocolate looks fancy, but honestly, I usually go with whatever's on sale.
How to Make These Little Beauties
- Crush the Oreos (filling and all) into fine crumbs. I usually toss them in a food processor, but, if you’re feeling old-school, just put them in a zip-top bag and bash them with a rolling pin. (Therapeutic, if you’ve had a long week.)
- Mix in the cream cheese. I use my hands, but a spatula works fine if you don't mind a bit of resistance. I always think it looks weird at this stage, like it’ll never come together, but trust me—it does.
- Roll the mixture into balls, about a tablespoon each. I get about 24-28 (depending on how much "taste testing" happens at this stage). Line them up on a baking sheet—parchment paper is handy here, but I've just used a plate before.
- Pop them in the fridge for at least 20-30 minutes, or honestly, as long as you remember they're there. I've forgotten them overnight and they were still perfect.
- Melt your chocolate (microwave in 30-second bursts, stirring between each; or over a double-boiler if you’re fancy). Dip each ball in the chocolate, let the excess drip off, then plop them back on the tray. This is the messy bit—embrace it. I usually lose at least one to the chocolate abyss (oops).
- Chill until set. This is where my patience is tested every single time.
Notes From My (Messy) Kitchen
- I once tried letting my kids help with the dipping and, well, let's just say, expect chocolate in places you didn't know existed.
- If you don't have cream cheese out to soften, just zap it (out of the wrapper!) in the microwave for 10-15 seconds. Not too long or it gets runny, which, trust me, gets messy fast.
- Actually, using two forks to dip is easier than just one. I always forget this until I’m halfway through.
Variations (What Worked... And One That Didn't)
- Swap the regular Oreos for Golden Oreos—my mom weirdly prefers these. (Sorry, Mom, but the original is still best in my book!)
- Try peanut butter Oreos and dip them in white chocolate. It’s a lot, in a good way.
- I once tried rolling them in coconut flakes before the chocolate. Did not love. Maybe you will?
- Crush a few extra cookies and sprinkle on top before the chocolate sets. Looks impressive. (Or so I like to think.)
Equipment (And What to Do If You Don't Have It)
- Food processor—makes crumbs in seconds, but, if yours is on the fritz, the zip-top bag and rolling pin trick works fine. Or a wine bottle. Not kidding.
- Microwave or double-boiler for melting chocolate. If you don't have either, put a heatproof bowl over a saucepan of simmering water. That’s how my nan did it.
- Baking sheet or just a big plate. (I've literally used a chopping board lined with foil. Don't overthink it.)

How to Store (But Good Luck With That)
These keep in a sealed container in the fridge for up to a week, in theory. In practice, they’re usually gone within 24 hours in my house—especially if my brother-in-law is visiting. If you want to freeze them, that's totally fine; they taste pretty amazing cold, actually.
How to Serve (Our Family's Way)
I like to pile them up on a pretty plate, maybe with a dusting of cocoa powder or some sprinkles if I’m feeling festive. My cousin insists they’re best with a cup of strong coffee. (Tea is fine too, if you roll that way.) Sometimes, for birthdays, we stick them on skewers and call them 'cake pops'—nobody complains.
So, What Have I Learned? (Pro Tips From My Odd Mistakes)
- I once tried to rush the chilling step—big mistake. The balls fell apart in the chocolate. So, yeah, patience here pays off.
- Don't use low-fat cream cheese unless that's all you have. The texture gets a bit softer, but the flavor is still on point.
- Actually, if you microwave the chocolate for too long, it seizes up and turns grainy. Short bursts, lots of stirring. I learned the hard way.
Real Questions (Because Friends Always Ask)
Can I make these ahead of time?
Yup! They actually taste even better the next day, if you ask me—maybe it’s magic or maybe just fridge time.
Do I really need a food processor?
Nope. I've even used the bottom of a mug to smash the cookies once, when all else failed. Bit of an arm workout, but hey, dessert is worth it.
Can I double the recipe?
Absolutely. But just know, you'll need a lot more chocolate for dipping than you think. Trust me on this one.
Any good resources for melting chocolate?
I like this guide from Sally's Baking Addiction—she's got photos and everything. Also, if you want different ways to decorate, Gemma's got some clever ideas.
And, totally off-topic, but if you ever spot the peppermint Oreos around Christmas—buy them. Oreo balls made with those are like a little holiday miracle.
Ingredients
- 36 Oreo cookies (about 14 oz), crushed
- 8 oz (225 g) cream cheese, softened
- 12 oz (340 g) semisweet chocolate chips, melted
- 1 teaspoon vanilla extract (optional)
- ¼ cup white chocolate chips, melted (for drizzling, optional)
- Sprinkles (optional, for decoration)
- Pinch of salt (optional)
- 1 tablespoon coconut oil (optional, to thin chocolate)
Instructions
-
1Place the Oreo cookies in a food processor and pulse until they become fine crumbs.
-
2In a large bowl, mix the crushed Oreos with softened cream cheese and vanilla extract (if using) until well combined and smooth.
-
3Roll the mixture into 1-inch balls and place them on a baking sheet lined with parchment paper. Freeze for 15 minutes to firm up.
-
4Melt the semisweet chocolate chips (with coconut oil if desired) in a microwave-safe bowl, stirring every 30 seconds until smooth.
-
5Dip each chilled Oreo ball into the melted chocolate, coating completely. Place back on the parchment-lined sheet.
-
6Drizzle with melted white chocolate and add sprinkles if desired. Refrigerate until set, about 10 minutes. Serve chilled.
Approximate Information for One Serving
Nutrition Disclaimers
Number of total servings shown is approximate. Actual number of servings will depend on your preferred portion sizes.
Nutritional values shown are general guidelines and reflect information for 1 serving using the ingredients listed, not including any optional ingredients. Actual macros may vary slightly depending on specific brands and types of ingredients used.
To determine the weight of one serving, prepare the recipe as instructed. Weigh the finished recipe, then divide the weight of the finished recipe (not including the weight of the container the food is in) by the desired number of servings. Result will be the weight of one serving.
Did you make this recipe?
Please consider Pinning it!!

