
You Ever Get So Hungry You Start Wrapping Stuff in Bacon?
Okay, here's the deal: the first time I ever made these Nashville hot bacon wrapped mozzarella sticks was after a football game, and honestly, I wasn't sure if I was a genius or just really hungry. The kitchen smelled so good the neighbor's dog started howling. Also, fair warning: these can get a little messy and, once, I managed to get cheese on the TV remote. So yeah, don't multitask too much during this recipe.
Why You'll Love Making These (Even When It's Hot Outside)
I make these for family movie nights or if I'm in a bad mood and want to bite into something spicy (or both). My brother begs for them at every BBQ, which is both flattering and kind of a pain, but I love him anyway. They're spicy, cheesy, smoky, and gooey—in the kind of way that makes you forget you're supposed to be eating salad for dinner. (But hey, you could toss a leaf or two on the side... for, you know, balance.) And I'll admit, they weren't perfect on the first try; the bacon kept unwrapping itself like it was Houdini. Actually, I learned a little trick for that below!
What You Need (And a Few Things You Probably Have at Home)
- 12 mozzarella cheese sticks (honestly, the store brand works just as well, but my grandma loved Polly-O)
- 12 strips thin-sliced bacon (I use regular, not thick-cut, so it crisps up but if you mess up just pull the bacon sooner)
- ½ cup hot sauce (Frank's RedHot is classic, but I've used Texas Pete in a pinch)
- 2 tablespoon melted butter (or margarine—when my fridge is pretty empty)
- 1 tablespoon brown sugar (optional, that's just dad's sweet tooth talking)
- 1 teaspoon smoked paprika
- ½ teaspoon cayenne pepper (less if you don't want your face to melt off)
- Toothpicks, if you have them—but I sometimes use uncooked spaghetti, it works... kinda
How To Make Bacon Wrapped Mozzarella Sticks That Just Might Blow Your Socks Off
- Freeze Your Cheese. Start by tossing those mozzarella sticks in the freezer for at least 2 hours (or longer if you forget about them like I do). Trust me, it's worth the wait—otherwise, they'll ooze all over before the bacon cooks. I learned that the hard way; cleaning cheese off foil is a real treat.
- Mix Up the Nashville Hot Sauce. In a bowl, stir together the hot sauce, melted butter, brown sugar, smoked paprika, and cayenne. I usually sneak a taste here, just to see if my eyeballs will water.
- Wrap the Cheese in Bacon. Take a frozen cheese stick, wrap a bacon strip around it, and secure with a toothpick or whatever makeshift item you found in your utensil drawer. It's okay if the bacon overlaps—actually, it's better. Gives it that lovely layered crunch.
- Dunk in Sauce. Roll your bacon-wrapped cheese in the hot sauce mixture until it looks good and messy. Don't worry if some sauce sloshes off, that's extra flavor for the baking tray. Lay them on a parchment-lined tray—makes cleanup way easier.
- Bake. Preheat oven to 425F (220C for my UK pals), and pop them in for about 22-25 minutes. Sometimes I flip them halfway if I'm feeling energetic. The bacon should be crispy and the cheese—well, mostly still inside. (If you see a little cheese lava escaping, don't panic. It happens.)
- Cool and Eat. Let them sit for about 3 minutes before biting in or you'll need an ice pack for your tongue.
Stuff I Figured Out After a Few Fails
- If you try to use thick-cut bacon, sometimes the cheese melts before the bacon crisps. Maybe just stick to the regular stuff.
- When I tried frying instead of baking, I ended up with a smoky kitchen and less-than-pretty results. Baking is just easier on everyone, trust me.
- The sauce is spicy. If you don't love a lot of heat, knock the cayenne back or even skip it. Your taste buds will thank you.
A Few Weird Things I've Tried (Not All Winners!)
- Swapping the hot sauce for BBQ sauce—good, but not as good, in my opinion.
- Tried turkey bacon. It was fine, but the cheese and sauce want the full fatty bacon hug. Sorry, turkey lovers!
- Once, I added dill pickles before baking. Look, some folks liked it, but I thought it tasted like I dropped my snack in a burger.
What If I Don't Have a Baking Rack?
No sweat. I've baked these straight on a parchment-lined sheet plenty of times. If you want the extra crisp, you could put a cooling rack on top of your baking tray (just double check it's oven-safe, learned that lesson with a melted plastic rack once—yikes).


How To Store 'Em (Kind Of a Joke, But Just In Case)
So, if you somehow have leftovers, pop them in a lidded container, then into the fridge. They'll last a day or two, though, honestly, in my house it never makes it past midnight snack raids. And I think they're even better the next day, maybe that's just me. To reheat, I toss them in the oven for a few minutes at 350F—microwaving makes them a bit sad and soggy.
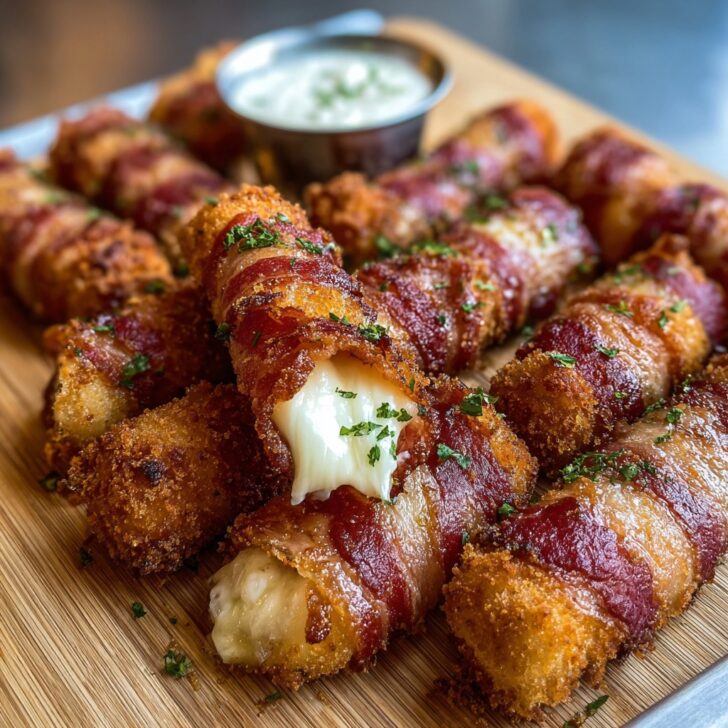
How I Like To Serve These
We usually pile these up on an old wooden board (classy? rustic? who knows). Dipping sauce is non-negotiable: ranch is classic. My uncle swears by blue cheese, but that's a divisive topic at our family parties. Bonus points if you pass around napkins before serving—it's about to get messy. I also saw this chef on YouTube serve them with a little honey drizzle and, just saying, that was wild and addictive. Check YouTube Nashville hot snack recipes if you're into trying new twists.
If You're Like Me, You'll Appreciate These Pro Tips
- I once tried rushing the cheese freezing step and, well, let's just say the cheese oozed out like a slow-motion horror flick.
- If your bacon smiles at you (i.e., unravels), try wrapping it tighter, and always start and finish with the loose ends tucked under the stick.
- Actually, I've found that baking them a tad longer at a lower temp (400F) can help if your oven tends to run hot, but then you have to wait longer and patience is not my strong suit.
Questions I Actually Get Asked (And My Not Quite Perfect Answers)
- Q: Can I air fry these instead of baking?
- A: Oh, totally. I do it at 400F for about 10-12 minutes, shaking halfway. Just know they might stick a little, so give your basket a spritz of oil first!
- Q: Do I have to use mozzarella?
- A: Not at all. String cheese works in a pinch. I've even done cheddar, but it gets super oozy, which is kinda fun and kinda tricky. Up to you.
- Q: Is this really Nashville style?
- A: Well, it's got the bold spice and a nod to the city, but let's be honest, it's more "inspired by" than authentic. For some more traditional Nashville recipes, try Bon Appétit's hot chicken—super spicy but worth it!
- Q: What if mine fall apart?
- A: Happens to the best of us. If the bacon isn't sticking, stick another toothpick in there or even wrap a bit of aluminum foil around the ends for baking. Just take it off before eating (yes, someone in my family learned that the hard way).
And if you get stuck, just holler. I'm not a chef, just a home cook figuring it out (and occasionally making a mess), but hey, that's where the fun is, right?
One quick side note—I've tried a zillion recipes form Serious Eats for inspiration. Their science-y approach helps, even if I usually go rogue by step four. Just in case you're the curious type too.


Ingredients
- 8 mozzarella cheese sticks
- 8 slices thick-cut bacon
- 2 tablespoons Nashville hot seasoning
- ½ cup all-purpose flour
- 2 large eggs
- 1 cup panko breadcrumbs
- Vegetable oil for frying (optional, if frying)
Instructions
-
1Pat the mozzarella sticks dry with paper towels. Wrap each cheese stick tightly with a slice of bacon, securing the ends with toothpicks.
-
2In a small bowl, mix Nashville hot seasoning into the panko breadcrumbs. Dredge each bacon-wrapped stick in flour, dip in beaten eggs, then coat with the seasoned breadcrumbs.
-
3Place the prepared sticks on a baking sheet lined with parchment paper and refrigerate for at least 15 minutes to help them firm up.
-
4Preheat your oven to 400°F (200°C), or heat vegetable oil in a deep fryer to 350°F (175°C) if frying.
-
5Bake for 18–20 minutes until bacon is crispy and cheese is melted, or fry the sticks in batches for about 2–3 minutes until golden brown. Let cool slightly before serving.
Approximate Information for One Serving
Nutrition Disclaimers
Number of total servings shown is approximate. Actual number of servings will depend on your preferred portion sizes.
Nutritional values shown are general guidelines and reflect information for 1 serving using the ingredients listed, not including any optional ingredients. Actual macros may vary slightly depending on specific brands and types of ingredients used.
To determine the weight of one serving, prepare the recipe as instructed. Weigh the finished recipe, then divide the weight of the finished recipe (not including the weight of the container the food is in) by the desired number of servings. Result will be the weight of one serving.
Did you make this recipe?
Please consider Pinning it!!