
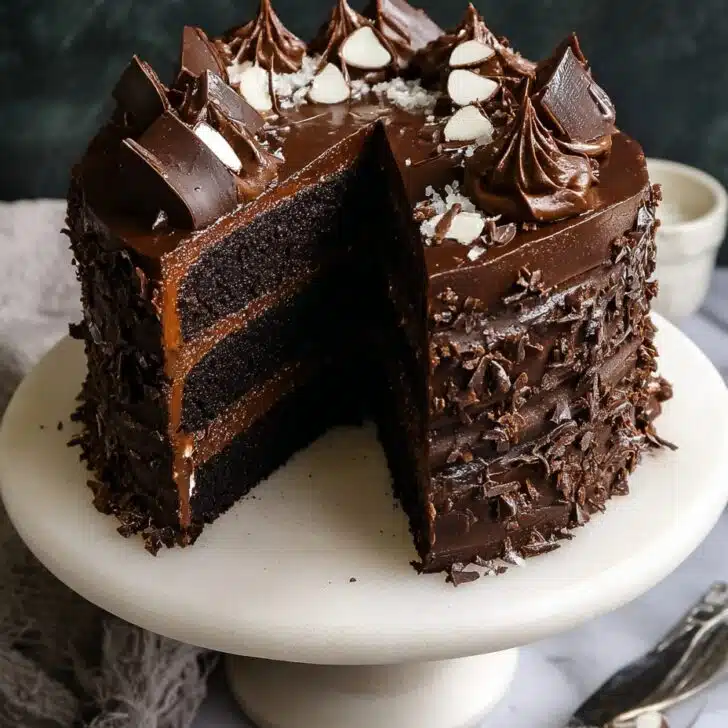
Let's Talk About Love at First Sight Chocolate Cake
If you’re reading this, I’m guessing you share the universal truth: there’s always room for chocolate cake. Especially this one. The first time I baked this Love at First Sight Chocolate Cake, it was on a rainy Saturday, and I accidentally doubled the cocoa (totally on purpose, if anyone asks). Well, my husband swears it changed his mind about homemade cakes forever. Or at least now he requests this instead of the store-bought stuff. Not to be dramatic, but it’s basically a hug in cake form.


Oh, quick digression — one time I tried baking it in a round pan that was ever-so-slightly bent from a previous “oven incident” (do not ask). If your pan’s lopsided, your cake might end up with more personality, but hey, tastes the same. Promise.
Why You'll Love This Chocolate Cake
I make this when I need a chocolate fix and can’t face the world, or when someone’s having a birthday, or just, you know — Wednesdays. My family basically wrestles over the last slice (it’s not dignified), and once my neighbor asked for the recipe after tasting a leftover sliver I dropped off "for later." Oh, and you don't need any fancy chocolate bars — regular old cocoa powder does all the heavy lifting. I used to be scared of scratch cakes (pro tip: boxed is fine, but this is worth the tiny bit more washing up). Actually, I find the messier the kitchen, the better the cake. Hmm…maybe not the best life motto, but for baking, it works!
What You’ll Need (Ingredients)
- 1 and ¾ cups (220g) all-purpose flour (if I’m low, I’ll sneak in a bit of bread flour, nobody’s noticed yet)
- ¾ cup (75g) unsweetened cocoa powder (Grandma always pushed Hershey’s, but honestly, whatever’s on sale works fine)
- 2 cups (400g) sugar (sometimes I use half brown sugar for a little extra oomph)
- 1 and ½ teaspoons baking soda
- ¾ teaspoon baking powder
- 1 teaspoon salt
- 2 large eggs, room temp (or not, I almost never remember ahead)
- 1 cup (240ml) buttermilk (milk + a squeeze of lemon in a pinch does the trick)
- ½ cup (120ml) vegetable oil (melted butter’s grand if you’re feeling fancy)
- 2 teaspoons vanilla extract
- 1 cup (240ml) hot coffee (yep, even instant; or just use hot water if you're caffeine-averse or it’s after 5pm)
How I Throw it Together (Directions)
- Preheat your oven to 350°F, or as close as you can get it if your oven's as old as mine. Grease and line a 9x13-inch pan (or two 9-inch rounds—things might bake slightly different, just keep an eye out).
- Grab your biggest bowl (less spillage = less sweeping later). Whisk together flour, cocoa powder, sugar, baking soda, baking powder, and salt. Don’t worry if there are a few lumps – they'll work themselves out. Or use your hands, no one’s looking.
- Add eggs, buttermilk, oil, and vanilla. I just chuck everything in at once (less fuss), then beat till mostly smooth. I always sneak a finger taste here—no shame.
- Slooowly pour in the hot coffee. Your batter might look suspiciously liquidy. Totally normal. In fact, that’s the magic. Resist adding more flour. Stir until combined—it’s OK if it looks kinda runny.
- Pour into your pan(s), then bake for about 30–35 minutes, maybe a bit more, depending on your oven's moods. I check with a toothpick — it should come out with a few moist crumbs.
- Let it cool in the pan (or on a rack if you’re patient, which, honestly, I am not), then frost, devour, or… both.


Notes Only a True Chocolate Cake Devotee Would Know
- If you use Dutch process cocoa, the cake gets this deeper, almost mysterious flavor, but regular cocoa is totally fine.
- Once I tried Greek yogurt instead of buttermilk—turned out a bit denser, but still tasty.
- Crumbly edges? Totally normal! Actually, I prefer the corner pieces; they have character.
- And don’t panic if your cake sinks a tad in the middle—it'll get covered with frosting anyway.
Variations I’ve Bumbled My Way Through
- I once swapped the coffee for stout beer (on a dare) — it was, surprisingly, spectacular. But only if you’re into that rich malty thing.
- Adding orange zest gives it a bit of zing, but not everyone in my house was on board.
- I tried folding in chocolate chips just before baking once; they all sank. So, maybe sprinkle them on top instead next time?


Handy Stuff (Equipment)
- A big bowl (two if you’re anti-mess, but who has time for that?)
- Electric mixer is grand, but my whisk & elbow grease work in a pinch.
- If you don’t have parchment paper, a bit of flour-dusted butter on the pan usually does the job — yeah, it’s old-school.
Actually, I keep meaning to try one of those silicone spatulas, but so far, fingers still win for getting the last bit of batter out.
How to Stash It (Storage)
This cake’s happiest in an airtight container at room temp — it'll last about 3 days. But honestly, in my house, it never lasts more than a day! Fridge? Eh, makes it a bit fudgey, but not in a bad way. Oh, I once froze a few slices wrapped in foil; defrosted well, especially zapped in the microwave for those impatient moments.
Serving It Up (My Style!)
This cake and a cold glass of milk is classic, but sometimes I sneak it with ice cream or a blob of whipped cream (if anyone’s watching). Birthdays always mean sprinkles on top in our family, for good luck or something — not that we’re particularly superstitious. Or maybe just hopeful for cake more often.
Cake Pro Tips that Beg for your Patience
- I once tried shortcutting the cooling step and, yeah, my frosting half-melted and slid off. Learn from my tragic impatience.
- Don’t skip lining the pan, even if you’re in a rush — trust me; washing baked-on chocolate cement is no joke.
- Actually, if your batter looks super thin, resist all instincts to add flour. It bakes up perfectly moist as is (hard to believe, I know).
Frequently Asked (and Sometimes Slightly Odd) Questions
- Can I use gluten-free flour? I’ve tried it with a 1:1 swap, and it’s honestly pretty decent, though the crumb gets a bit softer. Just watch bake time, it can go quick.
- Do I have to use coffee? Nope! Hot water works, but coffee makes it chocolate-ier (totally a word).
- Can I frost this with anything? Pretty much! I like a ganache or even just a dusting of powdered sugar on crazy busy days. My cousin likes peanut butter icing, which is, well, not for everyone but worth a go if you’re adventurous.
- Why is my cake sinking? Oh, this happened to me when I opened the oven too early. Or if you overmix. But if you layer enough frosting, no one’s the wiser.
- How do I make cupcakes instead? Fill lined tins ⅔ full, bake 18-22 mins, give or take. They’re great for sharing (or hoarding, just saying).
Ingredients
- 1 and ¾ cups (220g) all-purpose flour
- ¾ cup (65g) unsweetened cocoa powder
- 2 cups (400g) granulated sugar
- 2 teaspoons baking powder
- 1 and ½ teaspoons baking soda
- 1 teaspoon salt
- 2 large eggs
- 1 cup (240ml) buttermilk
- ½ cup (120ml) vegetable oil
- 2 teaspoons vanilla extract
- 1 cup (240ml) hot coffee
- 1 cup (170g) semi-sweet chocolate chips (for ganache)
- ¾ cup (180ml) heavy cream (for ganache)
Instructions
-
1Preheat the oven to 350°F (175°C). Grease and flour two 9-inch round cake pans.
-
2In a large bowl, whisk together flour, cocoa powder, sugar, baking powder, baking soda, and salt.
-
3Add eggs, buttermilk, oil, and vanilla to the dry ingredients and mix until combined. Stir in the hot coffee until the batter is smooth.
-
4Divide the batter evenly between the prepared pans and bake for 30-35 minutes, or until a toothpick comes out clean.
-
5Let cakes cool in pans for 10 minutes, then transfer to a wire rack to cool completely.
-
6For the ganache, heat heavy cream until steaming, pour over chocolate chips, let sit for 2 minutes, then whisk until smooth. Spread ganache between layers and over the top of the cake.
Approximate Information for One Serving
Nutrition Disclaimers
Number of total servings shown is approximate. Actual number of servings will depend on your preferred portion sizes.
Nutritional values shown are general guidelines and reflect information for 1 serving using the ingredients listed, not including any optional ingredients. Actual macros may vary slightly depending on specific brands and types of ingredients used.
To determine the weight of one serving, prepare the recipe as instructed. Weigh the finished recipe, then divide the weight of the finished recipe (not including the weight of the container the food is in) by the desired number of servings. Result will be the weight of one serving.
Did you make this recipe?
Please consider Pinning it!!