
Okay, So Here's My Levain Bakery Cookie Confession
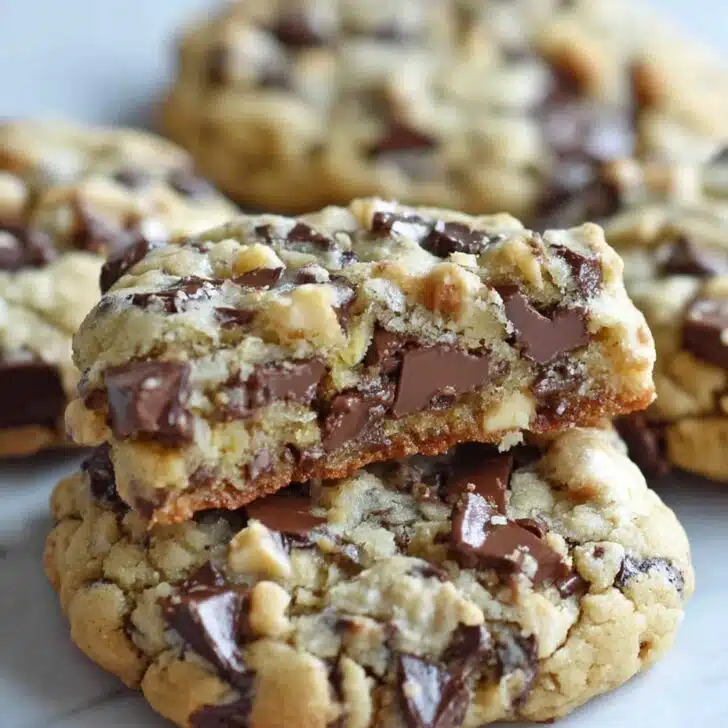
Let me get straight to it: I am obsessed (like, hide-them-in-the-pantry obsessed) with those giant Levain Bakery chocolate chip cookies. You know, the thick chunky ones—crispy outside, practically gooey in the middle? Yeah. First time I made these, I overbaked half the batch because I couldn't believe they were 'done'... Turns out, slightly underdone is the secret sauce. Lesson learned. Oh, and once I dropped half a chocolate chip bag on the floor. My dog was thrilled. Me, less so.


Why You'll Love These Monster Cookies
I pull out this recipe when I want to feel like a cookie wizard (or just need to impress my picky cousin). My family goes absolutely wild for these—especially when they're still warm, and the chocolate practically burns your tongue. Granted, waiting for the dough to chill sometimes drives me a bit nuts, but it's so worth the wait. Plus, if you like thick cookies that you can almost split in two, this one’s for you. (Side note: once tried to make them with just one egg because I ran out—wouldn’t recommend, cookies were sad and flat. Oops!)
What You'll Need (and a Few Sneaky Swaps)
- 2 sticks (about 225g) unsalted butter (I’ve used salted in a pinch, just skip extra salt)
- 1 cup light brown sugar, packed (dark brown for a deeper, molasses-y vibe, but honestly, both are great)
- ½ cup white sugar (sometimes I use organic, but regular is fine – grandma always just grabbed whatever bag she had)
- 2 large eggs (room temp is best, but if you forget like I always do, just run 'em under warm water for a bit)
- 3 cups all-purpose flour (bread flour makes ‘em chewier, but you do you)
- 1 teaspoon baking powder
- ½ teaspoon baking soda
- ½ teaspoon salt (I go for flaky sea salt on top sometimes)
- 2 cups chocolate chips (or chopped chocolate, or even a mix – honestly, you can't go wrong unless you use white chocolate, and I may have opinions about that)
- 1 cup walnuts (totally optional; my kids think nuts are "weird" so I leave half the batch plain)
Basically, whatever brand you have rolling around works. No need to get fancy unless you want to show off.
Let’s Bake These Cookie Beasts
- Get butter ready. I usually zap it for about 15 seconds so it’s soft but not melty. Cold works in a jam; just takes more stirring arm power.
- Cream your butter and sugars together. Mixer is easiest here, but you can totally use a big bowl and a wooden spoon—think of it as your arm workout for the week. Give it 3-4 minutes, until it looks all fluffy. (This is where I sneak a—okay, I mean "sample"—a tiny taste. No judgment, right?)
- Add in those eggs. One at a time, don’t rush, or the dough might get a bit streaky. If it does, just beat a little longer—it’ll come together. Sometimes looks weird here, but trust.
- Mix the dry stuff. In a separate bowl (or straight into the wet stuff if you’re lazy and don’t want more dishes, which, honestly, I respect), whisk together flour, baking powder, baking soda, and salt.
- Combine. Add dry ingredients to wet in a few goes—I do three, scraping the bowl in between. It’ll get thick, which is normal. If your mixer sounds like it's struggling, maybe switch to a spatula. On second thought, maybe just finish by hand.
- Stir in chocolate and walnuts. Don’t go crazy—just enough to get 'em scattered throughout. (Full disclosure: sometimes my patience runs thin by this stage, but the chunkiness is worth the arm ache.)
- Chill time! Absolutely slap some plastic wrap on the bowl and shove it in the fridge. At least 30 minutes, but I’ve gone as long as overnight. If you skip this step, the cookies will spread too much. I learned that the hard way. Twice.
- Shape. Preheat your oven to 410°F (yep, weird, but trust me). Line your baking tray with parchment. Scoop out huge, craggy mounds of dough—like the size of a golf ball, maybe bigger. Don’t bother smoothing them out; the bumpy bits bake up the best.
- Bake. 9-11 minutes, depending on your oven and the size of your dough mounds. Edges should look set, but the centers should look underbaked. That's what gives you that gooey, Levain-style center. They’ll finish setting as they cool.
- Cool… kinda. Let them sit on the pan for at least 10 minutes. But if you’re like me, you eat one way too soon, burn your tongue, and promise to wait next time (but don’t).


Stuff I Wish I'd Known (Cookie Epiphanies)
- If your dough’s really crumbly, just let it sit a few mins to absorb the liquid—don’t panic.
- Don’t skip chilling unless you like pancakes instead of cookies. (Learned that, um, three times now?)
- I think these actually taste better the next day, but that’s assuming any survive that long.
- You can totally halve this recipe. Or double it, if you’re feeding a rugby team or just really, really like cookies.
Some Wild (and Less Wild) Variations
- Tried drizzling salted caramel over the tops once—delicious, super messy, but probably don’t serve to small kids in white shirts.
- Used white chocolate chips and macadamias instead of chocolate and walnuts, but honestly it tasted a bit too sweet to me... maybe I just love dark chocolate too much.
- If you’re feeling fancy, mix in chopped dried cherries; apparently, that’s a New York thing?


Equipment: Don't Stress If You're Missing Stuff
Mixer makes this easier, but a big sturdy spoon (and maybe a bit of determination) will work. Parchment paper keeps them from sticking, but I’ve definitely buttered my pan when I ran out (just watch for burnt bottoms). Oh, and if you don't have a cookie scoop? I just use a big spoon or even my hands. Gets messy but who cares, right?
Keeping 'Em Fresh (Or, the Theory of Leftovers)
Supposedly, these last in an airtight container for up to 4 days. In reality, they’re usually gone by breakfast the next day in my house (not naming names... but it’s definitely my spouse). You can freeze extra dough balls, too, which is brilliant for emergency cookie cravings. Just add another minute or two to baking straight from frozen.
How We Serve 'Em at My Place
A big glass of cold milk is the classic move here, but my personal favorite? Scooping a warm cookie over a bowl of vanilla ice cream after the kids go to bed—don’t judge. Sometimes I dust the tops with a pinch of flaky salt for that sweet-salty magic. My family likes them with hot chocolate, even in July; don’t ask me why.
Pro Tips (A.K.A. How I Messed Up and What I Learned)
- I once tried rushing the creaming step—ended up with greasy cookies. Just wait; let your butter and sugars get light and fluffy.
- Overcrowding the tray? Guilty. Those cookies merged into some sort of mega-cookie. Leave a good few inches in between, or get ready with a spatula.
- And don’t trust your oven's timer—check a minute early. My first batch? Absolute hockey pucks.
Real Questions I’ve Actually Gotten
Can I make these without nuts?
Absolutely. I usually end up making a nut-free batch anyway, since half my friends aren’t keen on walnuts. Just add a bit more chocolate if you like—makes up for the missing crunch.
Why do you bake at that weird 410°F temp?
Honestly, no idea who came up with it, but it works. Crisp outsides, gooey centers. Go with it. (Though if your oven only does 400, that'll do in a pinch.)
My cookies spread too much—what happened?
You probably skipped the chill time. Don’t worry—you’re not alone. Next batch, just let the dough hang in the fridge for a bit.
They don’t look done after 10 minutes?
That's the point! If they look set on the edges and soft in the center, you nailed it. Let them cool on the tray—they’ll firm up like magic.
Do I really need parchment?
Parchment keeps them from sticking, but if you’re out, just butter your tray well and keep an eye out for burning. Or, worst case, scrape them off! Did that once—not pretty, but still tasted great.
(By the way, if you have a tip for getting melted chocolate out of carpet, let me know. My dog was no help there!)
Ingredients
- 1 cup (226g) unsalted butter, cold and cubed
- ¾ cup (150g) light brown sugar, packed
- ½ cup (100g) granulated sugar
- 2 large eggs, cold
- 2 cups (260g) all-purpose flour
- 1 cup (120g) cake flour
- 1 teaspoon baking powder
- ½ teaspoon baking soda
- ½ teaspoon Kosher salt
- 2 cups (340g) semi-sweet chocolate chips
- 1 cup (115g) walnuts, roughly chopped
Instructions
-
1Preheat oven to 410°F (210°C) and line two baking sheets with parchment paper.
-
2In a large bowl or stand mixer, cream together the cold butter, brown sugar, and granulated sugar until light and fluffy.
-
3Add the eggs one at a time, mixing well after each addition.
-
4In a separate bowl, whisk together all-purpose flour, cake flour, baking powder, baking soda, and salt. Gradually add the dry ingredients to the wet mixture.
-
5Fold in chocolate chips and walnuts until evenly distributed. Scoop large mounds of dough (about 4 oz each) onto the prepared baking sheets, spacing well apart.
-
6Bake for 11-12 minutes, or until the edges are golden but the centers are still soft. Cool on the baking sheets for 10 minutes before transferring to a wire rack.
Approximate Information for One Serving
Nutrition Disclaimers
Number of total servings shown is approximate. Actual number of servings will depend on your preferred portion sizes.
Nutritional values shown are general guidelines and reflect information for 1 serving using the ingredients listed, not including any optional ingredients. Actual macros may vary slightly depending on specific brands and types of ingredients used.
To determine the weight of one serving, prepare the recipe as instructed. Weigh the finished recipe, then divide the weight of the finished recipe (not including the weight of the container the food is in) by the desired number of servings. Result will be the weight of one serving.
Did you make this recipe?
Please consider Pinning it!!