
Let Me Tell You About This Graveyard Cake
I swear, nothing gets my family chattering like the sight (or frankly, the vague chocolatey smell) of this Layered Graveyard Dirt Cake. I mean, I’ve brought this wobbly delight to more Halloween shindigs than I can count, and there was this one time I tripped on a pumpkin at the door and nearly flattened the whole thing — dirt everywhere (except the cake)! Good times. Anyway, if you’re after a dessert that looks like something kids wish they could play with and adults, well, secretly want to gobble up without shame, this is for you. Honestly, sometimes I make it in July just because, you know, life’s too short for rules.
Why You’ll Want to Dive Face-First Into This
I make this when I want maximum fun with minimum faff. My picky nephew literally howls for it every Autumn (seriously, he’s eight but sounds like a wolf pup with a sweet tooth). My dad used to grumble about the gummy worms—then I caught him picking the biggest ones and sliding them onto his own plate. It’s barely even baking if I’m being honest, and if you mess up the layers, just call it "rustic" decor (I do!).
No matter how wonky it looks, people flock to it like ants to a picnic, and isn’t that the whole point?
Here’s What You’ll Need (and Maybe Don’t Need)
- 1 family-size package chocolate sandwich cookies (any brand; my mom used to swear by Oreos, but the store brand works fine. I’ve even used those gluten-free ones, and nobody noticed!)
- 1 block cream cheese, softened (light is fine; but honestly, full-fat is more fun)
- ¼ cup butter, softened (I once subbed in margarine in an emergency – nobody noticed, again)
- 1 cup icing sugar (or confectioners’ sugar, if you’re fancy)
- 2 packages instant chocolate pudding mix (125g each) – vanilla works in a pinch, but you lose some spooky points
- 3 ½ cups cold milk (for the pudding)
- 1 large tub frozen whipped topping, thawed (I’m not too proud to use Cool Whip, but real whipped cream holds better if you’re after that luxury feel)
- Gummy worms, candy pumpkins, tombstone cookies (Milano cookies or Biscoff if you’re feeling continental—the writing always looks dodgy, but it just adds “old graveyard” vibes)
The How-to (Call These Instructions or Friendly Suggestions!)
- Smash the cookies. Pop the cookies in a big zip bag and crush them up. I use a rolling pin; sometimes, I forget and whack them with a skillet, which is oddly therapeutic. Reserve a handful for the top layer.
- Mix up the cream cheese layer. In a bowl, mix cream cheese, butter, and icing sugar until smooth and lump-free—or accept a few lumps; nobody’s going to inspect your handiwork before desert. I use a hand mixer; once in a pinch, I used a wooden spoon and regretted it. Your call.
- Whip up the pudding. Combine dry pudding mix with cold milk and beat until thick. Here’s where I tend to zone out and start thinking about what’s for dinner. Fold in the whipped topping. Taste test only after you’ve saved enough for the cake—it’s way too easy to eat straight from the bowl.
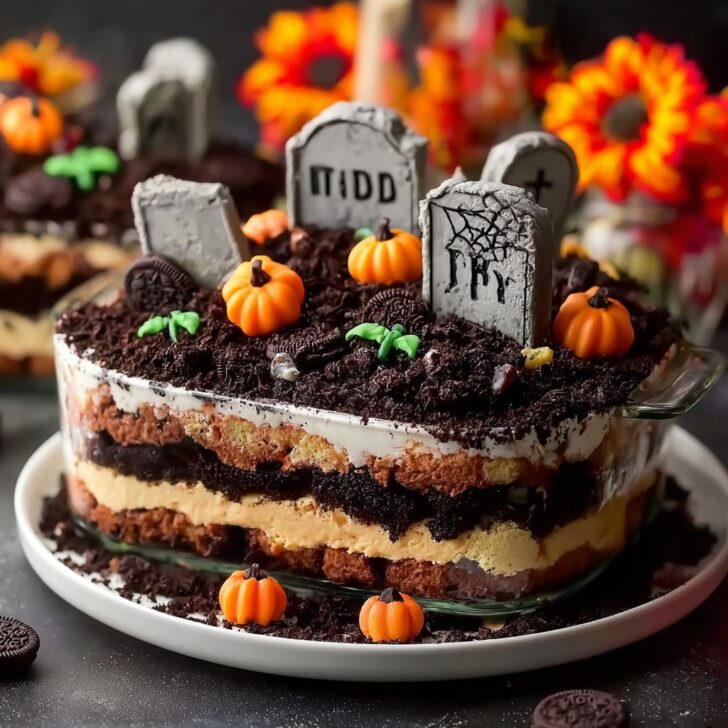
- Time to layer! In a trifle dish, 9x13 pan, or, heck, a salad bowl if that’s all you’ve got (I’ve done it), go cookies first, then the cream cheese mix, then pudding, and repeat. Make sure to leave some crushed cookies for the very top so it actually looks like dirt.
- Decorate. Stick tombstone cookies into the top so they look like they’re lurking in the dirt, poke some gummy worms around, and drop a candy pumpkin or two. I always freestyle here—one year, we had “ghost” marshmallows because the worms ran out.
- Chill. Into the fridge for at least two hours, although, I swear, honestly it tastes better the next day (if you can wait!).
A Few Notes From My Many Cake Escapades
- Once I tried to shortcut the softening step for cream cheese by nuking it a bit too long. Don’t. Cream cheese soup is not ideal for spreading.
- If you only have a small hand whisk, the pudding takes forever. At least you’ll get a good arm workout? Or, borrow a mixer like Sally does here.
- Vanilla pudding can work but doesn’t look, y’know, “dirt-y” enough.
What Happens If You Go Off Script (a.k.a. Variations)
- I’ve tried using butterscotch pudding. It was... weirdly delicious, but my kids revolted (“Where’s the chocolate, mum?!”).
- Mini marshmallows as “ghosts” are always a hit—just dot chocolate chips on for faces.
- One time I tried to use chocolate granola instead of cookies—too crunchy, didn’t blend well. Wouldn’t recommend unless you’re after a dental workout. Ree Drummond keeps it classic, and so do I (usually).
Kit You’ll Want (But Don’t Sweat It Too Much)
- 9x13 baking dish, trifle bowl, or even a deep mixing bowl. In a pinch, I’ve used a roasting tin (not ideal but cake is cake).
- Hand mixer is great, but you can use a regular whisk or even a fork. It might take longer, though—good for letting off steam!


Storage (Doesn’t Stick Around Long, Though)
So, you should cover it and refrigerate for up to 3 days—but honestly, it never lasts that long here. The cookies soften into the layers though, which is extra nice on day two. Just don’t let it sit out too long at room temp; those candies get weirdly sticky.
How I Like to Serve It (and Mischievous Add-Ons)
I cut big, lopsided squares and plop them in bowls, sometimes with a little whipped cream cloud if I’m feeling artsy. At my house, the first spoon always goes to whoever can recite their best ghost story (or worst pun, more often...)
Stuff I’ve Learned the Hard Way (Pro-Tip Territory)
- Don’t try to skip the chill time—once I did and the whole thing just slumped. Not exactly Instagram material.
- I tried to assemble it warm (was in a hurry), and the whipped topping just melted. Take it from me—patience pays off.
Questions I Keep Getting (and My Off-the-Cuff Answers)
- Can I make this ahead? Yep, even a day in advance—it’s maybe even better after a night in the fridge (as long as nobody sneaks a piece).
- Do I have to use pudding mix? Honestly, scratch pudding is great but, for this, the instant stuff saves time and my sanity.
- Is there a way to make it less sweet? Hmmm, maybe use less icing sugar and a darker chocolate cookie, but then again, it’s sort of a sugar rush type of cake.
- Gluten free? Sure! Loads of gluten-free cookies and even GF pudding mixes these days. Just check the labels. If you’re nervous, here's a handy roundup I trust: Celiac.org’s gluten free picks.
- Why does my tombstone writing smudge? Oh, it does for me too! Best bet is to let the cookie dry a bit after using the icing pen; or, just call them “weathered grave markers”—no one’s checking for calligraphy. (And if they are, maybe don’t invite them next time?)
And if you try this cake, tag me somewhere or just shout too loudly in your kitchen—it’s all good. Sometimes celebrations are messy. That’s the fun bit, right?


Ingredients
- 1 package (14 oz) chocolate sandwich cookies (e.g., Oreos), crushed
- 2 packages (3.9 oz each) instant chocolate pudding mix
- 3 ½ cups cold milk
- 1 package (8 oz) cream cheese, softened
- ½ cup unsalted butter, softened
- 1 cup powdered sugar
- 1 container (12 oz) frozen whipped topping, thawed
- Assorted Halloween candies (gummy worms, candy pumpkins, cookie tombstones) for decoration
Instructions
-
1In a large mixing bowl, beat together cream cheese, butter, and powdered sugar until smooth and creamy.
-
2In a separate bowl, whisk instant chocolate pudding mix with cold milk for about 2 minutes until thickened. Let sit for 5 minutes.
-
3Gently fold the whipped topping into the cream cheese mixture until fully combined. Add the prepared pudding and mix well.
-
4In a 9x13 inch dish or trifle bowl, layer half of the crushed cookies, then half of the pudding mixture. Repeat the layers once more, finishing with cookies on top.
-
5Decorate the top layer with candy pumpkins, gummy worms, and cookie 'tombstones' to resemble a graveyard scene.
-
6Chill the cake in the refrigerator for at least 2 hours before serving for best texture and flavor.
Approximate Information for One Serving
Nutrition Disclaimers
Number of total servings shown is approximate. Actual number of servings will depend on your preferred portion sizes.
Nutritional values shown are general guidelines and reflect information for 1 serving using the ingredients listed, not including any optional ingredients. Actual macros may vary slightly depending on specific brands and types of ingredients used.
To determine the weight of one serving, prepare the recipe as instructed. Weigh the finished recipe, then divide the weight of the finished recipe (not including the weight of the container the food is in) by the desired number of servings. Result will be the weight of one serving.
Did you make this recipe?
Please consider Pinning it!!