
Oh, Instant Pot Yogurt—My Lazy Sunday Favorite
Let me tell you, I never truly got yogurt until I tried making it in my Instant Pot (after a slight nudge from my cousin who swears she invented the method—she didn’t, but let’s not burst her bubble). The first time, I’ll admit, I was convinced I'd ruined it and created some sort of sci-fi petri dish. Turns out, nope! Just thick, creamy yogurt, minus the scary ingredients and mysterious aftertastes from store-bought. I make this mostly on lazy Sundays while I’m, you know, half-heartedly folding laundry or pondering how on earth socks vanish. Honestly, this recipe feels more like babysitting than cooking, except your house smells way better at the end.


Why I’m Obsessed With This (and My Family’s… Enthusiasm)
I make this Instant Pot Yogurt when my 5-year-old gets on a "breakfast for dinner" kick—he calls it "pajama yogurt night" and refuses to eat anything else (kids are strange and wonderful). Also, I’m all about anything that means fewer trips to the store. There was a time my batches turned out a bit, uh, 'tangier' than anyone liked (over-fermentation—who knew?). But I love how customizable it is; throw in some honey, and suddenly you’re a hero. Other times, I just want to prove to myself I can adult. Anyway, my family apparently thinks I moonlight as a dairy magician. If only they knew how little real effort goes into this!
What You’ll Need (Go as Fancy or Lazy as You Like)
- ½ gallon (about 8 cups) whole milk (I use whatever’s on sale; Granny always insisted on organic but honestly, they all work)
- 2 tablespoons plain yogurt (with live cultures—sometimes I use Greek, sometimes regular, sometimes I just wing it with what’s leftover)
- (Optional) 2-3 tablespoons instant nonfat dry milk powder (for thicker yogurt, I add if I remember)
- (Optional) Sweetener of choice, to taste (honey, maple syrup or skip it if you’re all about that tart life)
How I Actually Make Instant Pot Yogurt (Wobbly Bits Included)
- Pour the milk into the Instant Pot. Hit the 'Yogurt' button until it reads "boil." Put the lid on (doesn’t matter if it’s sealed or vented) and let it heat up. You’ll hear some clunks and beeps—normal.
- When it beeps, open the lid and check the temp with a kitchen thermometer (it should be around 180°F). If you don't have a thermometer, honestly, just wait till it's steaming hot but not bubbling furiously.
- Now, let that milk cool down to about 110°F. I sometimes pop the insert into a cold water bath in the sink if I’m feeling impatient. This is usually when I lose track and start scrolling my phone—don’t let it drop below 100°F though.
- Scoop about a cup of the warm milk into a bowl. Add the plain yogurt (and dry milk if using), whisk smooth. Dump this back into the Instant Pot and gently stir.
But don’t go wild! Just enough. - Pop the insert back, hit 'Yogurt' again. Set for 8 hours. Close the lid. Walk away. Have a cup of tea, or binge-watch some telly.
- After the timer’s up, sneak a peek. It’ll look set and maybe a bit wobbly. If it’s still runny, no panic—let it incubate another hour or two.
This is the place where I always taste a spoonful because... why not? - When you like the tang, transfer the insert to the fridge (don’t stir yet). Cool completely, at least 4 hours. Then give it a gentle stir, drain if you want it thicker, or just leave as is.
- You can add sweetener or fruit now—or just serve it up plain. Up to you. Trust your gut (literally, ha!).


A Few Hard-Earned Notes (Take it or Leave it)
- If your yogurt turns out runny, don’t cry. Strain it with a cheesecloth—voilà, Greek-style.
- Never used ultra-pasteurized milk? I find it works, but yogurt tastes a tiny bit less "fresh". Or maybe that’s just my brain.
- Forgot to save a bit as a starter for next time? Been there. Just grab another spoonful from a store-bought tub—no shame.
Variations (Yup, A Few Weird Ones)
- Greek-style: Strain with a fine-mesh sieve or cheesecloth for a few hours after chilling. So thick you could stand a spoon in it.
- Try coconut or almond milk for a dairy-free version. Warning: textures get odd; I had one turn out like a weirdly tangy pudding—still edible, just… unexpected.
- Add a splash of vanilla after chilling (not before—trust me, it doesn’t taste right warm!)


But What If My Kitchen Lacks Fancy Gear?
Honestly, while a kitchen thermometer’s dreamy, sometimes I just go by touch. If your finger feels like it could swim in the milk for a few seconds without yelping, it’s probably 110°F-ish. No yogurt button? Keep the Instant Pot warm setting on for 8 hours, but check it now and then. Or wrap the pot in a towel—old school!
Storage (Not That It Ever Makes It That Far)
Keeps in the fridge for 5–7 days, covered. Unless you have a teenager or a yogurt-crazed spouse, in which case, feed them first if you want leftovers. Honestly, sometimes I swear it evaporates overnight.
How I Serve It (Family Quirks Included)
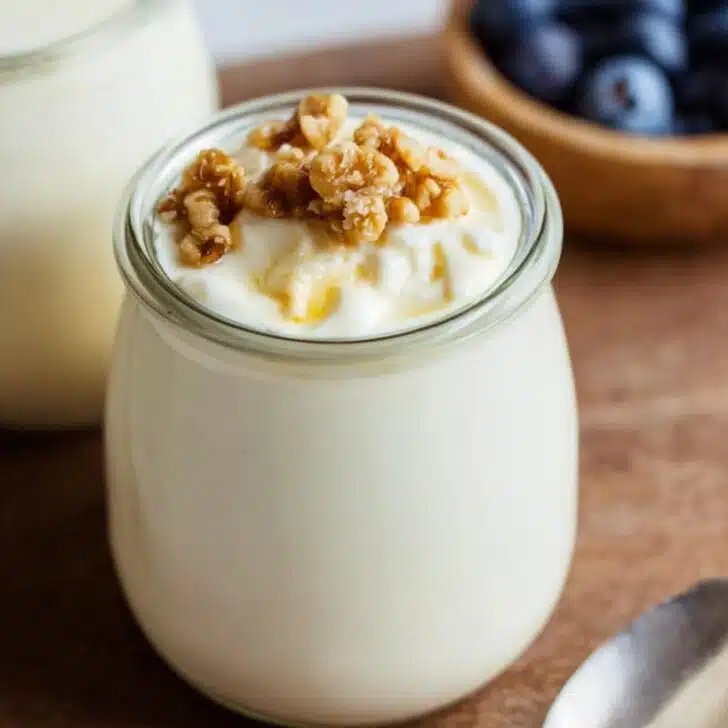
I love it with a drizzle of honey and a sprinkle of toasted nuts—sometimes we go full Aussie and serve it with passionfruit pulp. Kiddo drowns his in sprinkles (yep, rainbow ones). My partner claims it’s unbeatable with jam and granola, so now it’s become a family democracy (but I still sneak mine plain late at night when no one’s watching).
Pro Tips: The Mistakes That Taught Me Everything
- I once tried to incubate it hotter for less time. Do not do this—ended up with a lumpy, separated mess.
- Don’t stir the yogurt until it’s completely chilled. I got impatient, and it turned weirdly grainy—so yeah, patience for the win.
- Use fresh starter every 3–4 batches; otherwise, things get... funky.
Instant Pot Yogurt: Real Questions, Straight Answers
- Does this work with skim milk? Kinda! It’ll be thinner, but toss in extra dry milk powder if you want it a bit more like what you get at the shop.
- Can I make it overnight? Absolutely. I set it before bed; just pop it in the fridge in the morning—quick and painless.
- What do I do with leftovers? Stir in fruit for smoothies, use as a sour cream stand-in, or—yes—make frozen yogurt if you’re feeling whimsical.
- Why does my yogurt look lumpy? Usually, it’s just rushed chilling or over-stirring. Next time, chill first, stir later. (Learn form my mistakes!)
Sorry, got distracted—have you ever tried yogurt on warm toast with a spicy sprinkle? No? It’s a game-changer. Anyway, enjoy your batch—and if you mess it up, just call it "artisan." Works every time.
Ingredients
- ½ gallon (about 8 cups) whole milk (I use whatever’s on sale; Granny always insisted on organic but honestly, they all work)
- 2 tablespoons plain yogurt (with live cultures—sometimes I use Greek, sometimes regular, sometimes I just wing it with what’s leftover)
- (Optional) 2-3 tablespoons instant nonfat dry milk powder (for thicker yogurt, I add if I remember)
- (Optional) Sweetener of choice, to taste (honey, maple syrup or skip it if you’re all about that tart life)
Instructions
-
1Pour the milk into the Instant Pot. Hit the 'Yogurt' button until it reads "boil." Put the lid on (doesn’t matter if it’s sealed or vented) and let it heat up. You’ll hear some clunks and beeps—normal.
-
2When it beeps, open the lid and check the temp with a kitchen thermometer (it should be around 180°F). If you don't have a thermometer, honestly, just wait till it's steaming hot but not bubbling furiously.
-
3Now, let that milk cool down to about 110°F. I sometimes pop the insert into a cold water bath in the sink if I’m feeling impatient. This is usually when I lose track and start scrolling my phone—don’t let it drop below 100°F though.
-
4Scoop about a cup of the warm milk into a bowl. Add the plain yogurt (and dry milk if using), whisk smooth. Dump this back into the Instant Pot and gently stir. But don’t go wild! Just enough.
-
5Pop the insert back, hit 'Yogurt' again. Set for 8 hours. Close the lid. Walk away. Have a cup of tea, or binge-watch some telly.
-
6After the timer’s up, sneak a peek. It’ll look set and maybe a bit wobbly. If it’s still runny, no panic—let it incubate another hour or two. This is the place where I always taste a spoonful because... why not?
-
7When you like the tang, transfer the insert to the fridge (don’t stir yet). Cool completely, at least 4 hours. Then give it a gentle stir, drain if you want it thicker, or just leave as is.
-
8You can add sweetener or fruit now—or just serve it up plain. Up to you. Trust your gut (literally, ha!).
Approximate Information for One Serving
Nutrition Disclaimers
Number of total servings shown is approximate. Actual number of servings will depend on your preferred portion sizes.
Nutritional values shown are general guidelines and reflect information for 1 serving using the ingredients listed, not including any optional ingredients. Actual macros may vary slightly depending on specific brands and types of ingredients used.
To determine the weight of one serving, prepare the recipe as instructed. Weigh the finished recipe, then divide the weight of the finished recipe (not including the weight of the container the food is in) by the desired number of servings. Result will be the weight of one serving.
Did you make this recipe?
Please consider Pinning it!