
So picture this: it's pouring outside, the kind of day where even your socks feel damp, and you’re hit with this random, deep craving for something a bit indulgent yet definitely homemade. That was me last weekend. My brain wandered right to onion rings—specifically, Parmesan onion rings. Probably because I remember my uncle Dave practically living off these back in the 90s (not that I recommend that). I keep coming back to them. They’ve got that nostalgic, garage-band kind of comfort food vibe, you know?
Why You'll Love These (Trust Me, I Do Too)
I honestly whip these up for movie nights, or when I'm too tired for a full-blown dinner but still crave something golden and crunchy. My family's obsessed—though my cousin always tries to sneak extra cheese into the coating behind my back (can't blame her). Also, they're just…easy. There's no deep-fryer drama or worrying about soggy batter. Sometimes the real struggle is saving enough for leftovers. (Spoiler: I barely ever manage.)
Here’s What You’ll Need (With a Few Swaps)
- 2-3 decent sized onions (I like yellow onions, but I've used red once—looked wild but tasted fine)
- 1 cup all-purpose flour (or plain flour—I’ve used whole wheat in a pinch; it’s a bit earthier, but still works)
- 2 eggs, beaten (sometimes I sneak in an extra white if it’s hanging around the fridge)
- ¼ cup buttermilk (totally optional; regular milk is just fine, water also works but don't tell my gran)
- 1 heaping cup panko breadcrumbs (regular breadcrumbs get soggier, but do what you want)
- ¾ cup grated Parmesan cheese (no shade—those green shaker cans will do if that’s all you’ve got)
- ½ teaspoon garlic powder (just a shake, I never measure this exactly)
- Good pinch of salt and a twist of black pepper
- Oil for baking or lightly frying (sunflower, olive, whatever you've got—my friend once used coconut oil, it was... interesting)
Let’s Get Cooking (Don’t Stress)
- Preheat your oven to 220°C (about 425°F). If you remember. I occasionally forget and panic halfway through.
- Slice up your onions—aim for about 1cm thick rings (honestly, I eyeball this every time). Carefully separate the rings. Some will break and that’s ok, those crunchy bits are the best part anyway.
- Grab three bowls: throw your flour in one, beat your eggs and buttermilk together in another, and your breadcrumbs, parmesan, garlic powder, salt, and pepper in the third bowl. Actually, I find it works better if you mix the cheese in after a quick breadcrumb stir (just something I noticed).
- Dredge each onion ring in flour first (shaking off the extra). Dip it into the egg mixture next, then toss it in the cheesy breadcrumb mix, patting them gently so the coating really clings. This is the fun (and messy) bit. Don’t be afraid to get your hands dirty!
- Arrange the coated rings on a baking sheet lined with parchment. Or, if you’re like me and ran out of parchment again, a well-oiled tray will do. Drizzle with a smidge more oil—or just mist if you’ve got a spray.
- Bake for about 18 minutes, flipping halfway through until they're crisp and golden. Sometimes my oven's a bit temperamental so check early. If you wanna fry them (which I do when feeling nostalgic) – heat oil in a big skillet and fry for about 2 minutes each side. Whichever you do, prepare for serious kitchen smells.
- Let them cool a minute—I know, the wait is rough. Then eat a sneaky one before they hit the table (I always do).
Messy Notes of a Serial Onion Ringer
- Don’t sweat it if your breading is a bit patchy. I tried double-coating once and it went way too thick, so thin bits = extra crunchy."
- If you accidentally use sweet onions, they're less sharp but still yum.
- Actually, I find they reheat best in the oven—not the microwave, unless you like floppy snacks (hey, no judgement).
If You Wanna Mix It Up (Some worked, some didn’t…)
- SWAP: Try pecorino for Parmesan—it's a bit saltier, yum. I tried emmental once… not the move; too melty, kinda odd.
- SPICY: Toss a pinch of cayenne or smoked paprika in the breadcrumb mix for heat—my brother insists on this.
- GLUTEN-FREE: Substitute in GF flour and panko. (I've done it. No huge difference.)
- FRY VS BAKE: If you deep-fry, they get more classic diner-style, but honestly the oven version is less faff.
Kit I Use (And What to Do If You Don’t Have It)
- Baking tray or cookie sheet (no joke: a roasting tin will do, just oil it well)
- Three mixing bowls—or, in an emergency, the big mug trick works (did it last month, no one noticed)
- Tongs or fingers – mine are heatproof, at least until proven otherwise.


How to Store (If… and That’s a Big If)
I know I should say "store in an airtight container for 2 days," but honestly, in my house it just doesn't last that long. If you do manage to hide some away, pop them in the fridge. I've had luck crisping them in the oven next day. Or I'll just eat 'em cold from the fridge (late-night style) and they're still delightfully cheeky.
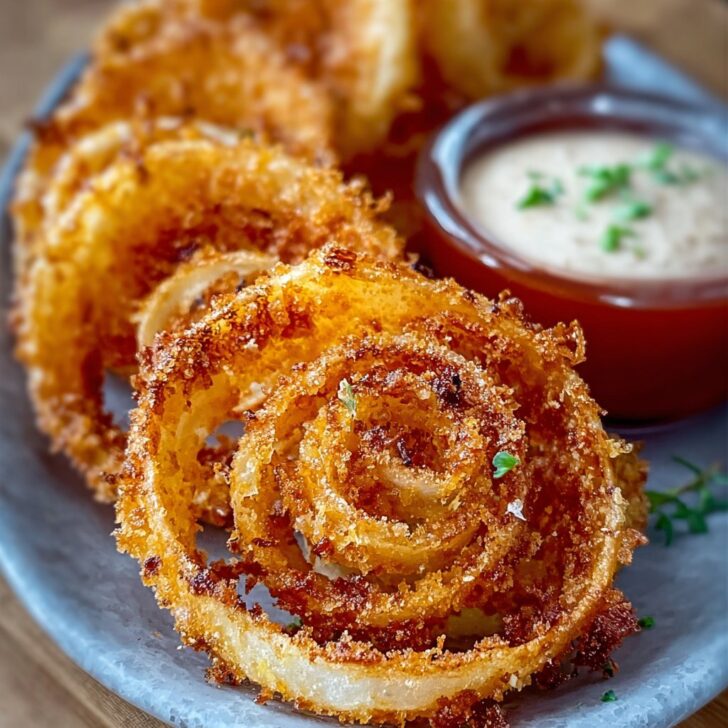
Serving: My Family’s Way (You Can Shake It Up)
Honestly, nothing beats dunking these in some good old ranch or a sriracha mayo—I once tried them with honey mustard (here's a great recipe, btw) and let me tell you, not bad at all. We sometimes pile 'em on top of burgers; my mum eats hers with veggie soup (I know, but it works). Chips on the side? Sure, live a little.
Real-Life Pro Tips (From Someone Who’s Messed Up Plenty)
- Don’t rush the flipping step – I tried to speed things up once, half the coating stayed on the tray. Nightmare!
- Mix the breadcrumb and cheese after you pre-stir otherwise the cheese clumps up weirdly. (Took me years to realise this...would've helped if I'd actually read the whole recipe first.)
- Keep a wet cloth nearby, the breading gets stuck everywhere—reminds me of that time I lost a whole onion ring in the sink! Long story.
Oh, and a Few FAQs (Because My Friends Text These Constantly)
- Can I freeze these? Technically yes, though texturally they're just not the same. I tend to eat them fresh—next day at most—but freezing? Well, do it if you must; just re-bake to bring back the crunch (mostly).
- Got a dairy-free version? I usually use nutritional yeast mixed with a tiny bit of flour to mimic that parm flavour. Not 100%, but it scratches the itch.
- Air fryer? Sure thing! Shake halfway, reduce bake time a smidge, watch that first batch. I find they can brown real quick. Oh, the first time I left them in too long and…well, let's just say, they became onion crisps instead.
- What onions are best? Honestly, whatever’s rolling around in your veg drawer. I've even used shallots for mini ones—adorable and dangerously poppable.
- What if I’m out of eggs? A glug of oil and a dash of Dijon in the buttermilk actually helps everything stick. Or try a splash of plain yogurt—worked for me in a pinch.
- Sauce recommendations? Apart from the classic ranch, I sometimes go for sweet chili or (don't judge) plain ketchup. Depends on the day!
And just because it’s on my mind: Do you ever find yourself getting oddly proud when your homemade snacks vanish faster than takeout? Happens every time with these. Give it a go, mess it up, make it yours!


Ingredients
- 2 large yellow onions
- 1 cup all-purpose flour
- 2 large eggs
- 1 cup breadcrumbs
- ½ cup grated Parmesan cheese
- ½ teaspoon garlic powder
- ½ teaspoon paprika
- Salt and black pepper to taste
- Vegetable oil for frying
Instructions
-
1Slice onions into ½-inch thick rings, carefully separate the rings, and set aside.
-
2In a shallow bowl, mix flour with salt, pepper, garlic powder, and paprika. In a second bowl, beat the eggs. In a third bowl, mix breadcrumbs with grated Parmesan cheese.
-
3Dredge onion rings in the flour mixture, dip in beaten eggs, then coat with the Parmesan breadcrumb mixture. Press gently to help coating adhere.
-
4Heat about 2 inches of vegetable oil in a deep skillet over medium-high heat (350°F/175°C). Fry onion rings in batches for 2-3 minutes or until golden brown and crispy.
-
5Remove onion rings with a slotted spoon and drain on paper towels. Serve hot with your favorite dipping sauce.
Approximate Information for One Serving
Nutrition Disclaimers
Number of total servings shown is approximate. Actual number of servings will depend on your preferred portion sizes.
Nutritional values shown are general guidelines and reflect information for 1 serving using the ingredients listed, not including any optional ingredients. Actual macros may vary slightly depending on specific brands and types of ingredients used.
To determine the weight of one serving, prepare the recipe as instructed. Weigh the finished recipe, then divide the weight of the finished recipe (not including the weight of the container the food is in) by the desired number of servings. Result will be the weight of one serving.
Did you make this recipe?
Please consider Pinning it!!