
Alright, gather 'round, because I'm about to spill the beans (or the cinnamon, I guess) on my go-to breakfast for rushed mornings—or really, any lazy Sunday. Homemade French toast sticks. These were a Saturday morning staple in my house growing up; my dad would man the griddle while I snuck bites when he turned his back. Still do, some times (don't tell anyone). Sometimes they turned out perfectly golden; some days, a little too brown—either way, still delicious! I once tried to stack them like Jenga blocks. Bad idea. Syrup gets everywhere.


Why You'll Love This—At Least I Do
I make this when I need something that looks impressively put-together but really only takes about 20 minutes, tops. My family goes absolutely bonkers for these French toast sticks; my youngest says they're better than the frozen ones, so there—a win for homemade. And let me tell you: dipping your breakfast just hits different (anybody else unreasonably excited by finger food?). Plus, when the bread's a little stale, it works even better. Oh! One time I tried to use some super fresh bread and, you guessed it, French toast soup. Not my proudest moment.
Here’s What You’ll Need (Or, What I Use, Mostly)
- 6 thick slices day-old bread (brioche is dreamy, but I’ve used plain sandwich bread after forgetting to shop—it works!)
- 3 large eggs
- ¾ cup whole milk (any milk honestly, I’ve even used almond milk mid-panic)
- 2 tablespoon granulated sugar (sometimes I swap half for brown sugar; it’s got a nice flavor)
- 1 teaspoon ground cinnamon (if you love cinnamon, just eyeball it—my grandma did)
- ½ teaspoon vanilla extract (okay, confession: once I left this out and no one even noticed...)
- A pinch of salt
- Butter for frying (oil works too, but you’ll miss that buttery vibe)
- Optional: powdered sugar for dusting
- Maple syrup for dunking (on chaotic days, honey or jam is fair game)
What To Do: (Directions with Some Real Talk)
- Cut the bread slices into thick strips—think about the width of your finger, or as much as you can stack on a fork (precision is overrated here).
- In a shallow bowl (a pie dish is my usual stand-in), whisk eggs, milk, sugar, cinnamon, vanilla, and that tiny pinch of salt. I do this with a fork. Less washing up.
- Dunk bread sticks into the egg mixture, maybe 10-15 seconds per side. Not too long or things get soggy, trust me. I’ve learned this the sticky way.
- Preheat a large skillet over medium heat, toss in a good hunk of butter. If it sizzles, you’re good to go. If it’s silent, turn up the heat a tad.
- Lay the soaked sticks in the skillet (don’t crowd them!), and cook until golden brown, about 2-3 minutes per side. I do some peeking and flipping—don’t be shy, there’s no toast police.
- Transfer finished sticks to a plate. I usually sneak one here. It’s inevitable.
- If you’re making a bunch, keep them warm in the oven (set to low, if you remember) while you cook the rest. But honestly, they disappear fast.
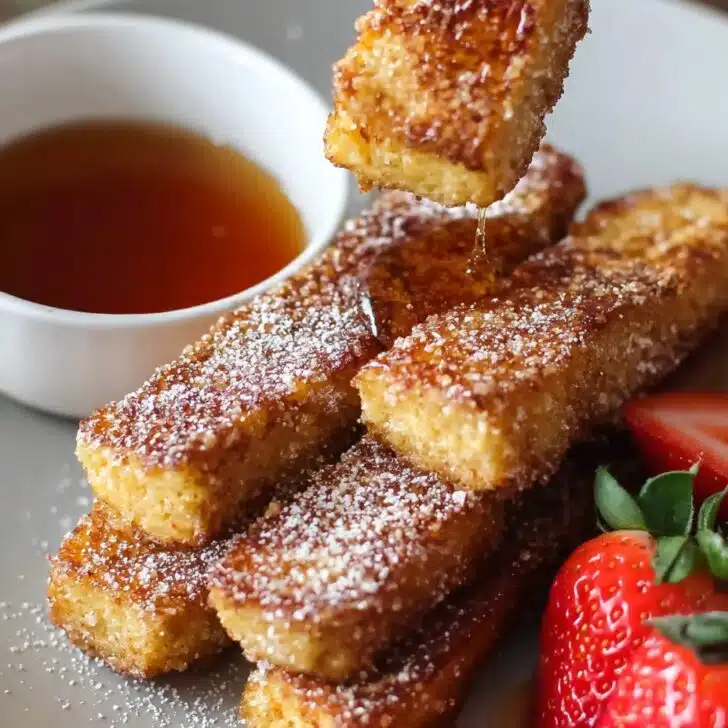
- Sprinkle with powdered sugar if you’re feeling fancy, and serve with maple syrup (or the nearest sweet thing in your kitchen).


Notes from the Battlefield (a.k.a. My Kitchen)
- I’ve tried this with gluten-free bread. It’s a bit crumblier—expect some weird-shaped sticks, but still tasty.
- Day-old bread holds up better; super fresh gets mushy fast. But if it’s all you’ve got, it’ll just be a little softer. Not the end of the world!
- Let the pan get hot before you start frying, otherwise you’re just drying out bread, not toasting it.
Tried-and-Tested Variations (Plus One Fail)
- Chocolate chips sprinkled into the egg mix—big hit, but warning, they get a bit melty and messy.
- I once added orange zest—actually, works really well for a brunch thing. Brightens up the flavor.
- I tried stuffing the sticks with cream cheese one time—ended up halfway delicious and halfway a total mess. Approach with caution!


Handy Tools (But I Won’t Judge If You Don’t Have 'Em)
- Large skillet or griddle (I once used a cake pan on the stove—doable, but not recommended)
- Shallow dish (like a pie plate, or honestly, a big dinner plate works in a pinch)
- If you have a cooling rack, you can keep the sticks crispier while they wait, but a normal plate’s fine, too
How to Store (Not That You’ll Need To...)
If somehow you have leftovers, let them cool and pop them in an airtight container in the fridge. I think they taste pretty good cold, but you can reheat in the oven at 350F for 5-10 minutes. They’ll keep for 2-3 days, but honestly, in my house they never last more than a day!
How I Serve These
My favorite is dunked in warm maple syrup, but my partner always goes for whipped cream and berries. Growing up, my mom dusted them with cinnamon sugar and called it dessert. Sometimes we just eat them plain in the car (oops, sticky fingers).
Pro Tips (AKA Oops, Learned That the Hard Way)
- Don’t rush the dunk—the bread needs a little soak but not a swim. One time, I just dipped super quick and the sticks were dry inside, which, let’s face it, was tragic.
- Wait until the butter is really sizzling before you add anything. Cold butter just makes sad, pale toast.
- Try one stick first to test the heat. I always do; then you can adjust before you commit the whole batch.
Your Burning Questions, Sorted
Can I freeze these French toast sticks? Yes! Pop cooled sticks on a tray, freeze ‘em, then toss in a bag. Reheat in the oven or toaster oven. They come out almost as good as fresh (but no promises—they’re still homemade).
Will any bread work? Pretty much! Brioche makes it extra rich, but sandwich bread gets the job done. I've even used bagels once in desperation (not bad).
How do you keep them warm for a crowd? Stick ‘em in the oven on low—just keep an eye they don’t dry out. Or, just make them as people show up, that’s what actually happens here.
What if I don’t have vanilla? Honestly, just skip it. Maybe add a little more cinnamon. Or don’t worry—no toast cops.
Is this healthy? Hmm, define "healthy." It’s got eggs and milk... but yeah, it’s also got syrup. Hey, it’s breakfast—live a little.
Oh, and in case you’re wondering: cleaning syrup off the counter is a full-contact sport. Get ahead with a damp cloth and a bit of elbow grease!
Ingredients
- 6 thick slices day-old bread (brioche is dreamy, but I’ve used plain sandwich bread after forgetting to shop—it works!)
- 3 large eggs
- ¾ cup whole milk (any milk honestly, I’ve even used almond milk mid-panic)
- 2 tablespoon granulated sugar (sometimes I swap half for brown sugar; it’s got a nice flavor)
- 1 teaspoon ground cinnamon (if you love cinnamon, just eyeball it—my grandma did)
- ½ teaspoon vanilla extract (okay, confession: once I left this out and no one even noticed...)
- A pinch of salt
- Butter for frying (oil works too, but you’ll miss that buttery vibe)
- Optional: powdered sugar for dusting
- Maple syrup for dunking (on chaotic days, honey or jam is fair game)
Instructions
-
1Cut the bread slices into thick strips—think about the width of your finger, or as much as you can stack on a fork (precision is overrated here).
-
2In a shallow bowl (a pie dish is my usual stand-in), whisk eggs, milk, sugar, cinnamon, vanilla, and that tiny pinch of salt. I do this with a fork. Less washing up.
-
3Dunk bread sticks into the egg mixture, maybe 10-15 seconds per side. Not too long or things get soggy, trust me. I’ve learned this the sticky way.
-
4Preheat a large skillet over medium heat, toss in a good hunk of butter. If it sizzles, you’re good to go. If it’s silent, turn up the heat a tad.
-
5Lay the soaked sticks in the skillet (don’t crowd them!), and cook until golden brown, about 2-3 minutes per side. I do some peeking and flipping—don’t be shy, there’s no toast police.
-
6Transfer finished sticks to a plate. I usually sneak one here. It’s inevitable.
-
7If you’re making a bunch, keep them warm in the oven (set to low, if you remember) while you cook the rest. But honestly, they disappear fast.
-
8Sprinkle with powdered sugar if you’re feeling fancy, and serve with maple syrup (or the nearest sweet thing in your kitchen).
Approximate Information for One Serving
Nutrition Disclaimers
Number of total servings shown is approximate. Actual number of servings will depend on your preferred portion sizes.
Nutritional values shown are general guidelines and reflect information for 1 serving using the ingredients listed, not including any optional ingredients. Actual macros may vary slightly depending on specific brands and types of ingredients used.
To determine the weight of one serving, prepare the recipe as instructed. Weigh the finished recipe, then divide the weight of the finished recipe (not including the weight of the container the food is in) by the desired number of servings. Result will be the weight of one serving.
Did you make this recipe?
Please consider Pinning it!