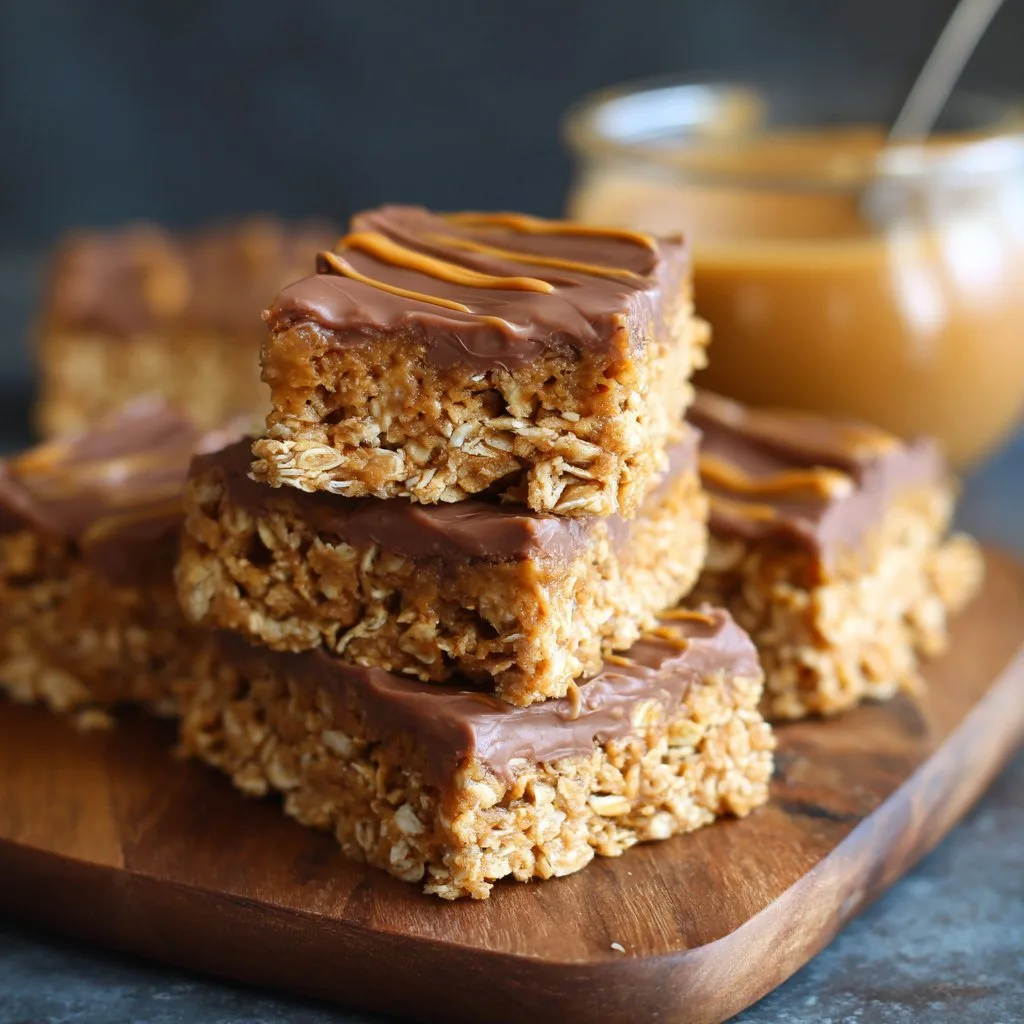
Catching Up Over Oat Bars (Have You Tried These?)
Hey there! So, confession time: I basically live off snacks. Actual meals? Not so much—especially when things get busy or I can't be fussed to cook. That’s how I stumbled on these Healthy No-Bake Peanut Butter Oatmeal Bars. I first made them on a whim after seeing a half-empty jar of peanut butter staring at me from the pantry (judging me, honestly). They were supposed to last the whole week, but my kids and I demolished the first batch by the next morning. Oops. But, really, who can resist something chewy, sweet, and a little nutty, without turning the kitchen into a sauna?
Why You'll Love This (Or at Least Tolerate It Until It's Gone)
I make these whenever I've got a pile of oats and nothing for breakfast (or when energy bars are suddenly £2 a pop at the shop, which is just cheeky). My family goes wild for these—especially when I add chocolate chips, although sometimes I hide the bars in the back of the fridge just so they don’t disappear in 15 minutes. Oh, and if you’re not a morning person—it’s one of those recipes where you basically throw everything together and hope for the best; it’s pretty forgiving, even if you get distracted scrolling Pinterest mid-stir.
What You'll Need (Swaps Welcome)
- 2 cups rolled oats (the old-fashioned kind, but quick oats work if that’s all you’ve got—just a bit mushier)
- 1 cup peanut butter (I use smooth, but my friend swears by chunky; almond or cashew butter are pretty good too if you're feeling fancy)
- ½ cup honey or maple syrup (agave works in a pinch, or honestly, I’ve even tried golden syrup—bit sweet, but still tasty)
- ½ teaspoon vanilla extract (I usually just eyeball it, no one's counting drips)
- Pinch of salt (if your peanut butter isn’t already salty; if it is, skip this—learned the hard way)
- Optional: Handful of mini chocolate chips, raisins, or a sprinkle of chia seeds (sometimes I even toss in a spoonful of flaxseed; my mum claims it's magic)
How To Make 'Em (Zero Baking, Zero Fuss)
- Grab a medium saucepan and mix together the peanut butter and honey over low heat. Stir until it’s all smooth and melded—takes about 2 minutes if your hob isn't ancient. This is where I usually sneak a taste. If you don’t have a nonstick pan, just keep stirring and don’t wander off (trust me, cleaning burnt peanut butter is not a good time).
- Take it off the heat. Stir in the vanilla and salt (if using). Sometimes I forget the salt until the oats are in; no big deal, honestly.
- Dump in the oats and any extras you like. Stir until everything looks evenly coated. Don't worry if it seems a bit dry—give it a minute, it always sorts itself out. Actually, I find it comes together better if you let it sit for a minute before squishing it into the pan.
- Line an 8x8 inch (or sort of close—who measures?) baking dish with parchment. Press the mixture in firmly with the back of a spoon or your hands (I always end up using my hands, but hey, clean hands are a cook's best tool). It will look a bit rustic. That’s fine.
- Sprinkle on chocolate chips if you like, then press them in a bit. Pop it in the fridge for at least an hour. Or, if you’re impatient like me, the freezer for 20-30 minutes does the trick.
- Slice into bars or squares—whatever tickles your fancy. Enjoy!
Notes Worth Reading (Learned by Accident)
- If you use natural peanut butter (the kind that separates), stir it really well first or the bars come out a bit oily on top and crumbly underneath.
- Batch too sticky? Add more oats. Too dry and falling apart? Bit more honey or a splash of milk. I’ve done both in the same batch before. Still good.
- Once, I tried to melt chocolate right into the mix, but it seized up and turned odd. Stick to chips on top or mixed in.
Tweaks and Experiments (Some Genius, Some Less So)
- Swapped half the oats for Rice Krispies once—really fun texture, but my youngest thought it was weird (kids, eh?).
- Added chopped dried apricots and sunflower seeds—delicious, and kind of feels like I’m eating bird food, in a good way.
- Once, I tried coconut oil instead of peanut butter. Let’s just say: wouldn’t recommend unless you love the taste of coconut more than life itself.
Equipment (And How to Wing It)
You’ll want a saucepan and a square baking tin. But, if you’re in a pinch, a pie dish or even a lunchbox works. For lining, I’ve used both parchment and foil, and sometimes just oiled the pan and hoped for the best (it mostly works, but getting the bars out is a bit of a wrestling match).

How to Store Them—If They Last That Long
Keep these in an airtight container in the fridge. They’re at their chewiest cold, but if you like them a bit softer, leave them out for 10 minutes. In my flat, they’re usually gone in 24 hours, so honestly I don’t know how long they last past that, but I’d say 5-6 days, tops. The Kitchn has good storage tips if you’re a batch-prepper.
Serving Up—My Fave Ways
I love these for breakfast when I’m running late (which is, uh, every morning). My partner dunks them in his coffee, which I thought was odd at first but actually, it’s pretty tasty. Sometimes I cut them into teeny squares for after-school snacks. And you can get away with packing them for picnics or potlucks—they hold up better than you’d think.
Lessons Learned—Pro Tips (From a Serial Rusher)
- Don’t try to cut them before they’re chilled. I rushed it once and ended up with a pile of tasty rubble (still ate it, though).
- Use parchment, not wax paper. Wax paper melts a bit and sticks—learned that the hard way.
- Actually, if you warm the honey a bit before mixing, it stirs in way easier. I always forget this until I'm struggling.
FAQ—Because People Actually Ask
- Can I make these nut-free? Sure thing, just swap peanut butter for sunflower seed butter. Tastes a smidge different, but still works a treat.
- Are they gluten free? If you use gluten-free oats, yes! Otherwise, it’s a roll of the dice. (Check your labels.)
- Can I freeze them? Yup, just wrap ‘em tight. Though, why would you? They disappear too quick!
- Do they travel well? More or less, but on a hot day they can get a little squishy. Pack an ice pack if it’s a scorcher outside.
- Help, mine are falling apart! Happens! Maybe more honey next time, or just embrace the crumbly life and eat with a spoon.
- What's the best part? Honestly—I think they taste even better the second day, after they've had a chance to hang out in the fridge. Or maybe that's just me.
So there you go—a snack that’s hearty enough for breakfast, sweet enough for dessert, and easy enough for even the most distracted home cook (ahem, me). Let me know if you try any wild versions! And if you’re after more snack ideas, Sally's Baking Addiction has some epic twists, too. Happy munching!
Ingredients
- 2 cups old-fashioned rolled oats
- ¾ cup natural peanut butter
- ⅓ cup honey or maple syrup
- ¼ cup chopped nuts (such as almonds or walnuts)
- ¼ cup mini dark chocolate chips
- ¼ cup ground flaxseed
- 1 teaspoon vanilla extract
- ¼ teaspoon sea salt
Instructions
-
1Line an 8x8-inch baking pan with parchment paper, leaving some overhang for easy removal.
-
2In a large mixing bowl, combine the rolled oats, chopped nuts, ground flaxseed, and sea salt.
-
3In a microwave-safe bowl, warm the peanut butter and honey (or maple syrup) together for about 30 seconds, then stir in the vanilla extract.
-
4Pour the wet mixture over the dry ingredients and mix until everything is well combined.
-
5Fold in the mini dark chocolate chips. Press the mixture firmly and evenly into the prepared pan.
-
6Refrigerate for at least 1 hour, then lift out and slice into bars. Store in an airtight container in the fridge.
Approximate Information for One Serving
Nutrition Disclaimers
Number of total servings shown is approximate. Actual number of servings will depend on your preferred portion sizes.
Nutritional values shown are general guidelines and reflect information for 1 serving using the ingredients listed, not including any optional ingredients. Actual macros may vary slightly depending on specific brands and types of ingredients used.
To determine the weight of one serving, prepare the recipe as instructed. Weigh the finished recipe, then divide the weight of the finished recipe (not including the weight of the container the food is in) by the desired number of servings. Result will be the weight of one serving.
Did you make this recipe?
Please consider Pinning it!!

