
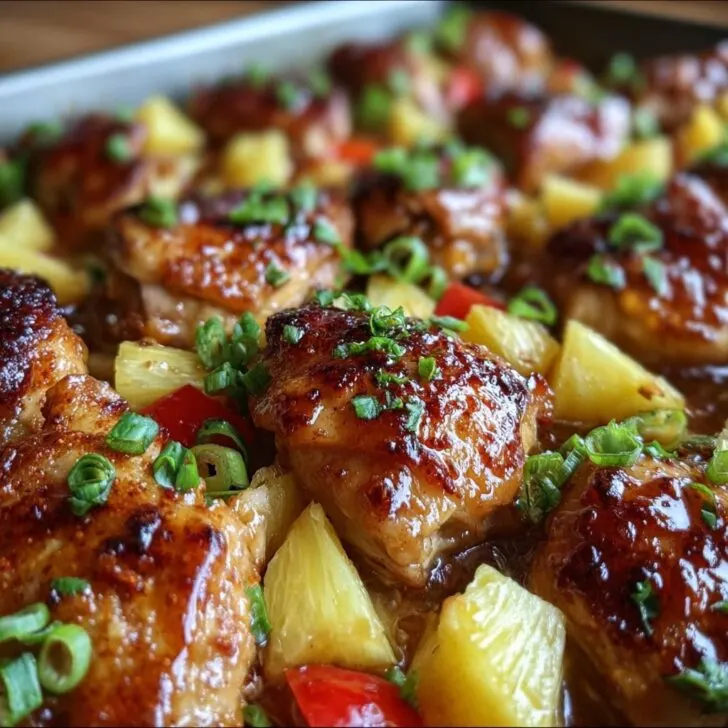
If You Need a Vacation... Make This Hawaiian Chicken Sheet Pan
So, the first time I whipped up this Hawaiian Chicken Sheet Pan, I was actually trying to use up a can of pineapple and some chicken that was threatening to stage a coup in my fridge. You know those weeks where grocery shopping is more wishful thinking than an actual event? Yeah, that. Anyway, the smell alone had my kids poking their heads into the kitchen like meerkats. And, honestly, it’s now my secret weapon for those days when the only thing I want to do is binge-watch old episodes of Great British Bake Off (which, by the way, has nothing to do with this recipe, but I digress).
Why You’ll Love This (Like I Do)
I usually make this when I need something that basically cooks itself while I try (often in vain) to catch up on laundry. My family goes nuts for it because, well, it’s got pineapple and that sticky-sweet glaze that makes you want to lick the pan (not that I’d admit to that in public). If you’re the type who hates a mountain of dirty dishes, this is your jam. Once, I tried to do all the prep in one bowl to save time—let’s just say marinating in the actual sheet pan isn’t always a genius move, but it’ll do in a pinch.
What You’ll Need (Substitutions Welcome)
- 4 chicken breasts or thighs, boneless and skinless (sometimes I’ll use drumsticks if I have them—thighs stay juicier, though)
- 1 large bell pepper, any color—I grab whatever’s on sale or just languishing in the fridge
- 1 red onion, sliced (my grandmother was weirdly loyal to yellow onions, but I like the color from red)
- 1 can (about 400g) pineapple chunks, drained (if you’ve got fresh pineapple, go wild, but canned is usually just easier)
- 3 tablespoons soy sauce (I’ve used coconut aminos in a pinch, honestly nobody noticed)
- 2 tablespoons honey or brown sugar (maple syrup works—it’s just a bit runnier)
- 2 cloves garlic, minced (or a handful of pre-chopped from a jar, I won’t tell)
- 1 tablespoon fresh ginger, grated (powdered works if you don’t have fresh, but fresh is better—just saying)
- Salt and pepper (to taste, but don’t go wild with the salt because of the soy sauce)
- 1 tablespoon olive oil (vegetable oil is fine, or even melted butter in a pinch)
How I Actually Make It (Not Always By The Book)
- First up, preheat your oven to 220°C (that’s 425°F if you’re in the US). If you forget, like me, just stick everything in when you remember. No biggie.
- Chop the chicken into chunky bite-sized pieces. Or don’t—whole pieces work too, just need a bit more time.
- Throw the chicken, bell pepper, onion, and pineapple on a big ol’ sheet pan. Line it with baking paper if you hate scrubbing pans (I do).
- Whisk together the soy sauce, honey, garlic, ginger, olive oil, and a pinch of salt and pepper in a bowl. Or just dump it all over the pan and toss with your hands—less washing up, really.
- Toss everything so it’s all glossy and coated. This is about the time I steal a pineapple chunk, just to...check for freshness. You know how it is.
- Bake for about 25–30 minutes until the chicken is cooked through and everything’s a little caramelized around the edges. Halfway through, I sometimes flip stuff around so things cook evenly, but honestly, if I forget, it’s still good.
Things I’ve Learned (Notes from a Real Kitchen)
- If you use parchment paper, things stick less, but if you forget (like me), a good soak fixes most problems.
- Chicken thighs are way juicier than breasts, but don’t stress if you have to use what’s in the freezer.
- Don’t crowd the pan—unless you like things a bit more steamed than roasted. Sometimes I do; sometimes I don’t.
Variations I’ve Tried (Some Winners, Some... Not)
- Swapped out chicken for tofu for my vegetarian friend—actually, pretty tasty if you press it well first.
- Tried it with barbecue sauce instead of soy—came out weirdly sweet, not my favorite, but the kids ate it anyway.
- Added jalapeño for a kick; that was a happy accident I’d recommend if you like a bit of heat.
Do You Need Fancy Gear? (Not Really)
One good, rimmed sheet pan is pretty much all you need. But if you don’t have one, I’ve used a big roasting tray in a pinch. And if you don’t have parchment, a bit of oil on the bottom helps prevent the tragic stuck-on pineapple situation (trust me).


What About Leftovers?
Just pop them in an airtight container and stick ‘em in the fridge. They’ll last about 3 days—though honestly, in my house it never survives past breakfast the next day. Cold pineapple chicken? Weirdly delicious.
How I Like to Serve It (And You Might Too)
Usually, I spoon it over steamed rice, but my cousin swears it’s great over quinoa (she’s very on trend). Sometimes, I chop up the leftovers and stuff them in a wrap—lunch sorted. For a real treat, throw a handful of chopped cilantro on top, or even some toasted coconut if you’re feeling a bit fancy.
Little Lessons Learned (AKA My Pro Tips)
- I once tried rushing the marinade step—just dumping it all on and shoving it in the oven. Not bad, but if you let it sit for 10 minutes first, it really does taste better.
- Don’t skip the ginger. I did, once. It just wasn’t the same—kind of flat, if that makes sense?
- On second thought, if you’re out of honey, maple syrup works but it’s runnier. Just don’t pour too much.
FAQ: Things I’ve Actually Been Asked
- Can I make this ahead? – Yep! I think it tastes even better the next day, actually. Just reheat in the oven or microwave.
- What if I don’t like pineapple? – I get it—fruit with meat is a love-hate thing. Skip the pineapple and toss in more peppers or maybe some zucchini. No rules here.
- Do I have to use fresh ginger? – Honestly, no. Powdered is fine, just use about half as much. But if you’ve got fresh, use it!
- Can I freeze it? – You totally can, but the veggies get a bit soft after thawing. Still tastes good, though.
- Why is my chicken dry? – You probably overcooked it. Happens to the best of us! Try thighs instead of breasts next time, they’re more forgiving.
- Any good sides to go with this? – Rice is my go-to, but a tangy slaw is brilliant too. I found a great one over at Serious Eats—worth a look.
- Where do I get the best sheet pans? – I like the ones from King Arthur Baking. But any rimmed pan will do, really.
Alright, that’s my rambling guide to Hawaiian Chicken Sheet Pan. If you give it a go, let me know how it turns out—or if your family polishes it off before you even get a bite (it happens). Don’t be afraid to play around with it; recipes are just guidelines after all. Now, if you’ll excuse me, I think I just heard the oven timer—or maybe it’s just the dog again.


Ingredients
- 1.5 lbs boneless, skinless chicken breasts, cut into 1-inch pieces
- 2 cups fresh pineapple chunks
- 1 red bell pepper, chopped
- 1 yellow bell pepper, chopped
- 1 red onion, sliced
- 2 tablespoons olive oil
- ¼ cup soy sauce
- 2 tablespoons honey
- 2 cloves garlic, minced
- 1 teaspoon ground ginger
- Salt and black pepper to taste
- 2 tablespoons chopped fresh cilantro (optional, for garnish)
Instructions
-
1Preheat the oven to 425°F (220°C). Line a large sheet pan with parchment paper or lightly grease it.
-
2In a large bowl, whisk together olive oil, soy sauce, honey, minced garlic, ground ginger, salt, and black pepper.
-
3Add the chicken pieces, pineapple chunks, bell peppers, and red onion to the bowl. Toss until everything is evenly coated with the marinade.
-
4Spread the mixture evenly on the prepared sheet pan in a single layer.
-
5Roast in the preheated oven for 25 minutes, or until the chicken is cooked through and the vegetables are tender, stirring halfway through.
-
6Remove from the oven and garnish with chopped fresh cilantro if desired. Serve hot.
Approximate Information for One Serving
Nutrition Disclaimers
Number of total servings shown is approximate. Actual number of servings will depend on your preferred portion sizes.
Nutritional values shown are general guidelines and reflect information for 1 serving using the ingredients listed, not including any optional ingredients. Actual macros may vary slightly depending on specific brands and types of ingredients used.
To determine the weight of one serving, prepare the recipe as instructed. Weigh the finished recipe, then divide the weight of the finished recipe (not including the weight of the container the food is in) by the desired number of servings. Result will be the weight of one serving.
Did you make this recipe?
Please consider Pinning it!!