If you’d told me years ago I’d become the Queen of Halloween Quesadillas, I’d have laughed you out of my kitchen. But then one rainy October, with trick-or-treaters ringing the bell (and me basically running on fumes), I whipped up a batch of these cheesy little beauties. They vanished faster than a ghost at sunrise! Now it’s a full-on tradition. I even caught my husband sneaking one before the kids got home last year—his idea of grown-up mischief, I guess. Now every fall, the family expects these, and honestly? They’re so easy, it’s almost cheating. I say almost because, well, the cheese grating part is still a pain.
Why You’ll Love This (Or At Least Tolerate It)
I make this when I want to look like a creative parent but barely have the energy to open the fridge. My kids go bananas for them because they’re crispy, cheesy, and they get to help decorate (which means there’s cheese everywhere but hey, childhood memories, right?). Plus, you can actually make them taste good—none of that Pinterest-only, looks-better-than-it-tastes business. I used to struggle with getting the tortillas to crisp up just right—turns out, don’t skimp on the oil (and don’t wander off to check your phone like I did once; slightly charred Jack-o’-lanterns are not as charming as you’d think).
Here’s What You’ll Need (or Whatever’s Close Enough)
- 8 small flour tortillas (I’ve used whole wheat when the store’s out—no one noticed except me)
- 2 cups shredded cheese (cheddar, Monterey Jack, or whatever’s on hand; my grandmother swore by Kraft, but any old block will do in a pinch)
- 1 can black beans, rinsed and drained (or skip ‘em if your crew is anti-bean like my youngest)
- 2-3 tablespoons olive oil or butter for frying (I’ve been known to use coconut oil—tastes slightly tropical, kinda fun?)
- Sliced olives, bell peppers, or whatever you want for faces (I sometimes raid the pickle jar—no regrets)
- Optional: salsa, sour cream, or guac for dipping
How I Actually Make These
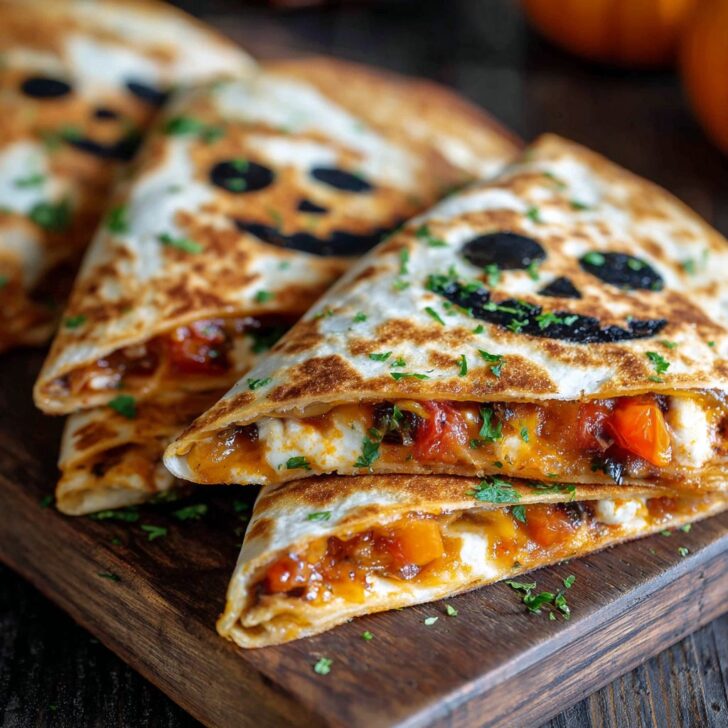
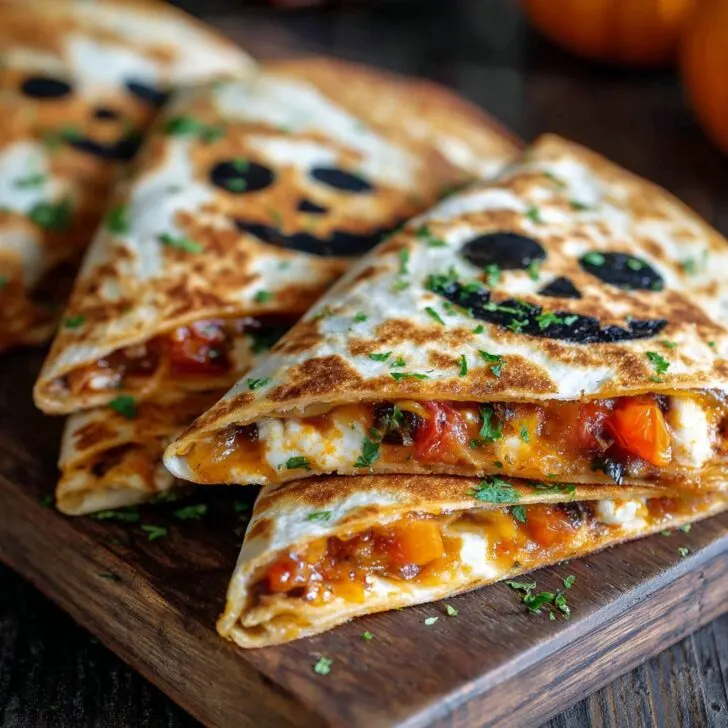
- Grab a tortilla and, using a sharp knife (or, honestly, clean kitchen scissors if you’re brave), cut out Jack-o’-lantern faces on half of them. Triangles, circles, wonky smiles—go wild. Don’t worry if they look a bit like Picasso pumpkins.
- Heat a big skillet over medium heat. Splash some oil in—don’t be stingy. Place the uncut tortilla down, sprinkle a handful of cheese, a few beans if you’re using them, then top with your artistically mutilated tortilla face.
- Press it down gently. Cook for 2-3 minutes, or until the bottom is golden and the cheese is starting to melt. Flip carefully. This is where I usually sneak a stray olive slice. Cook the other side another 2 minutes until crispy. If the face holes look gooey, you did it right.
- Let them cool a sec before slicing—hot cheese is basically edible lava. Decorate with more olives, peppers, or weird pickle slices as you see fit. Or don’t.
The Real-World Notes (Because Life Isn’t Perfect)
- I once tried using corn tortillas—delicious, but they crack when you cut faces unless you warm them first. Or just embrace the shattering, honestly.
- If you overstuff, the cheese oozes everywhere. But is that really a problem?
- My neighbor swears by vegan cheese, but it never melted for me. Maybe it’s my pan. Maybe it’s fate.
- Oh, and if you want to go full Halloween, serve these with a bowl of tomato soup. Looks like a witch’s cauldron—my kids love that.
Variations I’ve Actually Tried (And a Fail or Two)
- Chorizo or cooked chicken tucked in with the cheese—excellent for grownups, less popular with picky eaters.
- For a gluten-free version, use those fancy GF tortillas. They work, but sometimes taste a bit... earnest?
- Once I tried sweet potato mash instead of beans. Looked cute but tasted kind of odd with the cheese, so maybe don’t.
Stuff You’ll Need (But Don’t Panic If You Don’t Have It)
- Large skillet or frying pan (cast iron is best, but I once used a sandwich press when my pan was MIA. It sorta worked.)
- Sharp knife or scissors
- Spatula (or, if you’re like me, that random wooden spoon you use for everything)


Keeping ‘Em Fresh (Or, How I Sometimes Eat Them Cold)
Store leftovers wrapped in foil in the fridge—they’re actually not bad cold for breakfast the next day (I know, I know). Or reheat in a toaster oven if you want them crispy again. But honestly, in my house, they rarely last more than a day. Once they do, though, they get a bit floppy—still tasty, just, you know, not peak quesadilla.
How I Like to Serve These (And a Family Quirk)
Usually, I cut ‘em into wedges and arrange them on a big platter. My daughter insists on a dollop of sour cream on each one, which she calls “ghost hair.” No idea why, but it’s become a thing. If we’re feeling extra, we throw on homemade guac. Oh, and I sometimes sneak a few into the lunchboxes the next day—cold, but still gets smiles.
Lessons Learned the Hard Way (My ‘Pro’ Tips)
- Don’t rush the flipping—it’ll just spill goo everywhere. I’ve done it, and the mess is real.
- Actually, I find it works better if you press the quesadilla gently with a spatula while it cooks. Makes it extra crispy.
- Go easy on the oil—I once poured too much and wound up with a quesadilla hot tub. Tasty, but greasy fingers for days.
FAQ—Here’s What Folks Ask Me All the Time
- Can I make these ahead? Yep! Make and reheat in the oven. They’re actually a little crispier that way, though it’s not quite the same as fresh.
- Are they freezer friendly? Sort of. I tried freezing and reheating once, and the faces got a bit weird looking. Still edible, but kinda spooky in a different way.
- What cheese melts best? Cheddar or Monterey Jack, hands down. But honestly, whatever’s in the cheese drawer works.
- Can I use cookie cutters for the faces? Oh, absolutely. Especially if your knife skills are, well, not great. I usually just wing it, but the kids prefer the shapes.
- Got a favorite dipping sauce? Salsa, always. But for a twist, try this homemade salsa—it’s amazing. Or just ketchup, if you’ve got a toddler at your table.
- Can I make these in the oven instead of the stove? Yep, actually! Lay them out on a baking sheet, brush with oil, bake at 400°F until crispy. Less hands-on, but sometimes the faces don’t crisp as evenly.
Oh, and while we’re here, don’t be afraid to get a little silly with it. Last Halloween, someone brought over a pumpkin-shaped cheese ball (not related, but hilarious—see here if you want to try). Point is, Halloween food’s about fun, not perfection. If your Jack-o’-lanterns look more like mutant potatoes, welcome to the club!