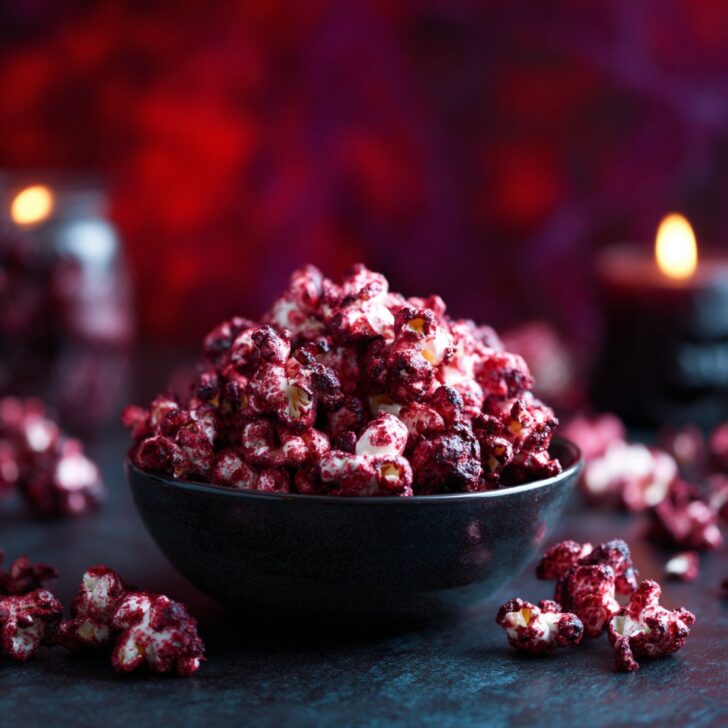

Okay, confession time: the first time I made Halloween Bloody Red Velvet Popcorn, I was mostly just trying to outdo my neighbor's (frankly terrifying) Jell-O brain mold. I mean, who knew popcorn could be both creepy and utterly addictive? Now, it’s a staple at my Halloween gatherings—plus, it looks fantastic, like something straight out of a cheesy B-movie. And if you saw my kitchen after—well, let’s just say the counter looked like a crime scene. But anyway, if you’re after something a bit different and not too fussy, this is it.
Why You'll Love This (Or, Why I Keep Making It)
I make this whenever the weather turns spooky and I want a snack that’s a bit of a conversation starter. My family goes a bit wild for it, especially my youngest, who thinks the red syrup is 'vampire sauce' (she’s six, bless her heart). Also, if you’ve ever tried cleaning red food coloring off your hands—you’ll understand why I now wear gloves. Honestly, the biggest perk for me: it’s quick, and most of the ingredients are probably already loitering in your pantry. (And if they aren’t, well, your local shop will definitely have them. Probably.)
What You’ll Need (and What You Can Swap)
- 8 cups popped popcorn (about ½ cup kernels). Sometimes I just use those microwave bags if I’m feeling lazy. My grandmother always insisted on popping her own, but honestly, who has the time?
- ½ cup unsalted butter. Salted works too; just go easier on extra salt later.
- 1 cup granulated sugar. I’ve tried coconut sugar once—it turned out okay, but the color wasn’t as dramatic.
- 2 tablespoons unsweetened cocoa powder. Dutch-process is nice if you have it, but any cocoa works.
- ¼ cup buttermilk (or just regular milk with a splash of vinegar if you’re out—learned that trick from Sally’s Baking Addiction)
- 1 tablespoon light corn syrup. Or golden syrup, if you’re in the UK; it’s fine.
- 1 teaspoon vanilla extract (I eyeball this, honestly)
- Red gel food coloring. The gels work way better than the liquid stuff, but, use what you’ve got.
- Pinch of salt
How To Make It (Honestly, It’s Not Hard)
- Start with your popcorn: Pop it however you like. Air-popped, stovetop, bagged—no judgment here. Just fish out any unpopped kernels because nobody wants a dental bill with their Halloween treat.
- Line a big ol’ baking tray (or two, actually) with parchment. I sometimes skip this and instantly regret it when I’m scraping caramel bits later.
- In a medium saucepan, melt the butter over medium heat. Add the sugar, cocoa powder, buttermilk, and corn syrup. Stir it all up—don’t worry if it looks weird at this stage. It always does. Bring the whole mess to a gentle bubble. Don’t let it boil too crazy; just a nice simmer for about two minutes, stirring a lot.
- Take it off the heat. Add the vanilla, food coloring (I use a big squeeze; probably a teaspoon?), and pinch of salt. Stir like mad until it’s all a gory shade of red.
- Pour that over your popcorn—right in the bowl. This is where I usually sneak a taste, hot sugar be damned. Toss everything together with a spatula or your (gloved!) hands until all the popcorn is coated.
- Tip it all out onto your lined baking tray. Spread it out as much as you can. Pop it in a low oven—say, 120°C (250°F)—for about 25-30 minutes, giving it a stir halfway through. Or, honestly, sometimes I skip the oven step and just let it set at room temp. It won’t be as crisp, but it still tastes fab.
- Let it cool completely before breaking up—unless, like me, you just start picking at it while it’s still sticky. Your call.
Some Notes I’ve Picked Up (AKA My Trials and Errors)
- If the coating’s too thick, just toss in more popcorn. If it’s too thin—eh, who cares? It still tastes good.
- Clean-up tip: Soak your saucepan straight away, or you’ll be chiseling out caramel for days. Trust me.
- Don’t stress about the exact amount of food coloring. Go for drama.
- I think this actually tastes better the next day, but that’s if you can resist eating it all first.
Variations (Things I’ve Tried—Some Winners, Some Not)
- Added mini marshmallows once. Turned into a sticky mess, but the kids loved it.
- Drizzled over white chocolate for a ‘veins’ effect—looked awesome, tasted even better.
- Once tried adding freeze-dried raspberries… it looked cool, but the flavor was kinda lost.
- If you want even more drama, mix in Halloween sprinkles (I get mine at Wilton).
Equipment: What You Need (And What You Can Improvise)
- Large mixing bowl (a salad bowl works if you’ve run out, which happens to me embarrassingly often)
- Saucepan (I’ve used a frying pan in a pinch—took longer, though)
- Baking tray or sheet
- Parchment paper or foil (if you have nothing, just oil the tray, but cleanup is rough)
- Spatula, or just two big spoons if that’s what you’ve got
- Gloves (optional, but saves your hands from looking like you’ve committed a crime)


How To Store (But Good Luck!)
Technically, you can keep this in an airtight container for 2-3 days. But honestly, in my house, it never lasts more than a day! If it somehow survives longer, it might lose its crisp. You can try reheating in the oven, but I rarely bother.
Serving It Up (My Favorite Ways)
I like piling this into a big cauldron bowl (yes, really!), especially for Halloween night. Sometimes I put it into paper cones for trick-or-treaters, but mostly it just gets devoured straight from the tray. And hey, if you want to get fancy, mix in edible eyes or those gummy fangs. My cousin once paired it with a scoop of vanilla ice cream—game changer.
Lessons Learned (AKA Pro Tips From My Own Mistakes)
- Don’t rush the syrup—one time I cranked up the heat, and the whole thing turned gritty. Not good.
- Actually, I find it works better if you let the popcorn cool a few minutes before adding the syrup so it doesn’t go soggy. Just a bit, though.
- Parchment paper is your friend. I once forgot, and spent a solid half hour chiseling popcorn off the tray (never again).
FAQ (Questions I’ve Actually Gotten…)
- Can I make this ahead? Oh for sure, it keeps pretty well. If it gets sticky, just bake it a little to crisp up—though, it’s rare there’s any left!
- Do I have to use buttermilk? Nah. Milk with a bit of vinegar works, or even just milk, honestly.
- Is it super sweet? It’s definitely a treat, but not tooth-achingly sweet. If you want it less intense, use a little less sugar.
- What if I don’t have red food coloring? It won’t look as bloody, but you can try beet powder! Or just skip it. It’ll still taste good, promise.
- Can I use air-popped popcorn? Absolutely! I do it all the time (mostly because I’m too cheap to buy the fancy stuff).
- I don’t have parchment paper—what now? Grease the tray with butter or oil, but, um, cleanup is going to be a bit of a faff.
- Is it messy? Yup. That’s half the fun, right?
So there you have it. Halloween Bloody Red Velvet Popcorn—messy, spooky, and just the right amount of over the top. If you give it a try, let me know how it goes. (Or if you figure out a way to keep the red off your kitchen walls, I’m all ears.) Happy haunting!