
Catching Up Over Cheesesteaks…
You know, every time I make these Ground Beef Philly Cheesesteaks, it reminds me of the first apartment I shared—tiny stove, windows that barely opened, but a whole lot of laughter (and smoke alarms going off because, well, rookie mistakes). There's just something magic about the sizzle of beef mingling with onions and peppers—that sound lets everyone know dinner's gonna be good, and my cats practically come running (which is odd given they supposedly hate peppers). Anyway, you don't need a flat-top like at Pat's or Geno's—just a skillet, a little patience, and a big enough mouth for the end result. Or a fork, I guess.


Why You'll Love This (According to Me)
I make this when I want something hearty but don't have the time (or patience) for those fussier cheesesteaks with, like, paper-thin steak. My family goes crazy for these because they're oozy, meaty, and you can scoop up the extras with chips afterward—plus, you know, fewer dishes since I usually serve them straight from the skillet. I used to stress over getting the onions just so, but honestly, they taste good even when I get distracted and let them caramelize extra. Oh, and if the cheese isn’t perfectly melted? Nobody’s ever complained, though my brother always threatens to call it a burger sub.
The Stuff You’ll Need (Plus Handy Substitutes)
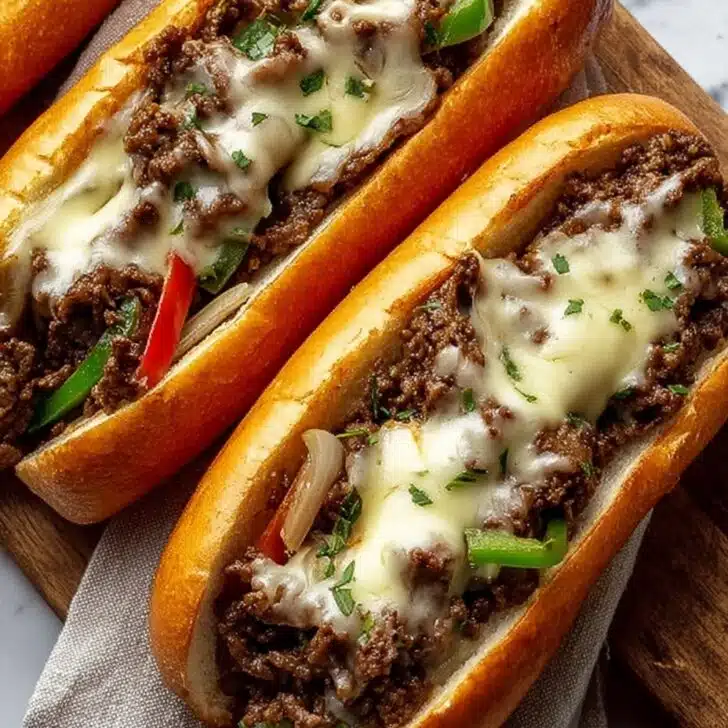
- 1 pound ground beef (I usually grab 85/15, but honestly, whatever is on sale works—my friend swears by ground turkey for a lighter take)
- 1 large onion, thinly sliced (yellow, white, red... they all taste fine, but Grandma always insisted on sweet onions. She also insisted on calling soda 'pop.')
- 1 green bell pepper, diced (I've tossed in red or even some poblano when feeling fancy, no one notices)
- 2 garlic cloves, minced (okay, sometimes I just use a big squeeze from that garlic paste tube)
- 1 teaspoon Worcestershire sauce (don’t stress if you’re out – a splash of soy sauce or even steak sauce will do in a pinch)
- ½ teaspoon kosher salt, or more to taste
- ½ teaspoon black pepper
- 4 hoagie rolls (soft subs, or whatever bread survived the week—I've even used hamburger buns when out)
- 6 slices provolone cheese (or a couple big handfuls of shredded mozz; my pal once used American cheese, it worked... sort of)
- Butter for toasting rolls—totally optional, but c’mon, live a little
The (Mostly) Foolproof Directions
- First off, crank up your skillet to medium-high and drop in the ground beef. Break it up little by little—I use my trusty wooden spoon but sometimes a potato masher gets the job done (weird, but it works). Cook until it starts getting browned and crispy in patches, around 5–7 minutes. Don’t worry about every single bit being brown yet, we’re not making fancy steak tartare.
- Push the beef to one side (just shoo it over), then add your onions and bell peppers to the pan. If the skillet's dry, I stick in a dab of butter or oil. Let them cook, stirring once in a while, till the onions are soft and golden—the longer, the sweeter! Garlic goes in next, just give it 30 seconds or so. The whole kitchen should start smelling dangerous at this point. (This is where I usually sneak a taste—just a little.)
- Mix the beef back together with the veggie crowd. Pour in Worcestershire sauce, sprinkle over the salt and pepper, and stir everything around to let it get cozy. If you’re a saucy person, toss in a few shakes of hot sauce or whatever makes you happy.
- While that’s mingling, split your hoagie rolls and butter them up (or don’t—I've skipped this step on lazy nights). Toast in a big pan, toaster oven, or just under the broiler real quick—watch them close, I’ve set off my smoke alarm here more than once.
- Spoon the hot beef-veggie mixture evenly onto your rolls. Immediately lay your cheese slices (or handfuls of shredded stuff) right over the top. Cover the filled rolls loosely with foil or pop a lid over the skillet for a minute so the cheese melts. Don’t stress if it oozes everywhere—that’s half the point.
- Eat right away. Or stand by the counter, scarfing one after another, with napkins nearby. Up to you.


Random Notes (AKA Things I Learned the Hard Way)
- If you get a pile of grease from the beef, just tilt and spoon out (or let your bread soak it up—no judgment).
- Cheese type is pretty forgiving. I once ran out, tore up string cheese, and hey—nobody even noticed.
- Honestly, these taste even better the next day (if there’s any left to reheat—rare in my house).
Variations I’ve Tried (Plus One Flop)
- Ground turkey instead of beef—lighter, still tasty, but I miss the richness
- Add mushrooms with the onions/peppers for an extra earthy flavor
- Spicy version: swap in pepper jack cheese or scatter pickled jalapenos. Once tried blue cheese… not great, tasted odd with the beef


What You Need (And Don’t Panic If You Don’t Have…)
- Big ol’ skillet (cast iron is fabulous, but regular nonstick is totally fine—never stopped me)
- Wooden spoon, or a spatula
- Toaster oven, broiler, or stick the rolls in a hot pan—one time I even used my waffle iron. It was weird, but not bad.
Keeping Leftovers (If That Ever Happens)
I think these keep fine in the fridge for a day or two (tucked into a container), though honestly, in my house they never last more than a day! If you must, reheat gently in a skillet, or zap it in the microwave—just cover so it doesn’t fly everywhere. On second thought, I’d say the filling freezes okay, but expect a little texture change.
Serving Ideas (How We Do It)
Always with kettle chips or fries—sometimes with a full pickle on the side, which my dad claims is “mandatory.” At parties, I cut them into little sliders… they disappear faster than you’d think. Oh, and on game day? Line up all the rolls, set out toppings, let everyone DIY—it gets rowdy but fun.
Hard-Earned Pro Tips (Or, What I Messed Up Before)
- Don’t rush the onions and peppers. I once cranked the heat too high—ended up half raw and way too crunchy
- If the bread is too soft, toast it longer so it doesn’t go squishy under the beef (because no one likes beef soup in a bun)
- Add the cheese while everything’s super hot to get max melt – tried adding it cold and, well, it just clumped. Sad sight.
FAQ from Curious (and Sometimes Sassy) Friends
- Can I make these without hoagie rolls? Sure thing! I’ve used hamburger buns, baguettes (cut up), even made it into a bowl with rice once when the bread vanished. It's all good!
- What else can I add to the filling? Folks have tossed in mushrooms, jalapenos, or even leftover roasted veggies. One person swore by a dash of hot sauce—can’t hurt to try (unless you’re my spice-averse uncle…)
- Does it freeze well? The filling does, kind of. It gets a tiny bit watery when reheated, but still tasty. Just drain or simmer off any extra liquid—that's what I do.
- How do I make this gluten-free? Easy—grab gluten-free rolls. Or just skip the bread and serve it over roasted potatoes or rice. (I actually love it with crispy tater tots; don’t knock it till you try…)
- What’s the difference from a classic Philly cheesesteak? Well, real purists use shaved steak, not beef, and usually American or Cheez Whiz. This is the “shortcut” cousin—ground beef is easier and, in my opinion, less hassle to eat.
Last thing: if you end up with as many dirty spoons as I always do, just soak them first—trust me, that’s the hardest part of cleanup. Happy cheesesteak-ing!
Ingredients
- 1 pound ground beef (85/15 preferred, but any kind you like works)
- 1 large onion, thinly sliced
- 1 green bell pepper, diced
- 2 garlic cloves, minced
- 1 teaspoon Worcestershire sauce
- ½ teaspoon kosher salt, or more to taste
- ½ teaspoon black pepper
- 4 hoagie rolls
- 6 slices provolone cheese (or shredded mozzarella, or American cheese)
- Butter for toasting rolls (optional)
Instructions
-
1First off, crank up your skillet to medium-high and drop in the ground beef. Break it up little by little—I use my trusty wooden spoon but sometimes a potato masher gets the job done (weird, but it works). Cook until it starts getting browned and crispy in patches, around 5–7 minutes. Don’t worry about every single bit being brown yet, we’re not making fancy steak tartare.
-
2Push the beef to one side (just shoo it over), then add your onions and bell peppers to the pan. If the skillet's dry, I stick in a dab of butter or oil. Let them cook, stirring once in a while, till the onions are soft and golden—the longer, the sweeter! Garlic goes in next, just give it 30 seconds or so. The whole kitchen should start smelling dangerous at this point. (This is where I usually sneak a taste—just a little.)
-
3Mix the beef back together with the veggie crowd. Pour in Worcestershire sauce, sprinkle over the salt and pepper, and stir everything around to let it get cozy. If you’re a saucy person, toss in a few shakes of hot sauce or whatever makes you happy.
-
4While that’s mingling, split your hoagie rolls and butter them up (or don’t—I've skipped this step on lazy nights). Toast in a big pan, toaster oven, or just under the broiler real quick—watch them close, I’ve set off my smoke alarm here more than once.
-
5Spoon the hot beef-veggie mixture evenly onto your rolls. Immediately lay your cheese slices (or handfuls of shredded stuff) right over the top. Cover the filled rolls loosely with foil or pop a lid over the skillet for a minute so the cheese melts. Don’t stress if it oozes everywhere—that’s half the point.
-
6Eat right away. Or stand by the counter, scarfing one after another, with napkins nearby. Up to you.
Approximate Information for One Serving
Nutrition Disclaimers
Number of total servings shown is approximate. Actual number of servings will depend on your preferred portion sizes.
Nutritional values shown are general guidelines and reflect information for 1 serving using the ingredients listed, not including any optional ingredients. Actual macros may vary slightly depending on specific brands and types of ingredients used.
To determine the weight of one serving, prepare the recipe as instructed. Weigh the finished recipe, then divide the weight of the finished recipe (not including the weight of the container the food is in) by the desired number of servings. Result will be the weight of one serving.
Did you make this recipe?
Please consider Pinning it!