
Let's Talk: Why I Love Making These Crackers
If you've ever found yourself staring at a jar of bubbly gluten free sourdough starter, wondering what on earth to do with all that discard — you are seriously not alone. The first time I made these crackers, I practically danced around the kitchen because, if I'm honest, the discard felt like a magic potion and a guilt trip rolled into one. My kids kept calling them "the crispy bits" (and now that name has kind of stuck), and my neighbor wandered in once, grabbed a handful, then looked stunned they were actually gluten free. (Apparently, that's the bar around here.)


Why You'll Love Making These (Even If You Don't Usually Bake)
I pull this recipe out on those days when the sourdough jar is about to overflow and I've run out of excuses to ignore it. My family goes wild for these at movie night—something about the crackly snap and the salt, I guess! Actually, they're so good that once I tried hiding them and my husband sniffed them out in less than an hour (never underestimate a man on the crumb trail). Also, if you hate waste, this recipe makes you feel like a kitchen wizard. Even on days when my dough looks weird or the edges get a bit dark (oops), they're still delicious.
Gather Up (or Substitute) These Ingredients
- 1 cup (about 250g) gluten free sourdough discard (room temp is ideal, but I've used fridge-straight and survived)
- 3 tablespoon olive oil (sometimes I swap in melted coconut oil if I'm feeling tropical)
- ½ teaspoon sea salt (I sprinkle extra on top because I am a rebel)
- ½ cup (60g) gluten-free flour blend (Bob's Red Mill is my go-to, but honestly, whatever's in the cupboard works—I've even mixed almond and rice flour once and nobody complained)
- 2 tablespoon seeds (I love a mix of sesame and poppy, but if you only have one, roll with it. Pumpkin seeds got weirdly chewy though... wouldn't recommend.)
- ½ teaspoon dried herbs (rosemary is amazing, but I've done thyme or Italian blend when that's all I've got)
- Extra salt, to finish (totally optional, but why not?)
Let's Make 'Em! (No Stress)
- Preheat your oven to 325°F (160°C). Line a baking sheet with parchment. Or, be like me last week and use a silicone mat when you can't find parchment. It works!
- In a largish bowl, stir together your sourdough discard, olive oil, and salt. It’ll look gloopy. Totally normal.
- Fold in the gluten free flour. It will thicken up, kind of like a thick pancake batter—don’t overthink it, just get it all together somehow.
- Toss in your seeds and dried herbs. At this point, I sniff it and always add more herbs than intended (whoops, rosemary everywhere).
- Spread the mixture out onto your prepared sheet, as thinly as you can manage. I go for about ⅛ inch or so. An offset spatula is a dream here, but I've literally used a butter knife in a pinch. The edges will look weird—ignore them.
- Sprinkle a bit of extra salt over the top. This is where you can channel your inner salt bae, or just be practical and pinch some on.
- Bake on a middle rack for 20 minutes. Rotate the pan, then bake another 20 to 30 min, or till very golden and crisp at the edges. If the middle feels soft, let it go longer—just check every 3-5 min so you don't wind up with charcoal (ask me how I know).
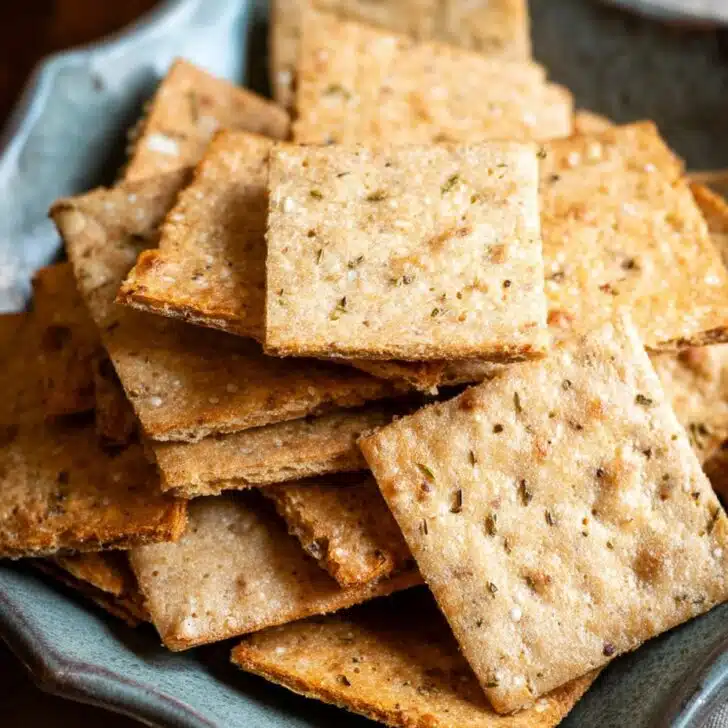
- Let cool on the pan. Crack into pieces—triangles, shards, whatever. This is where I usually sneak my first taste and burn my tongue because I'm impatient.


Lived-and-Learned Notes
- If you skimp on oil, they'll taste kind of dry. I tried once. Regretted it.
- Mixing flour blends can get unpredictable, but so far almond-rice-oat has been a safe bet. Avoid buckwheat unless you want purple crackers (my kids laughed, but I wasn't thrilled).
- Seeds: poppy and sesame are the best. Chia seeds made everything stick to my teeth; fair warning.
Things I've Tried (and Okay, One Total Flop)
- Added a tablespoon of grated parmesan—cheesy, yes, but burned quickly. Keep a close watch or skip.
- Used za’atar blend instead of Italian herbs: wow.
- Threw in sunflower seeds: soggy. Just no.


Tools I Use (and What to Do if You Don’t Have 'Em)
- Parchment paper is best—but when I misplaced mine, a well-oiled baking sheet worked, though they stuck a bit. Not the end of the world; just scrape them off (save the crispy crumbles for salads).
- An offset spatula is fancy but not essential. Honestly, any knife or even a big spoon will do in a pinch.
- If you have a pizza wheel, it's super fun to pre-score before baking for break-apart lines, but I never remember till it's already in the oven...
How I Store These (Or, More Honestly, How Fast They Disappear)
If you do have leftovers, pop them in an airtight jar or cookie tin. They'll keep crispy for ages—like, a week—but honestly, in my house they never last more than a day! If they somehow get soft (left the lid off overnight, oops), just toss them in a low oven for a few minutes. Good as new.
Serving? My Favorite Part
I love these dunked in hummus or scooping up goat cheese with a drizzle of honey. Somehow, my kids insist they pair best with plain cream cheese and cucumber (go figure). Oh, and at family picnics, I pile them next to deviled eggs for something a bit different. They even worked as a soup topper once when I was feeling extra fancy.
Stuff I’ve Learned (and Sometimes Forgotten)
- Don’t get impatient and take them out before they’re totally crisp—the middle bit feels firm at first and then turns floppy if you don’t let it go long enough. I learned the hard way, more than once.
- Lining the tray: seems optional till you have to scrub off stuck bits for half an hour. Trust me.
- Actually, letting them cool on the pan gives the best crunch. Impatience = sad, chewy crackers.
Some Of The Questions I Get (And My Not-So-Perfect Answers)
- Can I use regular sourdough starter? Sure, if you don’t need gluten free! This is just what I do since my stomach doesn’t like gluten.
- Can I add cheese? Yes—just be careful, as I mentioned up above. Parmesan is salty and snappy, but it does like to brown fast.
- Why are my crackers chewy? Honestly, they might just need more time in the oven. Or maybe they're extra thick. Next time, try spreading a little thinner (I always end up with at least one patch that’s soft, and, well, that’s the cook’s snack, isn’t it?).
- What if my discard is cold? Mine is cold half the time and it's fine. Might take a smidge longer to bake, that's all.
- Any flour blends to avoid? Buckwheat (weird color, did not love) and anything super starchy unless you want extra crunch (in which case, go wild).
- Can kids help? Only if you want seeds all over your kitchen! All jokes aside, it’s a fun project to do together. And yes, I still do most of the cleanup.
Oh—and before I forget, if you do end up with weirdly-shaped pieces, call them "rustic" and pretend it was the plan all along. Works for me.
Ingredients
- 1 cup (about 250g) gluten free sourdough discard (room temp is ideal, but I've used fridge-straight and survived)
- 3 tablespoon olive oil (sometimes I swap in melted coconut oil if I'm feeling tropical)
- ½ teaspoon sea salt (I sprinkle extra on top because I am a rebel)
- ½ cup (60g) gluten-free flour blend (Bob's Red Mill is my go-to, but honestly, whatever's in the cupboard works—I've even mixed almond and rice flour once and nobody complained)
- 2 tablespoon seeds (I love a mix of sesame and poppy, but if you only have one, roll with it. Pumpkin seeds got weirdly chewy though... wouldn't recommend.)
- ½ teaspoon dried herbs (rosemary is amazing, but I've done thyme or Italian blend when that's all I've got)
- Extra salt, to finish (totally optional, but why not?)
Instructions
-
1Preheat your oven to 325°F (160°C). Line a baking sheet with parchment. Or, be like me last week and use a silicone mat when you can't find parchment. It works!
-
2In a largish bowl, stir together your sourdough discard, olive oil, and salt. It’ll look gloopy. Totally normal.
-
3Fold in the gluten free flour. It will thicken up, kind of like a thick pancake batter—don’t overthink it, just get it all together somehow.
-
4Toss in your seeds and dried herbs. At this point, I sniff it and always add more herbs than intended (whoops, rosemary everywhere).
-
5Spread the mixture out onto your prepared sheet, as thinly as you can manage. I go for about ⅛ inch or so. An offset spatula is a dream here, but I've literally used a butter knife in a pinch. The edges will look weird—ignore them.
-
6Sprinkle a bit of extra salt over the top. This is where you can channel your inner salt bae, or just be practical and pinch some on.
-
7Bake on a middle rack for 20 minutes. Rotate the pan, then bake another 20 to 30 min, or till very golden and crisp at the edges. If the middle feels soft, let it go longer—just check every 3-5 min so you don't wind up with charcoal (ask me how I know).
-
8Let cool on the pan. Crack into pieces—triangles, shards, whatever. This is where I usually sneak my first taste and burn my tongue because I'm impatient.
Approximate Information for One Serving
Nutrition Disclaimers
Number of total servings shown is approximate. Actual number of servings will depend on your preferred portion sizes.
Nutritional values shown are general guidelines and reflect information for 1 serving using the ingredients listed, not including any optional ingredients. Actual macros may vary slightly depending on specific brands and types of ingredients used.
To determine the weight of one serving, prepare the recipe as instructed. Weigh the finished recipe, then divide the weight of the finished recipe (not including the weight of the container the food is in) by the desired number of servings. Result will be the weight of one serving.
Did you make this recipe?
Please consider Pinning it!