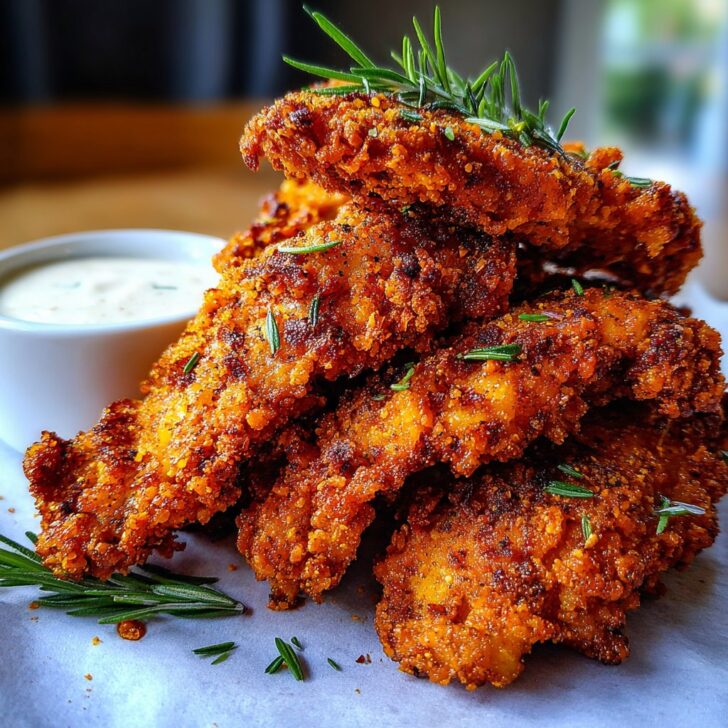

Okay, Let's Talk About These Chicken Strips
So last Saturday, when my nephew Jack decided to organize a “sports day” (which, for him, really meant eating and then maybe kicking a ball once), I made these Fried Chicken Strips with Buttermilk and Paprika. I swear, every time I make them, half the batch disappears before I even get them to the table—my partner claims he’s “just checking for doneness.” Right. Anyway, this recipe is a total winner, even if it does leave your kitchen looking like a tornado hit an oil factory. But hey, worth it.
Why You’ll Love This (And Why I Always Do)
I make this when I want comfort food but can’t stand another frozen nugget. My family goes bonkers for the crispy coating and that little kick from the paprika (not too spicy, just a warm sort of hello). And honestly, I used to dread frying stuff; the mess, the oil splatters, the “is this cooked?” anxiety—but this recipe is pretty forgiving. Plus, if you’re a dunker (I am, no shame) these strips are basically made for dipping in whatever you fancy.
The Ingredients (With My Usual Swaps)
- 500g (about 1 lb) chicken breast, cut into strips (sometimes I use thighs if I want juicier bites, but breast is classic)
- 1 cup buttermilk (or plain yogurt thinned with milk—totally works in a pinch, though my gran would disagree)
- 1 large egg
- 1 and ½ cups plain flour (I’ve tried gluten-free blends and, actually, it’s pretty good)
- 2 teaspoon smoked paprika (regular sweet paprika is fine, but I love that smokiness)
- 1 teaspoon garlic powder (onion powder if you’re out—no biggie)
- 1 teaspoon salt (sea salt just feels fancier)
- ½ teaspoon black pepper (sometimes I just eyeball it, which is probably not best but oh well)
- A good glug of oil for frying (vegetable or sunflower; I once used olive oil and, eh, wouldn’t recommend for deep frying)
How I Make These Chicken Strips (And How You Can Too)
- Marinate the chicken. Toss your chicken strips in a bowl with the buttermilk and egg. Make sure every piece is well coated—sometimes I even squish it with my hands (I know, not everyone loves that). Cover and let it chill in the fridge for at least 30 min; overnight is even better if you’ve got the patience.
- Mix the coating. In a big shallow dish, mix together the flour, paprika, garlic powder, salt, and pepper. Give it a good whisk or a fork stir. Actually, I sometimes double-dip: flour, then back in buttermilk, then flour again for extra crunch, but only if I’m feeling ambitious.
- Heat your oil. Fill a deep pan or skillet with about an inch or so of oil (I never measure, just eyeball). Heat it over medium-high; drop a little piece of bread in—if it sizzles right away, you’re good (technical, I know).
- Coat & fry. Working in batches—don’t crowd the pan—lift the chicken from the marinade, let the excess drip off, then coat in your flour mix. Straight into the hot oil they go. Fry about 3-4 minutes per side until golden and crispy. This is where I usually sneak a taste. Don’t worry if the first batch looks a bit weird; the oil settles as you go.
- Drain & serve. Put the cooked strips on a plate lined with paper towels. Or, on days I can’t find paper towels (story of my life), I just use an old tea towel—it works.
Real Notes From My Kitchen (A.K.A. Things I Wish I Knew)
- The first strip is usually the ugliest. It’s like a sacrificial chicken strip for the rest to look better.
- If the flour mixture is too dry, add a spoon of buttermilk to make those delicious craggy bits.
- I used to skip letting the chicken marinate because I’m impatient, but honestly, it’s juicier if you wait.
How I’ve Tweaked This (And One Flop)
- Added chili flakes once—too spicy for my nan but I loved it.
- Tried panko instead of regular flour; it was good but felt more like a pub snack.
- Tried baking instead of frying...eh, not the same. Save yourself the disappointment (unless you’re really set on less oil).
Equipment (And My Make-Do Tricks)
- Deep frying pan or big skillet (but I’ve used a wok in a pinch—works fine, just don’t overfill)
- Kitchen tongs (or, honestly, a couple forks if you can’t find yours—they always seem to vanish when you need them most)
- Paper towels or clean old tea towels for draining


Keeping Leftovers (If You Have Any)
Technically, you can store leftovers in the fridge in an airtight container for up to 2 days. But, honestly, in my house, these never last past breakfast the next day—cold fried chicken for breakfast is underrated, by the way. If you reheat, do it in the oven to keep 'em crispy.
How I Like To Serve These (And a Family Quirk)
These go down a storm with homemade coleslaw (here’s a coleslaw recipe I actually use), or just simple fries. My sister dips hers in honey mustard, while I’m all about spicy mayo. Oh, and sometimes we just pile them onto a big plate, slap on some pickles, and call it dinner. Fancy plating is...not our thing.
What I Wish I’d Known: Pro Tips
- Don’t rush the oil heating—a few times I did, and the chicken looked golden but was cold and raw inside. Grim.
- Double-dipping in flour makes a mess but the crunch is worth it. Wear an apron (I always forget).
- Test one strip before frying the whole lot. Saves you from a batch of bland or too-salty chicken.
People Actually Ask Me...
- "Can I make these in the air fryer?" Yeah, you can! They won’t be quite as crispy, but it’s still pretty tasty. Spray with oil first. Try 200°C (400°F) for about 15 mins, flip halfway.
- "Do I really need buttermilk?" Honestly, I’ve used yogurt with milk, or even just milk with a squeeze of lemon in a pinch. It’s all about tenderizing the chicken—doesn’t have to be fancy.
- "What oil should I use?" Vegetable or sunflower. Don’t bother with extra virgin olive oil—save that for salads. Here’s a handy resource I like for best frying oils if you want the science.
- "Can I freeze them?" Yeah, freeze after frying (let them cool first). Reheat in the oven for best crunch. Though, as I said, they don’t usually last that long at mine!
Oh—before I forget, if you’re ever out of buttermilk and can’t be bothered to go to the shop, just add a splash of lemon or vinegar to regular milk and let it sit a few minutes. Works in a pinch. And, speaking of pinches, don’t be afraid to pinch a strip straight from the pan (just blow on it first—ask me how I know). Happy frying!


Ingredients
- 500 g boneless chicken breasts, cut into strips
- 1 cup buttermilk
- 1 cup all-purpose flour
- 1 teaspoon paprika
- 1 teaspoon garlic powder
- ½ teaspoon salt
- ½ teaspoon black pepper
- Vegetable oil, for frying
Instructions
-
1In a large bowl, combine the chicken strips and buttermilk. Cover and marinate in the refrigerator for at least 15 minutes.
-
2In a separate bowl, mix together the flour, paprika, garlic powder, salt, and black pepper.
-
3Remove the chicken strips from the buttermilk, allowing any excess to drip off. Dredge each strip in the seasoned flour mixture, coating well.
-
4Heat about 2 inches of vegetable oil in a deep skillet or frying pan over medium-high heat until hot.
-
5Fry the chicken strips in batches for 4-5 minutes per side, or until golden brown and cooked through. Drain on paper towels.
-
6Serve hot with your favorite dipping sauce.
Approximate Information for One Serving
Nutrition Disclaimers
Number of total servings shown is approximate. Actual number of servings will depend on your preferred portion sizes.
Nutritional values shown are general guidelines and reflect information for 1 serving using the ingredients listed, not including any optional ingredients. Actual macros may vary slightly depending on specific brands and types of ingredients used.
To determine the weight of one serving, prepare the recipe as instructed. Weigh the finished recipe, then divide the weight of the finished recipe (not including the weight of the container the food is in) by the desired number of servings. Result will be the weight of one serving.
Did you make this recipe?
Please consider Pinning it!!