
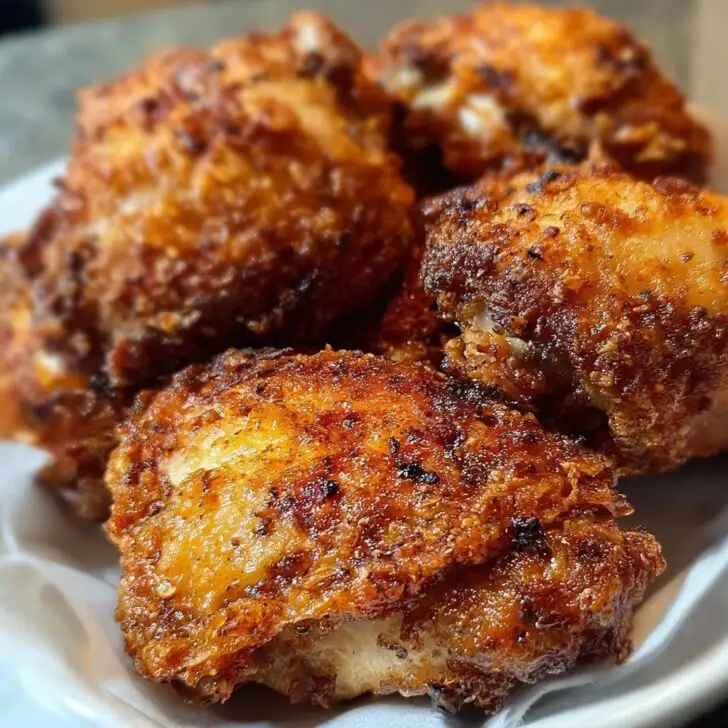
Let Me Tell You About These Crispy Irish Chicken Thighs
Alright, so here's the thing: I've probably made these extra crispy Irish oven-fried chicken thighs more times than I should admit (don't tell my doctor). The first time I tried this, it was a cold, drizzly evening and I just needed comfort—Irish style. My friend Aoife (she’s from Galway and a bit of a legend in the kitchen) swore by this method. I’ll be honest, I was skeptical. Oven-fried? Would it get that proper crunch? Well, let’s just say, after one bite, my doubts packed up and left the building, and now I make these any time I need to feed a rowdy crew or just want something that feels like a hug in chicken form.
Quick side note: I once tried cooking these during a blackout, using a camping stove and a torch stuck between some mugs, and, well, it was a bit of a disaster—but the story still makes everyone laugh at family gatherings. Anyway, let's dive in.
Why You'll Love This Recipe (Especially on Rainy Evenings)
I make this when the weather's awful and I need cheering up or when my nephew's coming over and demanding 'the crunchy chicken.' My family goes a bit mad for this because it's seriously crisp (I mean, you can hear the crunch from the next room). And honestly, it's a lot less faff than deep frying—no oil splatters or that lingering smell that makes you feel like a chip shop for days.
I used to mess up the coating all the time; it’d glue itself to the baking tray and I’d lose half my crunch. Actually, I find it works better if you use a wire rack—who knew? Plus, you get to pretend you’re being a bit healthier, which is a win in my book. And if you’re anything like me, you’ll love how you can just shove it all in the oven and get on with your evening (or, y’know, scroll through chicken thigh recipes for more inspiration).
What You'll Need (And How I Sometimes Wing It)
- 6 chicken thighs, skin-on and bone-in (although, if I’m in a hurry, boneless works—just a bit less juicy)
- 1 cup buttermilk (or, if you forgot to buy it—mix milk with a splash of lemon juice, give it a minute. Works just fine!)
- 2 cups fresh breadcrumbs (panko is king, but honestly stale soda bread pulsed in the blender is gorgeous too)
- 2 teaspoon smoked paprika (plain paprika works, but the smokey version is magic)
- 1 teaspoon dried thyme (fresh is lovely, but who always has that?)
- ½ teaspoon garlic powder (optional, but I throw it in for luck)
- 1 teaspoon salt (my grandmother swore by Maldon, but any sea salt does the job)
- ½ teaspoon black pepper
- 2 tablespoon melted butter (or a good drizzle of olive oil, if you’re feeling posh)
- Cooking spray or a bit more butter for the rack
How To Make Extra Crispy Irish Oven-Fried Chicken Thighs
- Marinate the chicken. Toss the thighs in the buttermilk (or your lemony milk substitute), cover, and let them sit for at least 30 minutes. Overnight is brilliant if you remember. I sometimes forget and do 15 minutes—still good, honestly.
- Preheat your oven to 220°C/425°F. Get it nice and hot, and stick a wire rack over a baking tray. If you don’t have a rack, a crumpled bit of foil works, but it’s definitely messier (trust me).
- Prepare your breadcrumb mix. Blitz your bread until it’s crumbly (panko saves time), then mix in the paprika, thyme, garlic powder, salt, and pepper. Stir in the melted butter—this is where I usually sneak a little taste. If it’s not salty enough now, it won’t be later.
- Coat the chicken. Shake the excess buttermilk off each thigh. Press them firmly into the breadcrumb mix—don’t be shy. Get into all the nooks; it should look like a proper winter coat.
- Arrange on the rack. Pop the coated thighs on your greased rack (or foil). Give them a spritz of oil or brush with a touch more butter. More butter = more crunch, in my opinion.
- Bake. Get them in the oven for 35–45 minutes until they’re golden and the juices run clear. Don’t stress if some crumbs fall off—just scoop them up and scatter them back on. No one’s judging here.
- Rest (if you can wait). I usually try to wait 5 minutes before digging in, but sometimes the smell wins.
A Few Notes From My Kitchen Trials
- If your breadcrumbs look a bit pale, whack on the grill for the last 2 minutes. Just keep an eye so you don’t burn the lot (spoken from experience).
- Don’t use super thick thighs unless you want to be microwaving the insides later. Medium size is king.
- On second thought, you could try gluten-free breadcrumbs—I did once, and it’s pretty good, but they brown faster.
Variations I’ve Tried (Some Better Than Others)
- Added grated cheddar to the crumbs once. It was…fine, but got a bit gloopy. Maybe just sprinkle it on afterwards?
- Spicy version: toss in some cayenne or chili flakes. Grand for grownups, maybe not for the kids.
- Herby experiment: rosemary instead of thyme. Actually, this was delish with roast potatoes.
About the Equipment (Or What to Do If You’re Missing Something)
- Wire rack on a baking tray is ideal for max crunch, but if you don’t have one, just use a lined tray and flip halfway. Not quite as good, but still tasty.
- Food processor for breadcrumbs—great, but if you’ve got strong arms, a bag and a rolling pin works too. Bit of a workout though.


How to Store (If You Have Leftovers... I Never Do)
Pop any leftovers in an airtight tub in the fridge. They’re honestly even better the next day, cold or reheated (oven, not microwave—the microwave makes them go a bit sad and floppy, trust me). They’ll keep 2–3 days but, in my house, they rarely last more than a day!
What to Serve With (Here’s What I Like)
I usually go classic: mashed potatoes and peas. Sometimes I’ll throw together a simple cabbage slaw—something with a bit of zing to cut through all the crunch. My dad always wants beans (I know, not very Irish, but there you go). Oh, and a dollop of Kerrygold herb butter never hurt anyone.
Pro Tips (Learnt the Hard Way)
- Don’t rush the marinating, or the buttermilk magic just doesn’t happen.
- I once skipped greasing the rack—absolute disaster. Chicken welded itself on. Don’t do it.
- Actually, let them rest a couple of minutes so the juices settle, otherwise you lose half your crunch to the chopping board.
FAQs (Things People Actually Ask Me)
- Can I use drumsticks instead of thighs?
For sure. They cook a bit quicker, so just start checking at 30 minutes. Sometimes I mix both if I’ve got a random pack from the shop. - Why buttermilk? Do I really need it?
It’s for the tang and the tenderizing—plus it helps the crumbs stick. But honestly, milk with lemon juice or even yogurt thinned with water does the trick. - What’s the secret to the crunch?
Don’t skimp on the butter in the crumbs, and don’t overcrowd the tray (the steam messes up the crispness). Oh, and use a rack, if you can! - Can I freeze these?
Yep, freeze before baking, then cook from frozen—just add 10–15 minutes. If you freeze after baking, reheat in the oven so they crisp back up. Not quite as good as fresh, but still better than takeaway, IMHO. - Can I make this gluten-free?
Yeah, gluten-free panko or your fave GF bread works. Just watch them closely as they brown faster.
And there you have it! If you try it, let me know how it goes—or if you end up with a new variation that’s a winner (or even a total flop, I want to hear about it). For more traditional Irish comfort food, I sometimes browse IrishCentral's food section—lots of good stuff there. Anyway, happy crunching!


Ingredients
- 8 bone-in, skin-on chicken thighs
- 1 cup buttermilk
- 1 ½ cups panko breadcrumbs
- 1 cup all-purpose flour
- 2 teaspoons salt
- 1 teaspoon black pepper
- 1 teaspoon smoked paprika
- 1 teaspoon dried thyme
- ½ teaspoon garlic powder
- 2 tablespoons melted butter
Instructions
-
1Preheat your oven to 425°F (220°C). Line a baking sheet with parchment paper and lightly grease it.
-
2In a large bowl, marinate the chicken thighs in buttermilk for at least 15 minutes to tenderize and flavor the meat.
-
3In a shallow dish, combine panko breadcrumbs, flour, salt, black pepper, smoked paprika, dried thyme, and garlic powder.
-
4Remove each chicken thigh from the buttermilk, allowing excess to drip off, then dredge thoroughly in the breadcrumb mixture to coat evenly.
-
5Arrange the coated chicken thighs on the prepared baking sheet. Drizzle melted butter over the top for extra crispiness.
-
6Bake for 40 minutes, or until the chicken is golden brown and cooked through (internal temperature should reach 165°F/74°C). Serve hot.
Approximate Information for One Serving
Nutrition Disclaimers
Number of total servings shown is approximate. Actual number of servings will depend on your preferred portion sizes.
Nutritional values shown are general guidelines and reflect information for 1 serving using the ingredients listed, not including any optional ingredients. Actual macros may vary slightly depending on specific brands and types of ingredients used.
To determine the weight of one serving, prepare the recipe as instructed. Weigh the finished recipe, then divide the weight of the finished recipe (not including the weight of the container the food is in) by the desired number of servings. Result will be the weight of one serving.
Did you make this recipe?
Please consider Pinning it!!