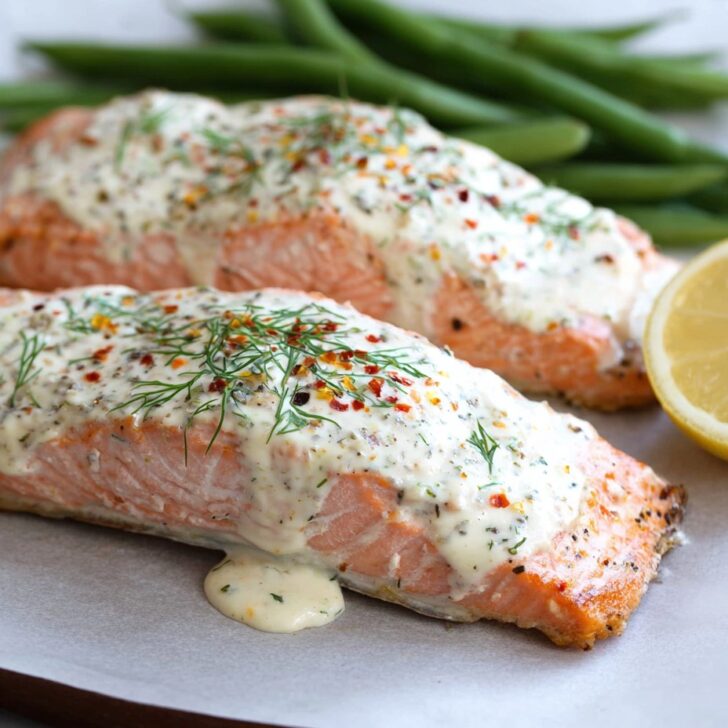

So this sour cream baked salmon…
You know those dinner ideas that save your bacon (or, well, your salmon) on a busy Wednesday when the fridge looks like it's auditioning for an empty fridge meme? That’s when this easy sour cream baked salmon steps in. I first tried making this while frantically looking for my can opener—I didn’t even find it—but, as it turns out, I didn’t need it. Salmon and fridge-staple sour cream to the rescue. Throw in some herbs, a squeeze of lemon, maybe a few breadcrumbs if you’re feeling fancy. Last time, my daughter asked if she could have it for breakfast the next day. (Um, no, but I get it.)
Why you'll genuinely love this (and why I reach for it)
I make this when I want something soothing but can’t be fussed with a five-ingredient marinade that takes two hours. My family polishes it off, and honestly, something about the combination of creamy topping and baked salmon just feels… fancy-ish, even though it’s embarrassingly simple. The clean-up is a breeze—unless you drop the salmon as you’re flipping it onto a platter. (Which I’ve done. Twice.) If you really want to look like you went the extra mile, scatter some dill and suddenly you’ve got restaurant vibes. Plus, it’s just as good cold. Actually, I think it tastes better the next day on some leftover rice, but don’t tell anyone I said that.
What you’ll need: ingredients (and a few swaps)
- 4 salmon fillets (skin-on or off — honestly, whatever’s on deal at Sainsbury's, but wild-caught if you can swing it)
- About ½ cup sour cream (I sometimes use Greek yogurt if I’m running low, and nobody’s ever noticed)
- 2 garlic cloves, finely chopped (granulated garlic works if you’re feeling lazy, or if you hate washing the garlic press)
- A small handful of fresh dill, chopped (dried dill is alright, or parsley—my grandmother always crooned about fresh, but dried is fine)
- Zest and juice of half a lemon (or the stuff from a bottle, but real lemon is worth the squeeze)
- 1 teaspoon Dijon mustard (if you’re out, just skip it)
- Salt and black pepper (I never measure, just a couple generous pinches)
- Optional: ¼ cup breadcrumbs (Panko is best, but whatever’s hanging about works. Or skip if you’re gluten-free.)
How I actually cook it (with scattered commentary)
- Get your oven going: Preheat to 210 C (or about 410 F). Pretty hot. I always forget to do this until I’ve mixed the topping, then I have to wait. Learn form my mistakes and start early.
- Line a baking dish with foil, or baking paper if you’re eco-minded (though if you don’t have either, just oil it well and cross your fingers).
- Lay the salmon fillets skin-side down, leaving some breathing room between them—don’t squish them together (but I sometimes do if my dish is too small—no biggie).
- In a bowl, mix sour cream, garlic, dill, mustard, lemon zest, and juice, plus salt and pepper. Give it a taste! This is where I sneak a spoonful. If it’s a little sharp, add a smidge more sour cream. Or more dill if you like green things.
- Spread the mixture evenly over the salmon. Don’t worry if it looks a bit gloopy—it sorts itself out in the oven, I promise. Top with breadcrumbs if using—they go lovely and golden.
- Bake for 14–18 minutes, depending on thickness. I usually poke it after 15—a knife should slide in with zero resistance. If you like your salmon super juicy (I do), err on the side of under rather than over.
- I sometimes crank it up to broil for the last minute just to get the topping bubbly—watch it like a hawk, though, as I’ve burnt it before while scrolling through phone notifications. Lesson learned.
- Let it sit for a couple minutes. Looks a mess, tastes divine.
Extra notes — the honest kind
- Don’t stress if your sour cream mixture looks a tad runny. It thickens while baking.
- If you’re using skin-on salmon, it usually peels away clean after baking (pro tip: never bother trying to remove it raw; you’ll just get annoyed).
- I once tried this with low-fat sour cream—nope, don’t recommend. Go full-fat or Greek yogurt for best vibes.
- Actually, I find it works better if you squeeze the lemon after baking, not before. Not a rule, more a preference.
Ways I’ve messed with this — some hits, one miss
- I’ve swapped dill for basil (not bad, kinda weird, but edible). Tarragon was better, if you can find it.
- Adding capers? So good! Briny and sharp. My sister hated it, though.
- I once tried a sweet chili drizzle after baking, but honestly, it turned into a confused mess. Wouldn’t repeat.
- If you like a crunch, toss some crushed crackers on top. Ritz crackers especially, though any salty cracker you’ve got kicking around adds a fun twist.
Gear I use (and hacks for when you don’t have it)
A shallow baking dish does the trick—is mine ceramic? Probably, but glass or a rimmed sheet pan works fine. If you don’t have a brush to oil your pan, use your (clean!) fingers or the back of a spoon, doesn’t make much difference.


How to store it (if it actually survives dinner)
Leftovers (ha! when does that happen?) keep fine in a lidded container in the fridge, up to two days. That said, mine usually vanish by lunch the next day. I like it cold on salad leaves or stuffing it into pita—totally transforms into a new lunch.
If you’re wondering how to serve it…
I love it with boiled new potatoes and a quick cucumber salad (here’s a fun smashed cucumber salad recipe from BBC Good Food). Or if I’m being lazy, just some steamed green beans. Sometimes I serve it right in the baking dish, forks all around—gets a bit rowdy but it’s fun.
What I wish I’d known: pro tips from my goof-ups
- Don’t skip the resting time after baking—even five minutes. I once rushed and all the topping slid off as I tried to plate it (messy but delicious, for what it’s worth).
- If you broil, stay close. Broilers burn things faster than you’d think.
- True story: I once bought pre-marinated salmon thinking I could shortcut the flavor—nope, weird clash with the sour cream. Stick with plain.
FAQs people (aka my mates) have actually asked me
- Can I use frozen salmon? Yeah, just thaw it first or you’ll get a watery mess. I forgot to once and… yikes.
- Do I have to use dill? Not at all! Use what you’ve got. Parsley, chives, even a pinch of tarragon—go wild.
- Is the topping very strong? I don't think so, but if you’re wary of garlic you can use less (I… never do).
- Can I prep this ahead? Kinda. You can mix the topping and refrigerate it, but I’d wait to put it on the salmon until you’re ready to bake or it gets weirdly watery.
- Can I make this dairy-free? I haven’t tried it, but I’ve heard that coconut yogurt works well here (though it might taste a bit, well, coconutty).
- Will kids eat this? Mine do, but yours may turn up their noses the first few times. Oddly enough, calling it ‘creamy fish dinner’ made it sound appealing at ours.
P.S. If you need more easy dinner ideas, I save a load of them on Pinterest. Give it a whirl. Anyway, hope you give this a spin—drop me a note if you find a shortcut I’ve missed!


Ingredients
- 4 salmon fillets (about 6 oz each)
- 1 cup sour cream
- 2 tablespoons fresh dill, chopped
- 1 tablespoon lemon juice
- 2 cloves garlic, minced
- 1 teaspoon salt
- ½ teaspoon black pepper
- 1 tablespoon olive oil
Instructions
-
1Preheat the oven to 400°F (200°C). Lightly grease a baking dish with olive oil.
-
2Place the salmon fillets in the prepared baking dish, skin-side down. Season with salt and black pepper.
-
3In a small bowl, mix together the sour cream, dill, lemon juice, garlic, and a pinch of salt.
-
4Spread the sour cream mixture evenly over the tops of the salmon fillets.
-
5Bake for 18-20 minutes, or until the salmon is opaque and flakes easily with a fork.
-
6Remove from oven, garnish with extra dill or a squeeze of lemon if desired, and serve hot.
Approximate Information for One Serving
Nutrition Disclaimers
Number of total servings shown is approximate. Actual number of servings will depend on your preferred portion sizes.
Nutritional values shown are general guidelines and reflect information for 1 serving using the ingredients listed, not including any optional ingredients. Actual macros may vary slightly depending on specific brands and types of ingredients used.
To determine the weight of one serving, prepare the recipe as instructed. Weigh the finished recipe, then divide the weight of the finished recipe (not including the weight of the container the food is in) by the desired number of servings. Result will be the weight of one serving.
Did you make this recipe?
Please consider Pinning it!!