
Alright, Let’s Talk About This Pineapple Heaven Cake
Okay, I have to tell you—this Easy Easter Pineapple Heaven Cake is one of those recipes I trot out every spring, usually because my sister will text me in a panic: “Wait, are you bringing the pineapple cake, or should I?” It’s become tradition at Easter brunch. There was one year we totally spaced and brought two, and honestly nobody was mad about it. The whole thing disappeared faster than you could say "I forgot to buy napkins." Anyway, if you’re after something ridiculously easy and almost accidentally fancy (because the name sounds super posh at the table), this is your guy.


Why You’ll Love This (Besides How Fast It Goes at Parties)
I make this when I’m feeling lazy but still want folks to say “wait, YOU made this?” There’s zero complicated steps—my family goes a little wild for it because it’s that sweet, fruity, custardy thing people always gobble up by the forkful. Actually, sometimes I don’t even get a piece if I don’t sneak a slice early. Plus, you can doctor it up depending on your mood or fridge situation (I’ll show you a few twists in a sec). If you’re not a fan of crunchy nuts, just skip ‘em—sometimes I forget to add them myself. I admit, finding the right cake mix brand gets trickier closer to Easter, but any yellow cake mix will do.
Here’s What Goes In (with Some Cheeky Swaps)
- 1 box yellow cake mix (Sometimes I reach for white cake mix if that’s all I’ve got—it’s fine!)
- 1 can (20 oz) crushed pineapple in juice, undrained (Don’t get the syrup one, trust me!)
- 1 tub (8 oz) whipped topping, thawed (I’ve used name brand and knock-off, no one noticed)
- 1 package (3.4 oz) instant vanilla pudding mix (Grandma would insist on Jell-O, but I like the store brand too, ha)
- 1 cup cold milk (whole or 2%—use whatever is in your fridge)
- ½ cup chopped pecans or walnuts, optional (Or skip it; I forget sometimes)
- 1 cup shredded sweetened coconut, optional (But I love it toasted!)
How To Make Pineapple Heaven Cake (Don’t Overthink It!)
- Preheat your oven to 350°F (that’s 175°C), and grease a 9x13-inch baking pan. Or just spray and hope for the best—that’s what I usually do.
- Prepare the cake mix according to the package directions (sometimes I sneak in a splash of pineapple juice instead of all the water—just feels fancy), then fold in the whole, undrained can of crushed pineapple. Pour it into the pan. It’ll look very gloopy, but don’t panic!
- Bake for 28 to 32 minutes, or until the top is golden and a toothpick comes out mostly clean (I’ve definitely pulled it too early before, so just give it an extra 2 minutes if you’re not sure). Let it cool completely—if you try to frost it too soon, you’ll make a mess (ask me how I know...)
- In a medium bowl, whisk together the instant pudding mix and cold milk until it’s thickened up a bit—about 2 minutes. After that, fold in the whipped topping gently. Sometimes I sneak a taste here—quality control, obviously.
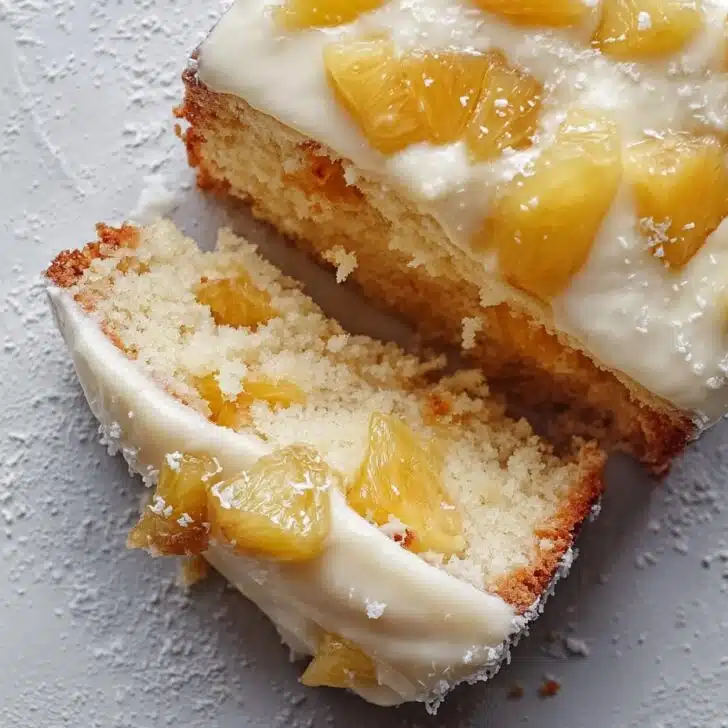
- Spread that cloud of pudding-whipped-topping over your cooled cake. Sprinkle the nuts and coconut all over, or, skip one, or, on second thought, both if you’re a coconut-hater.
- Chill for at least 2 hours before serving—overnight is even better (I honestly think the leftovers are the best breakfast).


Notes From The Trenches: Real-Life Lessons
- If your cake looks like the surface of the moon when it comes out—don’t sweat it. Frosting hides everything.
- I once used pineapple tidbits and that was kind of a mess, so stick with the crushed stuff.
- This is one of those cakes that welcomes all manner of “decorate with jellybeans” shenanigans if you have kids around, but those things roll everywhere, so maybe just a sprinkle!
Variations I’ve Tried (and a Flop!)
- Swapped pineapple for mandarin oranges—actually pretty tasty, just a smidge less sweet.
- Added a dash of rum extract to the pudding topping; everyone thought I’d gotten fancy.
- Tried a chocolate cake base once—nope, didn’t love it. Pineapple and chocolate are not pals in this context!


The Gear You’ll Want—But Don’t Panic If You Don’t Have It
So, a 9x13-inch baking pan is ideal, but I once made this in a big casserole dish and nobody noticed (though it was a tad thicker). Electric mixer is nice but not required; I usually make do with a whisk and some elbow grease.
How To Store It (But Good Luck With Leftovers)
Stick it in the fridge under some plastic wrap or foil; it keeps for 3 days, though honestly, in my house it never lasts more than a day! If you do have leftovers, it’s a sneaky little treat straight form the fridge when nobody’s looking.
How I Like To Serve It (Because Why Not Add a Little Flair?)
I slice big squares and add a scoop of vanilla ice cream if I’m feeling cheeky. My aunt always adds extra coconut on top, but I say go with what you’ve got. Oh, and we sometimes light a pink birthday candle for whoever finds the golden jellybean (don’t ask, it’s just a family thing).
Pro Tips I’ve Earned the Hard Way
- Don’t try to frost a warm cake; it’ll slide right off and you’ll want to cry (ask me how I know...again).
- If you’re in a rush, you can cool the cake in the fridge, but cover it unless you like your desserts “fridge scented.”
I Get These Questions Constantly—So Here’s the Scoop
- Can I make it a day ahead? Yes! It actually, I think, tastes better on day two. Just cover it up well.
- Can I use fresh pineapple? Probably, but make sure it’s pretty juicy—you want that extra moisture. Canned is easier though (and lazier, which works for me).
- No pudding mix on hand—any tricks? I’ve tried thick Greek yogurt and whipped cream, and it was fine, just not the classic flavor.
- Nut allergy—okay to leave out? Absolutely! I forget them about half the time anyway, ha.
- Why does my cake sometimes sink in the middle? Oven temp or old baking powder, I reckon. Or maybe shouting at the oven, which I did once and it still sank.
Anyway, hope you enjoy—let me know if your family polishes it off as fast as mine does! If anything odd happens, just cover it in more coconut. Works every time.
Ingredients
- 1 box yellow cake mix (Sometimes I reach for white cake mix if that’s all I’ve got—it’s fine!)
- 1 can (20 oz) crushed pineapple in juice, undrained (Don’t get the syrup one, trust me!)
- 1 tub (8 oz) whipped topping, thawed (I’ve used name brand and knock-off, no one noticed)
- 1 package (3.4 oz) instant vanilla pudding mix (Grandma would insist on Jell-O, but I like the store brand too, ha)
- 1 cup cold milk (whole or 2%—use whatever is in your fridge)
- ½ cup chopped pecans or walnuts, optional (Or skip it; I forget sometimes)
- 1 cup shredded sweetened coconut, optional (But I love it toasted!)
Instructions
-
1Preheat your oven to 350°F (that’s 175°C), and grease a 9x13-inch baking pan. Or just spray and hope for the best—that’s what I usually do.
-
2Prepare the cake mix according to the package directions (sometimes I sneak in a splash of pineapple juice instead of all the water—just feels fancy), then fold in the whole, undrained can of crushed pineapple. Pour it into the pan. It’ll look very gloopy, but don’t panic!
-
3Bake for 28 to 32 minutes, or until the top is golden and a toothpick comes out mostly clean (I’ve definitely pulled it too early before, so just give it an extra 2 minutes if you’re not sure). Let it cool completely—if you try to frost it too soon, you’ll make a mess (ask me how I know...)
-
4In a medium bowl, whisk together the instant pudding mix and cold milk until it’s thickened up a bit—about 2 minutes. After that, fold in the whipped topping gently. Sometimes I sneak a taste here—quality control, obviously.
-
5Spread that cloud of pudding-whipped-topping over your cooled cake. Sprinkle the nuts and coconut all over, or, skip one, or, on second thought, both if you’re a coconut-hater.
-
6Chill for at least 2 hours before serving—overnight is even better (I honestly think the leftovers are the best breakfast).
Approximate Information for One Serving
Nutrition Disclaimers
Number of total servings shown is approximate. Actual number of servings will depend on your preferred portion sizes.
Nutritional values shown are general guidelines and reflect information for 1 serving using the ingredients listed, not including any optional ingredients. Actual macros may vary slightly depending on specific brands and types of ingredients used.
To determine the weight of one serving, prepare the recipe as instructed. Weigh the finished recipe, then divide the weight of the finished recipe (not including the weight of the container the food is in) by the desired number of servings. Result will be the weight of one serving.
Did you make this recipe?
Please consider Pinning it!