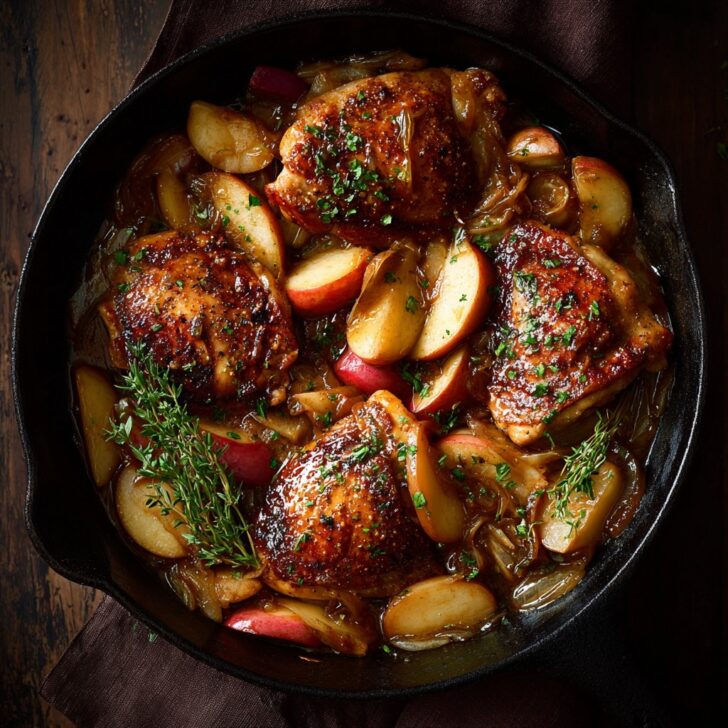
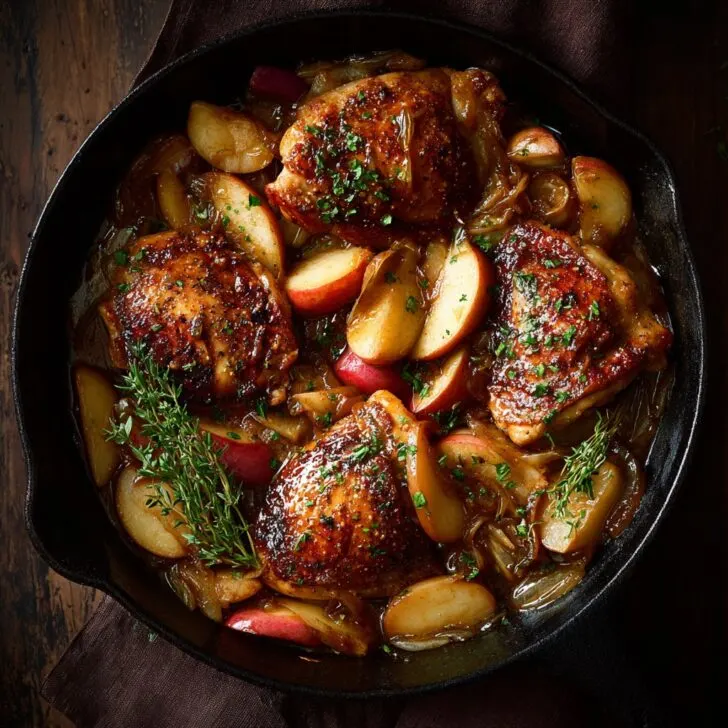
Catching Up Over Chicken: Why This Dish is in My Rotation
You know that feeling when you’ve been staring at the fridge after a long Tuesday and everything in there looks like it requires just a bit too much thinking? That’s me about twice a week, honestly. One rainy night, I cobbled together this Easy Apple Maple Chicken because the only things not expired were chicken thighs, an apple, and three different kinds of maple syrup I've been collecting (why do I do this?). The combo felt homey, like the smell of wet leaves in October or one of those jumpers you only wear at home. My kids now request it so often, I've started buying apples by the bag—did not see that coming.
Why This Chicken Wins at My House
I make this when the weather’s turning or when dinner needs to be just a smidge special without breaking a sweat. My family goes a little bonkers for the sweet-savory thing (my son says the apple makes it taste like "dinner dessert"—his words, not mine). And listen, if you sometimes forget to marinate or you’re just—oops—out of fresh herbs, nobody’s going to mind. The maple does all the heavy lifting. Oh, and bonus: barely any dishes. If you can wrangle a single skillet, you’re golden.
Gathering Up the Stuff (Ingredient List)
- About 4 boneless, skinless chicken thighs (or breasts, if you—like my aunt—just prefer it that way)
- 1 medium apple, sliced really thin (Granny Smith is best, but I've used Pink Lady, and once, a random pear… it worked out fine)
- 2 tablespoons real maple syrup (not that pancake stuff, but I won’t tell if you swap it)
- 1 tablespoon Dijon mustard (sometimes I use wholegrain, because it’s what’s in the fridge)
- 2 teaspoons apple cider vinegar (or white wine vinegar when I’ve run out—both do the trick)
- 1 small onion, chopped (honestly, red, yellow, or whatever's left half-used will work)
- 2 garlic cloves, minced (not minced? I’ve even grated it straight over the pan, just mind your fingers...)
- A bit of salt and pepper (to taste, obviously)
- A drizzle of olive oil (…nobody’s measuring this after a long day)
- Pretend-fancy optional: A sprinkle of fresh thyme or a handful of chopped parsley at the end
Let’s Cook This Thing (Directions)
- Heat your biggest, friendliest skillet over medium heat with a glug of olive oil. (If it sizzles when you add the first bit, you’re good!)
- Toss in the chicken and let it get some colour, about 3-4 minutes per side. Don’t stress perfection; mine always sticks a wee bit. Transfer it to a plate for now. (This is when I usually snack on apple slices—just me?)
- Add the onion to the same pan and let it go until it softens up and gets a bit golden—5-ish minutes as a guess. Scrape the sticky bits from the chicken; that’s where the fun lives.
- Drop in the garlic and apple slices and stir-fry for another couple of minutes. Don’t worry if the apples look sad; they perk up later.
- Now, mix up maple syrup, Dijon, and vinegar in a mug (I use the one from my tea earlier) and pour it in. Return the chicken (and any juices!) to the pan. Baste it around. Cover with a lid (or a sheet of foil, if you’re like me and your lids always disappear) and let it bubble away for 8-12 minutes until the chicken’s done. Chicken thighs are pretty forgiving here.
- Take the lid off, flip the chicken once, crank the heat for a moment if you want the sauce to thicken—not too much though, it can go sticky fast. Sprinkle herbs if you’re feeling it, add a touch of salt and pepper, and serve up hot.
Some Notes, Mostly from My Own Experiments
- Sometimes, I find it works better if you give the sauce a minute to cool before you plate—lets the flavors hang out a bit more.
- The first time I made this, I accidentally used all cider vinegar; too tangy. A half-half with water settled things down.
- If you want to skip onions, I get it, but it’ll miss a little "oomph" in the sauce.
Variations I’ve Fumbled My Way Through
- Swapped in pork tenderloin—worked a treat!
- Tried with tofu instead of chicken once (for my cousin who eats plant-based) and, well, straight up, it was just so-so. Maybe I need a new marinade for tofu.
- Added diced carrots to the sauté step for extra veg—looked pretty, tasted sweet.
What If You Don’t Have the Right Gear?
A deepish frying pan is the best, so the sauce doesn’t throw itself everywhere. Forgot your lid? A baking sheet or even a big plate works as a cover (I did it last time, and—other than burning my thumb a bit—it was fine). No fancy apple corer? Just slice around the core; rustic is the vibe anyway.


How to Store (If There Are Leftovers…Ha!)
Officially, it keeps in a sealed container in the fridge for maybe 2-3 days. Practically, though, it never sees a second sunset in my house. If you do stash some, reheat gently so it doesn’t dry out; a splash of water or broth helps. Or just eat it cold over salad, which is oddly good.
Serving This Up: My Favorite Pairings
I always pile this on a heap of buttery mashed potatoes, but rice or a chunk of fresh bread will soak up the sauce just fine. My pal Meg likes hers over couscous (she’s fancier than I am). For crunch, a peppery rocket salad on the side is always welcome. My youngest insists on applesauce as a "dip" (wild, right?).
Pro Tips (AKA Stuff I Learned the Hard Way)
- I once rushed the browning step and ended up with pale, limp chicken—regretted it instantly; take the extra minute for color.
- Maple syrup will burn if your pan is too hot when you pour it in. Keep it at medium, and you’ll be grand.
- Actually, I find it works better if you leave the chicken to rest a couple of minutes before serving—juicier and less messy.
FAQ: You Asked, I Floundered, Here’s What I Know
- Can I make this in advance? Yeah, totally! And honestly, I think it tastes even better the next day. Though, by then, the apples go a bit soft. If you’re into batch cooking, try these tips on prepping chicken ahead.
- What if I only have chicken breasts? Use ‘em! Just maybe shave a couple minutes off the simmer so they don’t go dry. Here’s a trick from BBC Good Food for chicken that stays juicy (I’ve followed most of ‘em!).
- Is it really sweet? Nah, it’s more like a whisper of maple—you can always add an extra splash if your crew likes it sweeter.
- What apples work best? Any kind that’s not mealy. I’ve used everything but Red Delicious, and...I’d give those a pass. Too mushy.
- Can I freeze it? Probabaly, though the apples get weird. Chicken and sauce freeze fine, in my experience.
That’s about it, mate. If you give it a go, let me know how it goes—I’m always curious. If you want more cozy and easy dinner ideas, I often check out Smitten Kitchen for inspiration (her photos make me hungry, every time). Now, off you trot—dinner’s waiting.


Ingredients
- 4 boneless, skinless chicken breasts
- 2 medium apples, cored and sliced
- ⅓ cup pure maple syrup
- 1 tablespoon Dijon mustard
- 1 teaspoon dried thyme
- 2 tablespoons olive oil
- ½ cup low-sodium chicken broth
- 1 small onion, thinly sliced
- Salt and pepper, to taste
Instructions
-
1Season the chicken breasts on both sides with salt, pepper, and dried thyme.
-
2Heat olive oil in a large skillet over medium heat. Add chicken breasts and cook for 5-6 minutes per side, until golden brown. Remove chicken and set aside.
-
3Add sliced onion and apples to the same skillet. Sauté for 3-4 minutes until softened.
-
4Return the chicken to the skillet. Pour in chicken broth, maple syrup, and Dijon mustard. Stir to combine.
-
5Simmer uncovered for 10-12 minutes, occasionally spooning sauce over chicken, until chicken is cooked through and sauce thickens.
-
6Serve chicken topped with apple-onion mixture and spoon extra sauce over each serving.
Approximate Information for One Serving
Nutrition Disclaimers
Number of total servings shown is approximate. Actual number of servings will depend on your preferred portion sizes.
Nutritional values shown are general guidelines and reflect information for 1 serving using the ingredients listed, not including any optional ingredients. Actual macros may vary slightly depending on specific brands and types of ingredients used.
To determine the weight of one serving, prepare the recipe as instructed. Weigh the finished recipe, then divide the weight of the finished recipe (not including the weight of the container the food is in) by the desired number of servings. Result will be the weight of one serving.
Did you make this recipe?
Please consider Pinning it!!