
Let's Talk Creamsicle Slushy (And Why My Blender is Always Out)
Okay, so this recipe is straight out of my childhood summers—hot days on my grandma’s porch swing, brain-freeze in a cup, pure orange-and-vanilla bliss. And yes, I still make this Creamsicle Slushy when my mood runs low or when my niece insists she “needs” something fun to drink. Last time, I spilled a bit of vanilla all over the counter because my dog decided that's when he'd bark at the mailman—classic. (Orange sticky floors, anyone?)


Why I Always Come Back to This One
I make this when regular lemonade just feels too plain (or when ice cream seems like overkill but I want to taste something kinda creamy and sweet). My family goes a bit wild for it—especially my cousin, who tries to convince me to spike hers, but that's another story. Also: if you’ve ever tried to blend ice and ended up with a lumpy snowball, you’ll appreciate how forgiving this recipe is, trust me. The vanilla covers a multitude of sins. Or maybe that's just my wishful thinking.
Here’s What You’ll Need (Or Swap)
- 1 ½ cups orange juice (I just use whatever’s in the fridge; fresh is amazing, but no-judgement if it's store brand!)
- ½ cup milk (whole milk makes it richer, but almond is lovely if you’re dairy-free)
- ½ teaspoon vanilla extract (my grandmother was loyal to McCormick, but honestly, any vanilla works)
- 2 cups ice cubes (I eyeball it, sometimes a small mountain is just fine)
- 2 tablespoons sugar (or honey—sometimes I’m in a honey mood, go figure)
- Optional: a scoop of vanilla ice cream if you’re feeling maximum nostalgia or just want dessert in a glass
Let’s Make This Slushy—My Way (It’s Easy, Promise)
- Start by adding orange juice, milk, vanilla, and sugar (or honey) into the blender. Put the ice on top—this just seems to help everything blend easier (maybe it’s science, maybe just habit).
- Now, blend! Seriously, let it go until it sounds like your blender’s protesting. I usually pulse a couple times, then just hold it down for 20-30 seconds. Sometimes I have to shake it. If your blender’s old like mine, don’t be afraid to stop and scrape the sides.
- This is the point where I sneak a taste—if it needs more vanilla, in it goes. (One time I put in way too much vanilla. Would not recommend!)
- If you want it extra creamy, add a scoop of vanilla ice cream and blend just until it disappears; I prefer the more slushy version but hey, you do you.
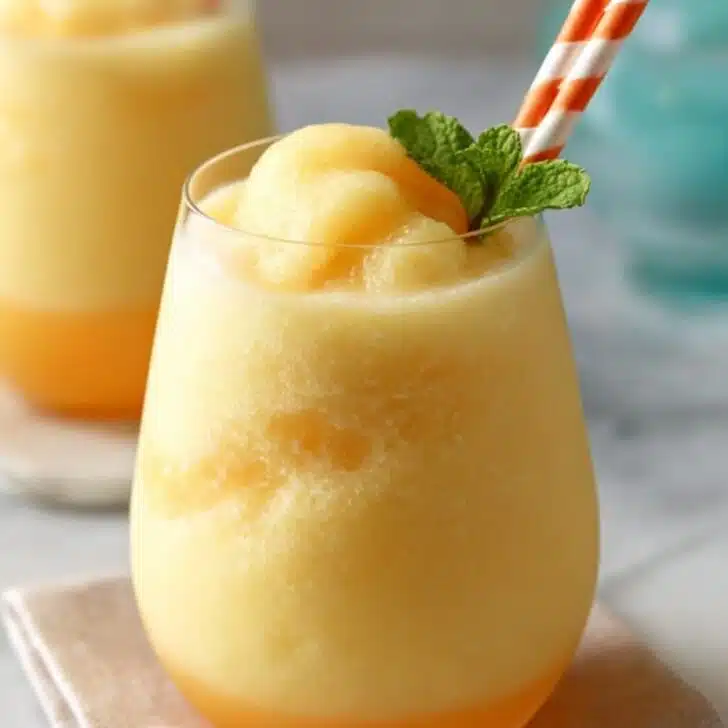
- Pour into tall glasses. If you’re feeling fancy, pop in a straw and maybe a little orange slice on the rim. Or just drink it from the blender, I’m not judging.


A Few Notes from My Kitchen Trials
- If you use fresh-squeezed orange juice (props!), taste before adding sugar. Store-bought is sometimes sweeter.
- Skim milk keeps it light, but I think oat milk actually gives it a creamier texture somehow.
- I used to try adding yogurt. It got weirdly tangy, not my favorite, but maybe you’ll like it.
Variations I've Tried (Some Winners, Some...Not)
- Once I added mango with the orange, and wow, tropical upgrade. Highly recommend!
- My friend tried it with coconut milk instead of regular milk—turned out extra rich, but tasted almost like a creamsicle-pina colada mashup.
- I attempted a “grown-up” version with a shot of vanilla vodka. Not for me. Maybe it just reminds me too much of college?


Do You Need Fancy Equipment?
Honestly, a sturdy blender is ideal. But I’ve resorted to a food processor in a pinch (just takes longer and is noisier). If you have one of those personal smoothie blenders, just make half the batch.
Keeping Leftovers—If You Have Any
If by some miracle you don’t slurp it all down, cover and stick it in the fridge. It settles and gets a bit icy, but just re-blend with fresh ice and milk. Though, honestly, in my house it never lasts more than a day. Maybe two hours.
Serving Vibes and Little Traditions
I like to serve mine in big glass jars with silly straws—my nephew always asks for extra orange slices. On really hot days, we’ll take them onto the porch and pretend we’re at the beach. No sand required!
What I Learned the Hard Way (A Few Pro Tips)
- Don’t skip the blending time—rushing means you get chunky ice, which is... not the vibe.
- It’s okay if it seems too thin when you pour; it thickens up a bit after a minute or two.
- Actually, I find it works better if you pour right away and let it sit for a couple minutes. Then, the texture is just right. Go figure.
FAQs from Friends and Family (Yes, For Real)
- Can I make this ahead of time? Sort of—blend everything but the ice, then whizz it with ice just before serving. That way it doesn’t go watery.
- Is it super sweet? That depends on your OJ. Sometimes I cut the sugar to a single tablespoon if the orange juice is already sweet. Or just taste and decide, no rules!
- I don't like milk—what else works? Go for almond, oat, or coconut, or skip it for more of a sorbet vibe.
- No blender—am I sunk? Well, you can try mashing crushed ice with the liquid using a sturdy jar and a muddler. It's a bit of a workout, but hmm, worth it for a single serving.
- Does it really taste like a creamsicle? If you nail the balance of vanilla and OJ, honestly, yes. Maybe even better (or at least a bit less sticky on the fingers!)
One last thing—this is a slushy but also sort of an excuse to forget you’re an adult for five minutes. So wear your silly socks and drink it with abandon. The only real rule: brain-freeze is basically part of the fun.
Ingredients
- 1 ½ cups orange juice (I just use whatever’s in the fridge; fresh is amazing, but no-judgement if it's store brand!)
- ½ cup milk (whole milk makes it richer, but almond is lovely if you’re dairy-free)
- ½ teaspoon vanilla extract (my grandmother was loyal to McCormick, but honestly, any vanilla works)
- 2 cups ice cubes (I eyeball it, sometimes a small mountain is just fine)
- 2 tablespoons sugar (or honey—sometimes I’m in a honey mood, go figure)
- Optional: a scoop of vanilla ice cream if you’re feeling maximum nostalgia or just want dessert in a glass
Instructions
-
1Start by adding orange juice, milk, vanilla, and sugar (or honey) into the blender. Put the ice on top—this just seems to help everything blend easier (maybe it’s science, maybe just habit).
-
2Now, blend! Seriously, let it go until it sounds like your blender’s protesting. I usually pulse a couple times, then just hold it down for 20-30 seconds. Sometimes I have to shake it. If your blender’s old like mine, don’t be afraid to stop and scrape the sides.
-
3This is the point where I sneak a taste—if it needs more vanilla, in it goes. (One time I put in way too much vanilla. Would not recommend!)
-
4If you want it extra creamy, add a scoop of vanilla ice cream and blend just until it disappears; I prefer the more slushy version but hey, you do you.
-
5Pour into tall glasses. If you’re feeling fancy, pop in a straw and maybe a little orange slice on the rim. Or just drink it from the blender, I’m not judging.
Approximate Information for One Serving
Nutrition Disclaimers
Number of total servings shown is approximate. Actual number of servings will depend on your preferred portion sizes.
Nutritional values shown are general guidelines and reflect information for 1 serving using the ingredients listed, not including any optional ingredients. Actual macros may vary slightly depending on specific brands and types of ingredients used.
To determine the weight of one serving, prepare the recipe as instructed. Weigh the finished recipe, then divide the weight of the finished recipe (not including the weight of the container the food is in) by the desired number of servings. Result will be the weight of one serving.
Did you make this recipe?
Please consider Pinning it!